videoConferencing_402800437_400.jpg

4 Useful Video Conferencing Etiquette Tips

videoConferencing_402800437_400.jpg

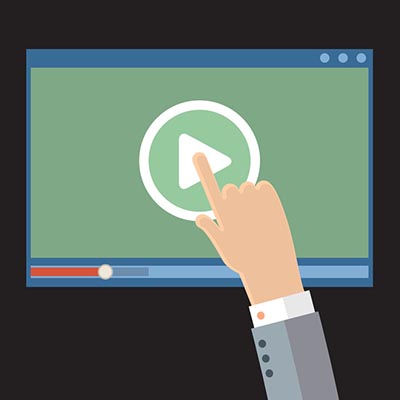
For the remote worker, video conferencing is an essential tool. Regardless if you are a veteran of using video conferencing or if you are a new remote worker, there are some tips that can help you be a more effective member of a remote team. Let’s go through four today.

Test Your Connection and Hardware Before You Meet

Nothing is more annoying than being in a virtual meeting only to have one of your team members constantly cutting out and dropping their connection. Not only is it annoying, but it can easily cause severe miscommunications or hold up the meeting as people are asked to repeat themselves over and over again. Taking a few brief moments to test your equipment and the stability of your connection will help make your meeting significantly more productive.

Stay on Topic

If there’s been an agenda shared for the meeting (which is something we recommend), do everything you can to stick to it. If something mentioned reminds you of something off-topic that needs to be addressed, make a note of it and follow up afterward.

The same goes if someone happens to join the meeting late. Instead of spending time circling back to bring them up to speed, make sure that someone is prepared to fill them in on what they missed afterward—if it’s something that pertains to them at all. You only have so long to meet, don’t spend that time reiterating what you’ve already covered.

Mute Yourself Unless You’re Speaking

This one is just about being polite, but even if you’re not intentionally making any noise, a live mic can pick up more than you’d expect. Clearing your throat, sneezing, background noise…all of it can distract from the topic at hand, and most of it can be pretty gross to hear if we’re being honest. Why allow the chance of interrupting the meeting when you can eliminate it by muting yourself? Your teammates would much rather have to remind you that you’re muted than listen to the potential alternative.

That being said, you’re still on video, so try and minimize visual distractions as well. If you have a coughing fit, for instance, politely cover your mouth, or even kill your video feed until the moment has passed. Your team would much rather you vanish for a moment than watch you blow your nose, trust us.

Take Notes

Whether or not someone is delegated the responsibility of taking notes during your conference, it is always a good idea to take notes for yourself, as well. This will help you keep track of whatever responsibilities were assigned to you specifically while also giving greater context to what has been discussed.

We Hope This Helps You Make the Most of Your Video Conferences

Reach out for more assistance, including a network audit to ensure that you have what you need to support successful conferencing. Give us a call at 810.230.9455 to get started!

restrictedAcess_451965388_400.jpg

Zero-Trust Policies Can Keep Your Business Secure

restrictedAcess_451965388_400.jpg

The modern cyberthreat landscape is nothing to be trifled with, so it makes sense that as threats grow more powerful, so too do the solutions used to address them. Nowadays, there is a practice that is designed to address just how serious the threat of cybersecurity is: zero-trust IT. Let’s discuss these policies and how you might put them in place.

What is Zero-Trust?

Zero-trust is when the default action of an organization or business is to scrutinize every little detail about an individual’s access to its IT infrastructure, from hardware to software to the network connection. In order to gain access, users must authenticate themselves in a trustworthy and secure manner.

This might seem like a lot of work, and that’s because it is. A zero-trust policy is something that may take some time to implement, but it’s proven to decrease the number of security risks a company experiences over time. All aspects of access must be considered for zero-trust to remain effective.

Zero Trust is Surprisingly Simple to Deploy

When adopting zero-trust, you need to take the following steps:

Determine Your Goals for Your Zero-Trust Processes

The NIST, or National Institute of Standards and Technology, has determined that there are two goals behind zero-trust: prevent unauthorized access to a business’ data and resources, and control access so that it is as granular as possible. In other words, prevent unauthorized access and make access as transparent and stringent as possible.

Determine Your Most Important Data

To best protect your business, consider the data that’s most important for your operations and how you want to control access. This will be critical for ensuring your zero-trust strategy can be pulled off.

Determine How Prepared You are for Zero-Trust

Similarly, you will want to ensure that your network is prepared to handle the authentication required of zero-trust policies. Does it have the safeguards needed to ensure it remains secure? What about your endpoints, or the employees accessing them? Are their accounts secured, and are they following best practices? Consider all of these to make sure your policies are implemented correctly.

Determine What You Need to Do to Improve

If you know what you need to improve, there is a greater chance that you will use that knowledge to act. A general rule to follow for zero-trust IT policies is that nothing and no one should be trusted without first being authenticated, coupled with real-time monitoring.

Determine Monitoring Practices

Your real-time monitoring practices should continue even after initial implementation and well into the future so that you can always catch and mitigate potential threats.

Ultimately, a zero-trust policy is one of the best ways to approach network security for your business and its resources. To learn more about how we can help to facilitate the implementation of this type of policy, be sure to contact us at 810.230.9455.

Efficiency_96557162_400.jpg

Learn to Get Through Distractions to Be More Productive

Efficiency_96557162_400.jpg

Productivity can be a challenging thing to measure and maintain, especially in a world full of distractions. Sometimes the distractions come from the nature of the work itself, and understanding this can become the key to overcoming them. Here are five tips you can use to overcome any workplace distractions and become more productive in the workplace.

Plan Your Route

Planning ahead can make your next workday much easier, and it doesn’t involve spending some time at home preparing for the morning after. We recommend that you take some time at the end of each workday to plan the next; you might find that you’re less likely to get distracted by the countless possibilities of the workday if you do so, and you will be more focused on the task at hand.

Put Your Phone Away

Sometimes notifications can distract you from getting work done–especially if these notifications are work-related. Sometimes the best course of action is to either silence your notifications or put your phone away so you can focus on whatever you happen to be working on at that time. More often than not, push notifications are not going to be urgent, so we recommend either limiting the notifications that pop up on your phone during work hours or just turning them off altogether. After all, if something is truly urgent, you can expect to be contacted in a different way than a text message or an email, right?

Don’t Overpromise

A deadline can make all the difference in productivity (depending on the individual), but there are often cases where people might overpromise on something they can’t simply deliver on. Even if these deadlines can be met, the work involved might suffer, so it’s best to give yourself some leeway so that these types of problems don’t surface in the first place.

Set Smaller Goals

Small goals are not just easier to accomplish; they also provide you with the appropriate forward momentum to stay positive about work throughout the day. Large tasks can be broken up into smaller chunks to make them less intimidating and more manageable, too.

Reward Yourself

If you can make work satisfying for yourself, then you can make it more productive. One way you can do this is by giving yourself rewards for accomplishing tasks, like a short break or something sweet to eat. If you want to be both satisfied and productive, taking a step back when necessary to appreciate yourself and the hard work you invest can be helpful.

What are some tips you have to stay productive in the workplace? Be sure to share them with us in the comments.

462322582_zip_400.jpg

Tip of the Week: Zipping and Unzipping Files

462322582_zip_400.jpg

Large files like videos aren’t exactly the ideal attachments for something like an email. There are also cases where you have to send multiple files, some of which may be large, attached to an email, but when the files are too large, this just won’t work. Thankfully, there are some ways around this, one of which is to compress files into a .zip file with a tool found in Windows 10.

There are tools besides the ones built into Windows 10, like the free and open-source 7-ZIP, which allow you to compress and decompress files; for the purposes of this blog, however, we want to focus on the built-in functionality of Windows 10.

First, let’s explain what compression and decompression actually does to the files; please note that we will use the terms “zip” and “unzip” files when referring to these processes moving forward. When you compress a file, it becomes a more compact format that can easily be transferred. This process helps to reduce the file size of the files. A ZIP folder is one which stores these compressed folders or files.

Windows 10 has made great strides in terms of transparency and accessibility of compression/decompression. Windows now allows you to view the contents of a zipped folder just by opening it like any other folder (it used to be the case that you would have to decompress it first). You can then use this information to determine whether or not you want to extract (or unzip) the contents of the folder to your PC. Any edits made to these files will not be permanent until you extract them.

Zipped files are easily identifiable by the zipper that runs up and down the icon, as well as the file type being .ZIP. To unzip a specific file, click and drag the file to the extraction location. Alternatively, if you would rather just unzip all contents of the folder, you can right-click the .ZIP file and click Extract All. If you are in the folder already, you can click the button from within the folder. You will have to choose an extraction location next. In the end, all extracted files will go to your desired location.

As for the extraction location, click on the Browse option and find the folder you want to extract your files to. Once you have the destination selected, click on the Extract button. Depending on how large the files are, it might take some time, but the process is simple enough and quick enough that it shouldn’t take too long before you see the unzipped folder in your desired location.

Did you find this trick helpful? Let us know in the comments below.

162947308_server_room_400.jpg

How to Build the Perfect Server Room for Your Business

162947308_server_room_400.jpg

Your business relies on technology for access to an IT infrastructure. One such piece of technology that you use on a daily basis, whether you realize it or not, is a server. A company that has a single server might be able to get away with less-than-stellar server management policies, but those that have multiple servers should never be skimping on the environment in which their servers live.

Let’s outline why having dedicated space for your technology is important.

Enough Space for Hardware and Work

This should go without saying, but your server room needs to comfortably house your server units and any other equipment you need to keep them functional. On a similar note, you should make sure that there is enough room to perform maintenance on them, should the need arise at some point in the future.

A Controlled Environment

Servers are not your typical workstations or computers. While they might appear to just be another box lit up by flashing lights and drives, they are far more powerful and output a significant amount of heat. This is why you often see server rooms that have climate controls that account for temperature and humidity. In fact, server rooms often store the units in specialized cabinets that control these conditions. Too much heat and moisture can cause harm over time, and hurt the overall performance of your network.

The Ability to Scale for Growth

You might be designing your server room for your current infrastructure, but it’s important to keep in mind that your infrastructure is not going to remain the same for the entire time you are in business. It will likely grow and scale with your business’ prosperity, so you should also plan for a certain level of growth. This means making sure that you have room to add new units, additional cabling, and other technological solutions as needed.

Physical and Digital Security Solutions

The more people who have access to your server room, the more that could possibly go wrong with it. All it takes is one person not following the appropriate protocols, changing settings on machines, or improperly handling the hardware to send everything out of whack and create chaos. Your server room should be secured on the physical side as well as the digital side, preferably with biometrics and multi-factor authentication whenever possible.

Now, let’s say that you don’t want to go through all the trouble of customizing a room in your office specifically for your servers. Many organizations tend to store their data and servers in off-site data centers, choosing instead to access it through the cloud rather than hosting it in-house. This is a perfectly viable solution, even for a small business with a more limited budget. That’s where we come in!

At NuTech Services, we believe that small businesses should have access to the same great solutions and services as enterprises. If you are worried that you cannot afford such solutions and services—including server management—give us a call and find out what your options are! We are sure that we can help you out. To discuss the possibilities with one of our skilled technicians, reach out to us at 810.230.9455.

429555099_2fa_400.jpg

Setting Up Two-Factor Authentication on Multiple Platforms

429555099_2fa_400.jpg

Many organizations are pushing for two-factor authentication, and it is easy to see why. The benefits are so great and the risks so devastating (and unnecessary) that there is no good reason to not implement two-factor authentication. Let’s discuss what two-factor authentication is, why it matters, and how you can set it up for your Microsoft, Google, and Apple accounts.

First, let’s examine two-factor authentication and its many benefits.

What is Two-Factor Authentication?

Passwords are the first line of defense against security threats, but for seasoned hackers, they are simply child’s play. Two-factor authentication aims to increase security through the use of multiple security measures. Ideally, the solution includes at least two of the three methods to secure an account. If they are not met, the account is inaccessible:

  • Something you know (a password)
  • Something you have (a secondary device you own)
  • Something you are (biometrics, facial recognition, fingerprinting, etc)

Why Is It Important?

One way to picture the benefits of two-factor authentication is using the example of a house. Imagine a home with two doors. The first is to the mudroom, and the second is into the house itself. If both doors use the same key, a thief only needs to steal one of the keys to gain access to both the house and the mudroom. If the two keys are different, on the other hand, the amount of effort required for the thief to succeed is effectively doubled.

Now let’s apply this to the cybersecurity topic. It is much harder for a hacker who only has access to one key (the password) when your security protocols require multiple keys (a mobile device or biometric of some sort). The hacker would have to go through a much lengthier and more difficult process to gain access to a mobile device or biometrics compared to the relatively simple act of stealing or guessing a password.

Setting Up Two-Factor Authentication

We will specifically discuss how to set up two-factor authentication for Microsoft, Google, and Apple accounts.

Microsoft

Before you get started, Microsoft recommends that you have a backup email address, a phone number, or the Microsoft Authenticator application installed on a mobile device. First, go to this page and sign in with your Microsoft account. Next, click on More security options. Under the option for Two-step verification, you must select Set up two-factor verification. Follow the on-screen instructions and you should be all set.

Google

First, log into your Google account by clicking here. The next step is to select Security. For the option Signing in to Google, select 2-Step Verification. Finally, click on Get started. The directions for the next steps should appear on your screen. You have several options for setting up your verification step, including Google Prompts, security keys, Google Authenticator, verification codes via text or call, or a backup code. You can also disable this second step on trusted devices, but why go through all the trouble of setting it up if you are just going to disable it?

Apple

The first step for setting up two-factor authentication for your Apple ID is to access your account here. After you sign in and answer your security questions, click on Continue. If you see a prompt to upgrade your account security, tap Continue. Select Upgrade Account Security. You can then add a phone number for receiving verification codes through text message or phone call. Click Continue, enter your verification code, and turn on two-factor authentication.

If you are looking to get started with two-factor authentication, don’t let these three accounts be the limit. NuTech Services can help you set up 2FA for your business. To learn more, reach out to us at 810.230.9455.

113943320_secure_wifi_400.jpg

How to Establish Fast, Secure Wi-Fi for Guests to Your Healthcare Organization

113943320_secure_wifi_400.jpg

Patients and hospital visitors have come to expect Wi-Fi internet access. It’s no longer seen as an extra convenience, but a requirement for the comfort and confidence of your patients. That said, it’s your responsibility to provide reliable Wi-Fi access that is reasonably fast, secure, and easy to sign into.

Your Main Hospital Wireless Network Needs to be Locked Down

First of all, your main office Wi-Fi cannot be used for guest access. The same network that your computers, tablets, laptops, and other equipment run on needs to be completely segregated from the rest of the traffic and secure. This might be pretty obvious for most healthcare professionals, especially those who have an understanding of HIPAA compliance, but it’s worth mentioning because it poses such a huge security risk (and breaks compliance).

Your guest network allows anyone to log in, which means a malicious person could log into it, or an honest person who has a compromised device. Both scenarios can result in serious problems if sensitive health data is accessible.

You need to ensure that your internal network is properly locked down, and that the password is never given out publicly, and is regularly updated. We can audit your existing network to look for vulnerabilities and shortcomings, and help you meet compliance standards—just reach out.

Guest Networks Don’t Necessarily Mean New Hardware

As long as the routers and access points you already have are capable, you usually don’t need to purchase additional hardware in order to establish a separate Wi-Fi network for guests. This is a huge perk—not only are you obviously not having to purchase new equipment, but you don’t need to worry about the installation of additional hardware. Of course, if your network is older, your requirements might be a little different.

One thing to think about, is how much bandwidth your existing wireless network allows. Most modern access points can be split so bandwidth usage is segregated between staff and visitors. You’ll want to make sure that the network can handle guest traffic without interfering with internal operations. You don’t want a visitor in your waiting room streaming Netflix to prevent your front desk from being able to print or access records.

It’s important to establish restrictions—not just deciding what a guest can see or do on the network, but how much bandwidth they are allocated.

Even Guests Require Policies

You don’t want to simply deploy a free-for-all network for your patients to access without setting some ground rules. You should require users to agree to terms of service, and you should definitely be able to monitor logs to detect any fraudulent activity. Depending on your practice, you may consider setting time restrictions so unauthorized users can’t access the network when your facilities are closed. We can also restrict access to certain locations to prevent access from outside your facilities.

Deploying a guest network doesn’t have to be extremely expensive, but it does require a lot more than simply enabling a feature on your wireless router. If you’d like help, we can start with a network audit and review your existing network, and help you establish the security and best practices you need to keep your visitors and patients safe and happy.

Give us a call at 810.230.9455 to get the process started.

197866824_email_inbox_400.jpg

Become an Email Champion by Spending Less Time Dealing with Email

197866824_email_inbox_400.jpg

Email is important, but it seems to steal so much of your valuable time, doesn’t it?

Conquering your never-ending inbox can seem like a feat all in itself—let alone having it done before lunchtime. There’s an easier way, and when done properly, you’ll be able to spend less time sifting through your email and more time on the more important stuff.

Make Your Inbox Do the Work for You

You’ve got better things to do than organizing and prioritizing your emails manually. Granted, you’ll still need to respond to important emails, but most email clients have everything you need to set up a system that automatically parses and sorts emails based on a whole slew of different factors. It will take a little time, and likely a few rounds of adjustments to get your inbox to work the way you want it to, but we’re going to show you the tools that will help get you there.

Most businesses either use Microsoft Outlook, or Google’s Gmail, so we’re going to cover these two email platforms.

Gmail’s Labels and Filters

If you use Gmail, there are two tools that you’ll want to get familiar with: Labels and Filters.

A label is exactly what it sounds like. Applying a label to an email will essentially categorize it. If you used to use Outlook in the past, think of these as Folders (we’ll get to Outlook next).

You can organize labels based on a wide variety of topics—maybe you have a label for each project you are working on, or a label for different types of correspondence (invoices, reports, employee evals, etc.). Organizing your email into labels makes it easier to pull up specific emails later without having to rely on searching for them. More than one label can be applied to any particular email.

To create a label, just select Create new label in the sidebar (hidden under the More link) in Gmail or select the Tag Icon Box that appears when an email is selected. You’ll be able to select any labels you already have or create a new one. You’ll also be able to color-code each label.

But remember, we want to save time, so instead of having to manually move emails to a label, you can create filters to automatically apply labels to certain types of messages. Once you have some labels created, go to Settings, and click the Filters and Blocked Addresses tab. Once there, select Create a new filter.

You can also start this process by doing a Search from the top of your Gmail. Click the little dropdown arrow in the search box at the top of your email, and you can fill out the form to search for specific emails. You can create filters based on who the email is from, what email address the email is sent to, the subject line, words within the email, and more. 

If I wanted to send all correspondence from Bob to a certain label, I’d just put his email in the To: line and click Create Filter. Then Gmail will allow me to choose what to do to all emails from Bob. I could star it to make it stand out, apply a label, or a variety of other options.

Microsoft Outlook’s Rules and Folders

Microsoft Outlook’s process is pretty similar. Instead of filters and labels, Microsoft calls them rules and folders. Here are the steps to set up new rules:

  • Right-click the message and select Rules, then, select Create Rule.
  • Then you need to select the conditions that activate the rule, and what that means. 
  • Make sure you select Run this new rule now on messages already in the current folder (if you wish) and click OK to finalize your rule.

This means that you will need to have a folder to file these messages in. While the option will be presented to you as you create a rule, you can also set up your folders separately in advance.

  • In the Mail pane, right-click where you want to add your folder and select New Folder… from the menu that appears.
  • Name your folder, and press Enter.

It takes time to build all of the rules (or filters) you need to streamline your inbox, but it will ultimately save you hours of time that would otherwise be wasted sifting through your inbox by hand. It’s all about becoming more efficient!

For more tips and tricks, bookmark our blog, and if you need help with your technology, give us a call at 810.230.9455.

124497990_helpful_tips_400.jpg

Tip of the Week: Streamline Your IT with These 4 Tips

124497990_helpful_tips_400.jpg

The world has been turned on its head recently and it has forced the hands of many business owners to make a complete digital transformation of their business. Many businesses have made this transformation previously, but haven’t completely worked out the logistics of it when the stay-at-home orders came down due to the COVID-19 pandemic. Today we will look at four elements of a digital transformation that are extremely useful for your business.

Real-Time Analysis

It’s been said that knowledge is the best weapon. For the small and medium-sized business looking to navigate this situation, this couldn’t ring more true. To be able to make the best financial and operational decisions possible, SMBs are turning to data analysis, in real time. By being able to look at the data that is coming in and going out in real time, a decision maker can swiftly make educated decisions. This can help businesses stay afloat in times where they are at their most vulnerable.

When decision makers can get insights as they happen, they can take action quicker. Additionally, many of today’s most dynamic analytics platforms can be deployed near the edge of their company’s computing infrastructure, meaning that data coming represents the flow of information in and out of a business. 

Some other benefits include:

  • Managing location data – Helps decision makers determine the relevant data for multiple locations.
  • Anomaly detection – Quickly detects outlying data sets to avoid impulsive decision making. 
  • Improved marketing – With a lot of the information coming in, decision makers can make decisions based on demand when it otherwise wouldn’t be noticed.

Online Sales

Many businesses feature ecommerce platforms already, but since all non-essential store locations are closed as lawmakers try to stymie the spread of the Novel Coronavirus, businesses are quickly ramping up their online sales capabilities. In fact, in the retail sector, some businesses are now seeing two-to-three times the amount of online orders than they would typically. It may not be the same as it was when foot traffic was allowed, but by having a strong online sales platform in place, businesses can stay in operation until the stay-at-home orders are lifted, and they are allowed to resume business as usual.

VoIP

It seems that Voice over Internet Protocol (VoIP) phone systems are the single most useful tool during this entire situation. VoIP provides businesses with strong and reliable telephone systems, with options that you would expect out of an enterprise phone system, for a fraction of the cost of what a business would normally pay for a comparable system from a telecom. 

Additionally, VoIP has a lot of optional features that a business can add when remote work is necessary. Solutions like instant messaging, text messaging, and audio and video conferencing can be major benefits for the remote workforce. Many businesses have taken advantage of their VoIP system’s more dynamic features during the stay-at-home period to ensure that communication and productivity isn’t stymied. 

Automate

Cutting costs during an economic downturn is an art form. Many businesses looked at their pre-coronavirus operations as efficient until they were forced to embrace a digital workforce and cut additional line-items from their budgets. If there is one element that will help any business streamline their operations it is finding ways to deploy automated tools. 

For the business that is looking to enhance their automated processes, they will first need to identify which of them they can effectively automate. These typically include:

  • Tasks that involve moving information around
  • Frequent and mundane, but necessary tasks
  • Tasks that frequently interrupt focus on business critical tasks

Investing in ways to automate tasks like these can go a long way toward streamlining your operations now when it’s most necessary. Best yet, these automated processes will be in place when business returns to some semblance of normalcy.

This is an unprecedented time for the small business, and we would like to help see you through it. Call us today at 810.230.9455 to find out more how we can help you streamline your business processes.

81131209_email_400.jpg

Tip of the Week: How to Utilize Your Business’ Email

81131209_email_400.jpg

Email seems to be a pretty basic workplace tool, but like any tool, there are many ways to use it. From sending emails to managing tasks and messages from your inbox, let’s discuss a few tips and best practices to help you use your email like a true professional.

Properly Managing Your Email Like a Professional

Let’s not split hairs here: checking your email throughout the day can be a major waste of time. In order to avoid sinking time you could otherwise spend productively on reading (and re-reading) emails, there are a few habits you could develop.

Impose Rules on Your Email Habits

As we’ve said, repeatedly checking your email throughout the day can very quickly become a waste of your time. To avoid this, schedule times throughout your day to commit to checking your email. Once your time is up, stop until your next scheduled time.

We’ve all also accumulated emails that we simply don’t need to read. As harsh as it may seem, archive these emails, or unsubscribe as they come in to keep your inbox clean based on the subject line or the sender.

Managing Important Emails

Admittedly, not every email that comes in will be a waste of time. However, an overstuffed inbox can make it easy to miss something important. To avoid this issue, utilize folders to file your emails so that your inbox doesn’t become overfilled.

If Time is Left, Return to Your Inbox

If you finish your other tasks, return to your inbox and review your messages in order of importance. If you happen to run out of time, stop your review until your next opportunity. As you review your emails, don’t be afraid to unsubscribe to emails that aren’t important to your tasks.

Don’t Be Afraid to Leverage Filters and Labels

Filters and labels can help you to keep your emails more automatically organized. Your filters/labels should be relevant to their content. One can contain messages from a certain sender or pertain to a certain topic. As a result, you will be able to more easily keep your emails organized.

Rules like these can also keep you from having to deal with automatic replies, like out-of-office autoresponders and similar replies that you don’t need to receive.

What other emails have gotten in the way of your productivity? Let us know… we might cover them in a future blog! For more information, subscribe to our blog!

92760244_video_400.jpg

Tip of the Week: How to Set your Default Video App in Windows 10

92760244_video_400.jpg

Windows 10 is a great operating system, but it changes up the formula a bit in regard to default applications for certain types of files. Anyone who has been using a computer for any amount of time has their preferred applications for watching videos or listening to music. We’ll show you how to set your default video playback application, as well as how to change certain settings for just about any purpose.

As with any applications on your device, you’ll have a variety of first and third-party applications that can be set as your default apps. Here are the steps to make this happen:

  • Click the Windows icon at the bottom left-hand side of the taskbar.
  • Click on the gear icon to open up your Settings.
  • Select Apps.
  • In the left-hand column, click on Default Apps.
  • In the right-hand side of the Default Apps screen, you can see the various types of files that will be opened by specific apps.

Changing your default video playback settings is also easy to do. From the Video playback option in the Apps section, you can enable streaming content at high dynamic range quality, process video for more enhanced quality, play back video in either a high or low resolution based on preference, and change how video is played based on battery life. You can pick from prioritizing video quality or battery life–whichever you prefer.

Before making any changes to your computer, we recommend speaking with the technology professionals at NuTech Services. This prevents you from making any changes to hardware or software settings that could cause frustrations for you and your staff. To learn more about the services we provide, reach out to us at 810.230.9455.

smart_compose_400.jpg

Tip of the Week: Enabling Smart Compose on Gmail for Android

smart_compose_400.jpg

As we have opened our lives to technologies like machine learning and artificial intelligence, it would seem that the beneficial predictions made in science fiction are more likely to become fact. Many of these technologies have actually manifested in some of the smallest, but most useful, ways. For this week’s tip, we’ll learn how to leverage Gmail’s predictive Smart Compose feature on Android.

Those familiar with the online version of Gmail will find all of this quite familiar, as Smart Compose has been predicting their next words for some time now. It will seem newer to those more familiar with the Gmail application in macOS and Windows, as it hasn’t been available there until now.

Using Smart Compose on Android Devices

The first thing you’ll have to have in order to use Smart Compose is an active Google account, with the latest version of the Gmail application installed on your chosen device. As you type, Smart Compose will present its predictive text suggestions that a user can either accept, or just keep typing to ignore. While this form of machine learning is pretty basic, it does demonstrate how a device can “learn” how a user is most likely to use it – in this case, what word is likely to come next in the user’s sentence.

Turning Smart Compose Off (and On Again)

Of course, some users may find these suggestions inconvenient or distracting. That’s totally fair, and means that these users should deactivate the Smart Compose feature. Access the Gmail app’s menu by pressing the hamburger icon at the top left. You should see your Settings from there. You will be asked to choose from the accounts that have access to your device. Once you’ve selected the appropriate account, look under General settings to find Smart Compose. Use the toggle switch to activate it or deactivate it as you please.

While Smart Compose may not be quite as impressive as the artificial intelligence that appears in feature films, it has one major advantage over them: it can actually be used to benefit your business. For other ways that you can give your business operations a boost through technology solutions and tips, subscribe to our blog! You can also reach out to us directly by calling 810.230.9455.

216680738_google_search_400.jpg

Google Search Practices That Have Purpose

216680738_google_search_400.jpg

You could say that Google is an extremely popular website, but even that is an understatement. It’s the most visited website in the world, with 3.5 billion search queries being processed every day, and over 1.2 trillion searches a year. With so many people using Google, it’s no wonder that it’s such an advertising conglomerate, but the fact remains that this can come at the user’s detriment more often than not.

Google.com
There are few resources out there that are as valuable as Google’s website. Even the act of “googling” something has become a verb. Granted, “googling” a query might not yield the results the user is expecting, which can lead to frustration. By effectively using search commands, you can make any Google search more accurate, saving time better spent actually using the plethora of knowledge you have at your fingertips.

Tip #1: Use the Tabs
Google has built-in search functionality for images, videos, news, and so much more. There are tabs for images, news, videos, maps, shopping, books, flights, and finance. You can use each of these to narrow down the results you get when you make a specific query.

#2: Use Quotes
Even if you type in what you’re looking for, Google will sometimes misconstrue what you’re looking for as something else. If you’re looking for a specific phrase, you can use quotes around it to find exactly what you’re looking for.

Example: “happy days”

The results will be the term or phrase exactly as it’s typed.

#3: Use a Hyphen to Exclude Words
Think of the hyphen as the “minus” sign of Google searches. If you have a word that you’d rather omit from a search, place a hyphen in front of it.

Example: scale -weight

By removing the topic of one of the homonyms from the equation, you will get more targeted and accurate results.

#4: Use a Colon to Search Specific Sites
If you know that what you’re searching for is found on a specific website, you can limit the search to that site with a colon.

Example: Virtualization site:azure.microsoft.com

In the above example, you can also use a specific keyword to include it in your search.

#5: Search Locally
Google can determine your location, giving you a lot of power to find local businesses, restaurants, institutions, you name it. Just type it into Google.

Example: Laundromats nearby.

Just make sure you have your location services on if mobile. Otherwise, the search engine will use your Internet connection’s IP address to figure out what’s close to you.

What are some of your favorite ways to use Google? Let us know in the comments.

totw_business_wifi_better_400.jpg

Tip of the Week: Improve Your Business’ Wi-Fi

totw_business_wifi_better_400.jpg

For many businesses, a wireless network connection plays a large role in what they do. The people who make your organization work require access to a continuous Internet connection to ensure collaboration can happen with minimal trouble, but it also means that more productivity can happen throughout the workday on your employees’ terms. Therefore, the problems that come from a poor wireless connection can present a considerable hurdle for your business to overcome.

We’re here to help your organization make better use of its wireless connection.

The Router
Your router will determine the general range of your wireless network, as well as its security. Depending on your business’ specific needs, a router can be a tricky investment. You have to consider several aspects, including how much range you need and what kind of options are available for it. Here are some of the variables you’ll need to consider:

  • It is within your budgetary constraints
  • It supports Internet speeds you pay for
  • The space your router needs to cover
  • The devices the router has to support
  • Ensure that any router you choose supports WPA2 encryption

Once you’ve determined which router you’re going with, you can set it up in a place that is most effective for your purposes. If you want your router to broadcast a signal through your entire office, you’ll need to test it out and see how the location works. Try to find a nice central location. If the router doesn’t work as intended in specific parts of the office, you might need to include a Wi-Fi repeater to get the range you’re looking for.

The Repeater
If your signal isn’t extending as far as you’d like, a repeater (or extender) can be used to extend the wireless signal to reach a larger area. This way, the signal will reach any area you need it to reach. A Wi-Fi repeater contains two wireless routers. One of them picks up the wireless signal coming off of your network’s central router, while the other picks up the signal and transmits it in much the same way as your network’s central router. Thankfully, the wireless repeater only needs to be in a location within the broadcasting range of the central router. Just plug it into an average outlet and you’re good to go.

Security
Security is another important part of your business’ wireless network that requires you to think about it during the setup phase. The router doesn’t necessarily have to be hard to set up, though. First, make sure you have WPA2 encryption turned on. Some models don’t default to this and instead use the ineffective Wireless Equivalent Privacy (WEP) encryption that can be broken through easily enough. With WPA2, you’ll be much more secure.

Next, you want to name your wireless network to something that can help you identify it, as well as assign a complex password to defend it. This ensures that only those who need the network for work will be logging onto it, and that they will know which network belongs to your organization if multiple are available. Once you’ve finished with this task, you want to enable the router’s firewall. Doing this provides an additional layer of protection against potential threats.

One more thing: be sure to change the admin’s password on the actual router, as most default passwords can simply be looked up online.

For more information on how to optimize the use you get out of your business’ wireless connection, reach out to us at 810.230.9455.

totw_display_settings_400.jpg

Tip of the Week: Change Display Settings in Windows 10

totw_display_settings_400.jpg

One of the easiest ways you can customize your Windows 10 experience is by changing your device’s display settings. There are plenty of settings to change as per your specific needs, so this week’s tip will be dedicated to getting the most out of your displays, whether it’s a large new monitor you got over the holidays or an old one that has a little more life in it.

There are lots of options for changing your display settings. To access these settings, click on the Start menu and select the gear icon for Settings. The first option on the Settings screen is System, where the first option is Display, so you’ll have no problem checking it out. Here are some of the options:

Change Your Screen’s Brightness
With this option, you can change–get this–your screen’s brightness! This is critical if you want your device’s battery to stay under control. There is a slider that you can use to adjust the screen’s brightness. Underneath this, you’ll see another option to turn on the Night Light. This makes the device’s screen turn to warmer colors to make it easier on the eyes at night. You can even schedule the night light to turn on at a specific time.

Scale and Layout
Under this option, you can change the default size of text and applications, among other things. There are several dropdowns under this heading that give you dynamic control over several aspects of your display, including the display’s resolution and the screen orientation.

Multiple Displays
One of the best ways you can get the most out of your monitors is by using more of them. If you have multiple monitors connected to your device, your settings will give you options for what to do with them. You can connect to them wirelessly, detect connected devices, and so much more. Just click on the links in your settings to learn more about what you can do, or reach out to us to learn more about what the settings mean.

Before you change any settings for your devices, if you have any questions about what they mean or why, consult professionals at NuTech Services who know what they are doing. It’s better than making a change and not knowing how to change it back.

Overall, changing up your display can be great for both your device’s battery and your productivity. For more great tips and tricks about how you can get the most out of your monitors and displays, reach out to us at 810.230.9455.

google_keyboard_short_400.jpg

Tip of the Week: Useful Shortcuts for Google

google_keyboard_short_400.jpg

Google is well-known for being a go-to provider for Internet-related services and solutions. Your business might already be taking advantage of them, but are you using them to the best of your ability? With keyboard shortcuts and other various tips and tricks, you’ll be able to take advantage of them in previously unforeseen ways. Here are just a few of them.

Google Drive

  • X allows you to select or deselect items.
  • Shift + A allows you to select all visible items. You can use Shift + N to clear your selection of visible items.
  • Enter or O will let you open an item you have selected, while N will let you rename it.
  • Z lets you move an item to a selected folder, while S will star or unstar them.
  • You can use these shortcuts to create various items:
    • Folder – Shift + f
    • Document – Shift + t
    • Spreadsheet – Shift + s
    • Presentation – Shift + p

Google Docs

  • Ctrl + K: Insert or edit a link.
  • Alt + Enter: Open a link.
  • Alt + Shift + 5: Type with a strikethrough in your text.
  • Ctrl +: Format your text with a superscript.
  • Ctrl -: Format your text with a subscript.
  • Ctrl + Alt + F: Insert a footnote.

Google Sheets

  • Ctrl + Space: Select all contents in one column.
  • Shift + Space: Select all contents in one row.
  • Alt + Shift + 7 or Ctrl + Shift + 7: Apply a border to your selected cells.
  • Ctrl + \\: Clear formatting of your selection.
  • Ctrl + Page Up or Ctrl + Page Down: Jump to either the previous sheet or the next sheet.
  • Ctrl + ~: See the list of formulas.

Google Slides

  • Ctrl + D: Duplicate a slide or object.
  • Page Up/Page Down, Up/Down: Move from slide to slide in the filmstrip.
  • Ctrl + Alt + Shift + F: Move over to the filmstrip.
  • Ctrl + Alt + Shift + C: Move back to the canvas.
  • Alt + Shift + Left/Right Arrow: Rotate objects by one degree.
  • Alt + Left/Right Arrow: Rotate objects by fifteen degrees.

By using these shortcuts, you should be able to get more out of your Google services. There are far too many shortcuts to include here, so for the complete list, you’ll need to be in Drive, Docs, Sheets, or Slides. Once you’re in, just use Ctrl + / to pull up the list of keyboard shortcuts for the Google app you’re using.

Do you have any tips and tricks to share? Let us know in the comments.

totw_pro_plan_400.jpg

Tip of the Week: Three Pro Business Tips

totw_pro_plan_400.jpg

While running a business can be quite rewarding on a professional level, it can be extremely challenging, with countless obstacles to overcome–particularly in regard to technology and its management. Thankfully, there are ways your business can minimize the pain of managing technology. Here are just a few of them.

Be Prepared to Lose Power
Electricity is perhaps the most important part of using technology in the workplace, as without it, the devices that empower your business’ operations just won’t function. In some cases, you might suddenly lose power, leading to data loss and other disaster scenarios that could strike your business down if you’re not prepared for them. With progress grinding to a halt, downtime will ensue, creating a considerable loss for your business.

Even if you’re not losing power, an excessive amount of it can create a surge, damaging the infrastructure itself and harming the individual components that make it up. It’s ultimately in your best interest to take measures against these events, as you made an investment that needs a substantial return. Surge protectors can be helpful to prevent excessive power from crippling these important machines, but in some cases, you’ll want a more powerful solution. An uninterruptible power supply, or UPS device, can help your servers, workstations, and other important technology shut down properly in the event of a power outage or surge, giving you the ability to minimize damage done.

Maintain a Steady Internet Connection
The Internet is an invaluable tool that can help your business succeed, and the Internet plays a larger role in its functionality than it ever has before. A lack of Internet ultimately becomes downtime for many organizations, as they depend on the Internet for various services and communications. More often than not, there’s nothing you can do about a lack of Internet if it comes from your service provider. To keep this kind of downtime from sinking operations, many businesses have implemented backup Internet connections, just in case they ever have to use it. This comes with a downside–you’ll have to maintain that connection–but it will likely be worth the investment if you ever need it.

Place Boundaries on Your Staff
Even the best employees are known to make mistakes from time-to-time. While you can trust them for the most part, nobody is perfect, nor should you expect them to be. Some might even try to implement their own solutions with the intention of making their jobs easier and more efficient. This is called shadow IT, and it can be dangerous. You have no way of knowing whether it’s putting your business at risk. You can implement measures to ensure that your employees aren’t downloading unauthorized applications through the use of administrator and user privileges. If you limit what your users can do with their machines, then you have less to worry about.

NuTech Services can help your business ensure managing IT doesn’t become a hassle. To learn more, reach out to us at 810.230.9455.

5_windows_400.jpg

Tip of the Week: 5 Tricks to Using Windows

5_windows_400.jpg

There’s a lot more to the Windows operating system than first meets the eye, especially where handy shortcuts are concerned. Today, we’ll cover five of the shortcuts baked into Windows that may be beneficial to your productivity.

Rename File
Every so often, you will discover that the name of a document isn’t entirely accurate anymore. Naturally, this file name should be changed to accurately reflect its contents. While you could right-click and select ‘rename’ for each one you have to change, it is much faster to simply select the file (or files) that needs a name change, and press F2. If you change the name of multiple files to the same thing, it will even automatically add the number to the end to differentiate them.

Active Window Screenshot
Screenshots can be very useful, but they can also be a pain to capture. Fortunately, there’s a way to easily take a screenshot of just the active window. By pressing Alt + Print Screen, the active window will be captured cleanly.

Problem Steps Recorder
Every so often, you may need to record your steps exactly, whether you’re replicating an issue for IT to check out or outlining a procedure for training purposes. Windows offers the Problem Steps Recorder, which is an easy-to-use action recording program that outlines and illustrates each step you take while the program is observing you. It then generates a step-by-step report to be reviewed. Creating one is especially simple – the hardest part is typing “psr” into the Windows search bar to pull up the program.

Easy Open Applications
The taskbar is extremely useful for storing your most-used programs and files for easy access. Windows has incorporated a shortcut that makes accessing them even easier. First, figure out which number your desired application is in sequence, then press the Windows key + the sequence number to open that application. This also works to maximize and minimize these windows.

Minimize/Maximize
Another way to quickly minimize and maximize your open windows is a little silly, but effective. If you want to minimize all but one of your windows, simply click and hold the window and shake it. All the rest will minimize. The same action will also reverse this, maximizing all of your windows again.

What other neat Windows tricks and shortcuts do you know about? Share them in the comments!

totw_set_system_apps_400.jpg

Tip of the Week: Set Your System up with the Apps You like to Use

totw_set_system_apps_400.jpg

Sometimes you’ll open up a document and it will open up in a default program on your computer that you never use, or one that you might not even know you have. This can happen with common types of file formats, like PDFs or MP3s, that could be opened by more than one program on your computer. Windows 10 makes it easy to customize your user experience through changing up the default applications for specific file types. We’ll show you how it’s done.

To change your default applications for Windows 10, just follow these steps:

  • Click on the Start menu in the bottom-left corner of the screen.
  • Click on Settings. It’s the option with a gear-like icon next to it.
  • Select the System option.
  • Click on Default apps next.

You’ll see your options for selecting an app in the form of categories. These categories are Email, Maps, Music Player, Video Player, Photo Viewer, and Web Browser. Once you’ve selected a category, you can choose a default app that will open anything related to that category.

An easier way to do this is by right-clicking the file you want to open. You then need to select Open with. Choose the app that you’d like to use to open the file, or you can select Choose another app if you don’t see the one you want. You can either select it for this one instance or you can have Windows remember your choice for the future.

If you need to reset your default apps, it’s as easy as can be. Just follow the steps below… just in case you set a default app you don’t like.

  • Click on the Start menu.
  • Select Settings.
  • Navigate to System.
  • Click Default apps.
  • Click the Reset button at the bottom.

Once you’ve finished, your Windows 10 device will reset to its default applications. It’s really that easy.

Don’t fall behind the times with your tech knowledge. To keep learning more about your favorite business solutions, subscribe to our blog.

totw_word_pdf_400.jpg

Tip of the Week: Changing a PDF in Microsoft Word

totw_word_pdf_400.jpg

Did you know that Microsoft Word can actually edit PDF files? Well… the most recent version of it can, anyway. Since Adobe Acrobat can be a considerable investment for each and every one of your employees, you can instead turn to the tried and true Microsoft Word for this purpose. We’ll show you how you can do this (as long as you have the most recent version of MS Word).

Open the PDF
First, you’ll need to open the PDF. To do this, open up Microsoft Word and select Open Other Documents from the left-hand menu.

_ib_word_pdf_1.jpg

This brings up the Open menu. Next, you want to click on Browse.

_ib_word_pdf_2.jpg

Another message will appear telling you that Word will convert the PDF to an editable Word document. If this sounds fine, click on OK.

_ib_word_pdf_3.jpg

Your PDF should open up in Word now, but you might notice that there is still a yellow bar at the top of the screen that says PROTECTED VIEW. This is meant to secure your software from opening anything dangerous. If you can trust the document, click the Enable Editing button.

_ib_word_pdf_4.jpg

Once you press the button, another notification will show you that Word will convert the PDF to an editable Word document. To close this message, just click on the checkboxor click OK.

_ib_word_pdf_5.jpg

You can now edit your PDF.

_ib_word_pdf_6.jpg

Once you’re done, you can save the file back to a PDF format. To do this, select File > Save As and set the type to PDF from the dropdown menu under the assigned file name. You will have to rename the document slightly to save it to a file folder.

_ib_word_pdf_7.jpg

Once you’re done, your edited PDF will open in Microsoft Edge, or whatever your default PDF viewer happens to be.

_ib_word_pdf_8.jpg

What are some other cool features of Microsoft Word that you would like us to cover? Let us know in the comments, and be sure to subscribe to our blog.