extensions_in_incognito_mode_400.jpg

Tip of the Week: Browse Incognito Mode Better By Enabling Your Extensions

extensions_in_incognito_mode_400.jpg

Fans of Google Chrome are familiar with using Incognito mode to cover their tracks and keep their Internet browsing private. Although, one downside of Incognito mode is that it disables your browser’s extensions by default. If this has been an annoyance for you, then you’ll be pleased to learn that switching on your extensions for Incognito Mode is easy to do.

Incognito mode might be a great way to browse the Internet with some semblance of privacy, but if it’s at the cost of your efficient browsing thanks to extensions, it’s somewhat unfortunate. Thankfully, there is a very simple way to make sure that your extensions work at all times, even when in Incognito mode.

Just follow these short directions and you’ll have extensions in your browser during Incognito mode:

  • Click Chrome’s menu button
  • Make your way to the More Tools
  • Click on Extensions
  • Go through the extensions and find the one that you want to enable in Incognito mode
  • Click on the Allow in Incognito Mode button

Well, there you have it. Now you can use your extensions even while in Incognito mode! Just keep in mind that there’s probably a very good reason why Google Chrome blocks extensions by default, so try to limit it to only extensions that you absolutely trust. The last thing you need is a security discrepancy caused by you trying to find a more convenient way to go about your daily business.

For more great tips and tricks to help you get the most out of your technology, subscribe to NuTech Services’s blog.

restart_windows_10_400.jpg

Tip of the Week: How to Prevent Windows 10 From Restarting While You’re Working

restart_windows_10_400.jpg

How many times has this happened to you: you’ve walked back to your home or work PC after taking a break, only to find that Windows 10 installed new updates and automatically restarted? Thanks to Windows 10’s notoriously aggressive update behavior, any work that wasn’t saved was lost forever. It can be very frustrating to lose a project that you’ve spent hours on, through no fault of your own. Luckily, there are steps you can take to easily create a restart schedule.

In the fall of 2016, Microsoft issued an Anniversary Update to the Windows 10 OS. With this update, Microsoft included a new feature called “Active Hours.” Active Hours was created to let users specify the times when they’re more likely to be using their computers. In order to set up an Active Hours restart schedule, ensure that your computer has the Anniversary update installed (check your PC settings to see if it has already present). If you need help installing Windows 10 Anniversary, you can download this Update Assistant on Microsoft’s website: https://www.microsoft.com/en-us/windows/features.

After Windows 10 Anniversary is properly installed, follow these steps to setup Active Hours on your PC:

    n

  1. Click on the Start menu and then the Settings. As a shortcut, you can also use Windows key + i on your keyboard.
  2. Next, select Update & Security.
    ib win 10 1
  3. Under the Windows Update tab, which will show up automatically, you’ll see a link to Change active hours. Click that.
    ib win 10 2
  4. From there, you can set your active hours (note: time lengths exceeding 12 hours will be marked as invalid).
    ib win 10 3
  5. Click Save to confirm your changes.

Now your PC will not install updates during those specified hours. But again, at most, you’re only covered for a 12-hour period. So, what about those times when you need to pull an all-nighter to complete a project? Not only can Windows 10 updates interrupt your productivity, they can also take a long time to install. To further prevent unwanted installations and restarts, you can also adjust your restart settings.

To change your restart settings, you’ll need to stay in the Update & Security section of your PC settings. Next:

    n

  1. Click on Restart options, which is located under Change active hours.
    ib win 10 4
  2. Turn the feature On.
    ib win 10 5
  3. Next, set the day and time when you’d like Windows to finish installing updates. There is no need to save anything. As long as the switch is set to On, you’re all set.
    ib win 10 6

If you find that the On/Off switch is grayed out and you aren’t able to adjust it, this means that there are no new updates available at that time. In other words, you won’t have to worry about updates finishing up and forcing your PC to restart. Be sure to keep an eye on your restart options if you are planning to burn the candle at both ends.

There you have it. Windows 10 will no longer be able to bully you into halting your productivity. For more tips on how to avoid downtime for your hardware, give NuTech Services a call at 810.230.9455.

breach_of_your_security_400.jpg

Tip of the Week: How to Know if You’ve Experienced a Data Breach

breach_of_your_security_400.jpg

Your data is vital to the success of your business, and as such, it needs to be protected. Can you identify the warning signs that someone has managed to get past your protections to access your data?

According to the Identity Theft Resource Center, or ITRC, there were 781 data breaches in 2015 within the United States alone. This marked the second-highest number since 2005, when the ITRC began to track these occurrences. Of particular interest, the ITRC report noted that, in 2015, the business sector saw the highest percentage of publically reported breaches with almost 40 percent of all reports coming from business organizations. What’s more, motive analysis saw that more and more thieves sought financial gain through accessing sensitive personal data.

Presumably, the report for 2016 should show more of the same.

Business owners should therefore be extremely cautious and prepared when it comes to possible data breaches, not only in terms of preventing them but also in terms of identifying them within their organizations. What follows are some best practices to assist you in determining if a data breach has occurred on your systems.

First, determine what is normal within your systems.
After all, you will need to know what is right to identify if something is going wrong. This can be largely accomplished by familiarizing yourself with the typical goings-on of your employees at different times of day, and with different levels of access.

Keep an eye out for unusual activity.
There are numerous warning signs that a data breach has occurred in your systems. These warnings might be as subtle as a piece of equipment suddenly becoming slower. They may include:

  • Unusual/unapproved programs: If there are suddenly unauthorized programs appearing on the company’s workstations, you may have a breach. You must be diligent in keeping an eye out for such red flags, as well as encouraging employees to do the same by insisting that they report any sudden appearances of new software that were not mandated by the company.
  • Unexplained “employee” activity: Have records suddenly shown users logging on to the system at odd times and from odd locations? Are your accounts being altered without your knowledge or approval? Have employees suddenly had unexplainable difficulties in remembering their passwords? These are also indicators that your system has been breached.
  • Other breach attempts: Have you had to fend off an overt cyber attack recently, such as a Distributed Denial of Service attack? If so, these attempts may have served a secondary purpose as a smokescreen to conceal a more insidious attack. It’s becoming a best practice to assume that an attack isn’t over, even when it’s over (because it may not be).

Educate your employees.
The first and last line of defense against most cyber threats is educated vigilance, including from your end users. Make sure your employees are also aware of the signs of a data breach, as well as other security threats. NuTech Services can help you to keep your systems safe from these attacks as well. To see what we can set up to keep you secure, reach out to us at 810.230.9455.

check_your_wifi_strength_400.jpg

Tip of the Week: What to Do When Your Device Won’t Connect to Wi-Fi

check_your_wifi_strength_400.jpg

Wi-Fi deadspots are very real, and tend to be annoying, fickle things. Despite maybe a wireless signal being strong enough for everyone else in a room to receive it, something may be interfering with the device. As a result, the Wi-Fi simply isn’t sufficiently strong enough to connect the device to the Internet. Fortunately, there are a few troubleshooting steps that may be taken to resolve the connection’s cutback.

Step One: Check Your Positioning
The first step to any Wi-Fi troubleshooting is to make sure that the router is located far enough away from any other electronic devices, as these devices can negatively influence the strength of the signal. This is especially true when these devices are positioned between the router and the workstation it is connecting to. Walls and floors can also affect the signal–the thicker the obstruction, the weaker the signal.

A relatively simple fix, especially when the router needs to be shared by multiple floors, is to elevate its position on the lower level. This reduces the amount of space the signal will have to cover before passing through the ceiling/floor (ideally without issue), as well as the amount of obstacles it has to contend with to reach the users on the level it is on.

Step Two: Antenna Adjustments
If a router (or PC) has an external antenna, it may be beneficial to adjust the antenna’s position until the signal’s sweet spot is found. Opinions of optimal antenna orientation vary, so it’s likely that the user will need to find the ideal alignment through some good, old-fashioned trial and error.

If that still isn’t effective enough to resolve the deadspot issue, there’s always the option of replacing the antenna itself. By simply unscrewing the included antenna and replacing it with a stronger model (or if absolutely necessary, a stand-alone antenna and extension cord combo), you can hopefully extend your reception out of your poorly-placed dead zone. After these adjustments are implemented, a device can pick up a signal that–under normal circumstances–would be out of reach.

If the equipment in question doesn’t have an adjustable antenna, there are USB adapters available to plug into a device that can work similarly to how the standalone and extension cord setup can, thanks to their longer USB connection cords.

If these adjustments still don’t deliver satisfactory results, it may be worth it to consider investing in a Wi-Fi extender. Rather than trying to maneuver a router and receiver to make a better connection, using a Wi-Fi extender means there only has to be a clear signal to each device from the extender’s position. This is a very effective solution if an immovable obstacle (say, for example, a wall) is blocking the signal, as the extender can create a detour around the obstacle, preserving the signal quality.

Step Three: Upgrades and Updates
Finally, check the router and adapters themselves. While age shouldn’t have too much effect on their performance, it could eventually develop into a problem if left unaddressed. Therefore, like all other office solutions, the costs associated with regularly upgrading equipment will likely be well worth the investment. However, if the equipment in question is too new to warrant a complete replacement, or hasn’t had its firmware upgraded in a while, it’s worth checking with the manufacturer or online for any updates that have been made to the device’s firmware or drivers.

With these practices at your disposal, your Wi-Fi isn’t likely to cause many problems in your office again. If you still can’t get your Wi-Fi to work as intended, NuTech Services would be happy to help. To learn more, reach out to us at 810.230.9455.

lesser_known_shortcuts_400.jpg

Tip of the Week: Be More Efficient With These Windows 10 Shortcuts

lesser_known_shortcuts_400.jpg

A mouse can be very handy when it comes to navigating around the documents you have to work on, but it can also slow you down. Fortunately, key command shortcuts exist for situations just like these, and as Windows 10 has continued to improve, more shortcuts have been included to accomplish more tasks with improved efficiency.

Quick Access to the Start Menu
Take, for instance, the Start menu. Almost anyone who has sat at a computer knows that by clicking the Windows icon in the bottom left-hand corner, a comprehensive menu of your available content is revealed. However, for those those cases when a mouse is unavailable and a trackpad (if working on a laptop) is inefficient, you can navigate the Start menu exclusively with your keyboard. Press the Windows key to open the menu and navigate up and down the column with the arrow keys. You may also begin a search by just typing, once you have opened the Start menu.

For users seeking a more advanced experience, there’s an additional menu, the Power Users menu, that offers utilities like your device’s Event Viewer, Device Manager, and Command Prompt module.

Greater Accessibility of Your Apps
You can also press the Windows Key in combination with a number key to open the associated apps that appear on your taskbar. If the app is already open, it’s a quick way to minimize and maximize a window. Adding the Control key to the combination will open a new window for an app. For example, if you want a separate Chrome window, and Chrome is the fifth app on your taskbar, you would press Ctrl+Windows+5. Alternatively, to open a new app from your taskbar, you can use Windows+T to highlight your first toolbar app by selecting which app to launch with the arrow keys and Enter.

Utilizing a Virtual Desktop
If you are one to heavily use virtual desktops in your day-to-day, you can quickly create one by pressing Windows key+Shift+D. Once you are finished, Windows key+Ctrl+F4 will close the virtual desktop back down.

With these shortcuts now in your arsenal, you have the tools to help you stay productive–with or without a mouse. For more tips, tricks, and handy information, keep coming back to NuTech Services’s blog!

access_old_clipboards_400.jpg

Tip of the Week: Access Old Clipboard Content With ClipDiary

access_old_clipboards_400.jpg

The Copy and Paste feature has long been a staple of computing, but it’s easy to lose something that may have once been stored on the clipboard. Most people who have used a PC understand this pain and will be happy to hear that recovering the lost “copy” might be easier than they thought. A third-party tool called ClipDiary allows users to retrieve information lost in this way, but without it, it’s notoriously difficult.

The Copy/Paste Conundrum
Let’s say that you copy some important text to your clipboard with the intention of using it somewhere–perhaps a username or password. You close the app containing this information and open the app that you need to enter it into, but then you get distracted by the Internet. Maybe it’s a cat video or a page of memes. Regardless of what it is, all you know is that you want to share it with the world via social media. You copy the URL of the page, and that’s when it hits you: you have copied over the information on the clipboard that you needed to use elsewhere.

Now you have to go back into the app you’ve already closed and copy the original information, or worse–completely rewrite the whole thing. Depending on your situation, you might realize that this is a bigger pain that it needs to be. Think about it like not saving the progress on a favorite video game, or forgetting to put a bookmark in a novel.

The unfortunate reality is that there isn’t a “secret” file within Windows that holds your copied content, so there’s no way by default for you to access any deleted copied content. Instead, you can install an app called a clipboard manager, like ClipDiary, which allows you to retrieve your copied content.

Introducing ClipDiary
If you’ve experienced the aforementioned Copy/Paste dilemma, or it’s a mistake that you can see yourself making in the future, try installing ClipDiary: http://clipdiary.com/

ClipDiary lets you dodge this bullet. Just enter the keystroke Ctrl+D to open ClipDiary. The app will display your clipboard history and allow you to copy items back to your clipboard.

The problem we explained in detail is just one of the ways which Copy/Paste woes can translate into missed productivity, and how ClipDiary can help. For some other similar tales, check out this blog from ClipDiary’s website:

http://clipdiary.com/clipboard-articles/using-clipboard-history-and-clipboard-manager.php

ClipDiary also comes with some pretty useful features:

  • Insert saved data directly into any application
  • Fast copy data back to the clipboard
  • Paste text without formatting (as plain text)
  • Find data you once copied to the clipboard
  • View the list of clips in the clipboard history viewer window
  • Recover data accidentally replaced in the clipboard
  • Improve your productivity and save lots of time with the clipboard manager

If you choose to check out ClipDiary, let us know what you think. It might turn out to be the most useful tool you’ve never heard of.

android_doze_400.jpg

Tip of the Week: Use Android Doze to Help Save Battery Power

android_doze_400.jpg

How often have you grumbled as you’ve reached for a charger at 2 in the afternoon as your smartphone clings to its last moments of life? If you’re anything like the typical user, quite often, but Android has attempted to reduce that number with the Android Doze feature.

Doze accomplishes this by disabling an application feature known as a wakelock. These wakelocks keep the device from entering its energy-conserving deep sleep mode, as deep sleep can interfere with some applications and functions.

While wakelock was originally intended to allow fitness trackers and similar applications to continue functioning with the screen deactivated, app developers began to apply wakelock to all of their applications, whether they needed it or not. This is precisely the reason that many apps are notorious for being battery-killers–we’re looking at you, Facebook.

So, the useful functionality of wakelock was spoiled by these app developers, essentially eliminating the power-saving capabilities of deep sleep mode. However, the implementation of Doze looks to fix all of that. By disabling wakelocks and network access after the phone hasn’t been used in a while, Doze prevents applications from pointlessly draining energy while still allowing these apps to update during periodic “maintenance windows.”

Android has even enabled users to customize their Doze settings, so that a user can dictate which apps are affected by the feature. To access this customization:

  • Open Settings.
  • Navigate to Battery.
  • Select Battery optimization from the Menu button.
  • Select All apps from the top-of-screen drop-down menu.

Doze will automatically set almost all of your applications to optimize your battery by default. If there is an app, however, that you need to have connected, you can always switch the setting to Don’t optimize for that app in particular.

Doze even has third-party apps designed to customize its functionality even further. With apps like Doze Settings Editor, a user is able to set Doze to turn off when a phone moves a certain distance–but only if the phone is running Android Marshmallow.

With all of this additional battery life available, do you think you’ll ever have to worry about missing an important call or notification? Let us know in the comments.

double_search_tips_400.jpg

Tip of the Week: 3 Expert-Level Search Tips to Help You Find Exactly What You’re Looking For

double_search_tips_400.jpg

These days, being able to find the exact information you need online is a valuable skill. However, sometimes a website’s search capabilities aren’t robust enough to be of much use. For this week’s tip, we’ll show you how to combine a website search feature with your browser’s search tool so you can easily find exactly what you’re looking for.

To begin, let’s go over one of the most valuable tools for online searching, quotation marks. If you need to locate a specific phrase, then enter it into a search engine like Google Search and bookend the phrase with quotation marks. Google will then show you results meeting your criteria exactly, word for word, instead of giving you a bunch of random results pertaining to each individual word of the phrase (which would be the case if you didn’t use quotation marks).

While using a major search engine like Google Search to find what you’re looking for is one thing, using the search feature of an individual website is completely another. For example, not every website allows you to use quotation marks to narrow down a search within its pages.

If you run into this problem, try instead using the website’s search feature to look for one of the two keywords, like “email,” and then use your browser’s search function to search for a second keyword, “hosting.”

To access your browser’s search function, simply select Ctrl+F. A drop down menu will then appear where you can enter the second word you’re looking for. Next, hit Enter and the browser will automatically highlight every instance of the second word you’re looking for that’s located on the open webpage.

When these two searches combine, you’ll essentially be able to weed through all the irrelevant search results provided by the website and use your browser to find exactly what it is you’re looking for.

Another Way to Search: One way that you can skip having to use a website’s search tool altogether (and keep in mind that not every website offers a search tool) is to search the content of an individual website using Google Search.

To do this, type into the Google Search form “site:” followed by the website URL, minus the “http://” and the “www.” Following this entry, add what it is you’re searching for. So the form should read something like this:

site:website.com email hosting

Add Quotation Marks: To help narrow down your search even further, Google allows you to search individual websites this way and use quotation marks so you can find an exact phrase. For example, site:website.com “email hosting” will provide much more specific results than site:website.com email hosting.

Ultimately, utilizing Google this way may be more effective than combining the website search and your browser search as previously suggested. Although, you’ll still want to keep this double search tip in mind for when you do use a website’s search tool and find that it’s not working for you. Also, keep in mind that not every website makes its content available to Google Search; using a website’s search tool for a site like this will yield results that Google won’t.

If you’ve found this tip helpful, let us know in the comments and check back with NuTech Services’s blog every week for more great tips!

net_worth_tracking_400.jpg

Tip of the Week: How Tracking Your Net Worth Can Benefit Your Long-Term Goals

net_worth_tracking_400.jpg

Tracking your net worth might not be the same as tracking how many much money you have in your account, but it’s a good start. By tracking your net worth, you’ll have a good idea of how your finances fare in the big picture of things. Doing this may even help you worry less so that you can focus more on improving your situation.

Finding Your Net Worth
To many people’s relief, their net worth takes into account much more than just their paycheck. You can basically think of your net worth as the grand total of all of your assets, minus your liabilities; or, rather, what you have minus what you owe. It’s actually quite easy for your net worth to increase over time, since you’ll owe less and obtain more.

Therefore, the first step toward determining your net worth is putting together a list of what you currently own, versus what you currently owe.

What You Own

  • Home (its current value)
  • Other real estate
  • Automobiles and other vehicles like RVs and ATVs (leased vehicles don’t count)
  • Jewelry and collectibles
  • Household items, like furniture, appliances, etc.
  • Retirement accounts, bonds, stocks, mutual funds
  • Cash value of life insurance
  • The balance of checking and savings accounts
  • Cash

What You Owe

  • Home mortgage principal
  • Other mortgage principal
  • Auto loans
  • Student loans
  • Credit card debt
  • Other loans

Once all of these items are in order, you need to plug this information into an online net worth calculator:

http://cgi.money.cnn.com/tools/networth/networth.html

http://www.creditcardfinder.com.au/net-worth

Tracking Your Net Worth
Now that you’ve attained your net worth, you can use a spreadsheet to track the growth–or (gasp) decline–of your net worth. Here are four ways that focusing on your net worth can be beneficial.

  • Financial progress: It’s in our human nature to evolve and make progress, and keeping track of your net worth gives you some solid statistics that you can focus on. It’s always great to look back on the previous month and see how much your financial situation has improved.
  • Confidence building: Keeping track of your net worth can be empowering. For example, saving an extra $1,000 in your emergency fund, or increasing your 401K with a bigger contribution can make you feel proud of yourself, and can help you stay focused on accomplishments rather than your debts.
  • Keeps you from focusing on assets: On the other hand, you need to keep yourself aware of more than just how much you currently have. Having $200k in assets is great, but you should also keep your $100k of debt at the top of your mind.
  • Acquiring loans: Your net worth could become a major factor when you apply for a loan in the near future. You want to ensure that you keep track of your net worth so that you aren’t unpleasantly surprised in the event that you need a cosigner for a loan.

Can tracking your net worth be help achieve your financial goals? Try it out and let us know in the comments how it goes.

multiple_file_storage_400.jpg

Tip of the Week: 5 Easy Ways to Move Several Files at Once

multiple_file_storage_400.jpg

File storage is a staple in the office, and chances are that even your work desktop is jam-packed with files and folders that could use a bit of sorting. This might include moving all of your files to different locations, but you don’t have to move each one individually. We’ll go over the many different ways that you can move files, many of which can save you considerable time and effort.

Click and Drag
If your files are located in one location, like your desktop, you can simply click and drag your mouse to display an area-of-effect box. Any files within this box will be selected. You can then drag any individual file to the desired location and you’ll move all selected files there. This is helpful if you have several files jumbled together on your desktop, and you want to move them all in one go.

Select the Checkboxes
In Windows 10, a little checkbox will appear when you hover over a file on the desktop or within a folder. If your files are scattered all over your desktop, you can simply check each of the boxes for the files that you want to move, then drag and drop any of them into the folder where you want them to be located. This will move every single item you checked to the designated location, saving you considerable time and effort.

Click and Shift
You can easily select files that are stored horizontally and adjacent to each other by using the Click and Shift method. First, select the first file that you want to move. Then, hold down the Shift key, and select the last one that you want to move. Anything stored in between the two will be selected. After that, it’s just a matter of dragging one of them to the desired folder or location.

Hold Ctrl
If you hold down the Ctrl key, you can click on files that you want to move, and they’ll be selected. Then, all you have to do is move your files to the appropriate folder.

Select Them All
If you decide that you really need to clean up your desktop, or move all of your files to a new location, you can use the Select All keyboard shortcut to do so. It’s the same as it is in any word processor: Ctrl + A. You’ll see all of your files in the current window, or your desktop, selected. Just drag them where you want and you’re all set.

Keep in mind that many of the same keyboard shortcuts will also work with Mac OS X as well. Just substitute the Command key for the Ctrl key and many of them will provide the same experience.

Fun Fact: You know how Windows is bundled with Solitaire? No, we aren’t assuming that you are playing it at work. Microsoft decided to bundle their OS with Solitaire as a way to get users more accustomed to dragging and double-clicking objects with their mouse.

For more great tips, reach out to NuTech Services at 810.230.9455; or, subscribe to our blog to receive new tricks straight to your email inbox.

facebook_info_download_400.jpg

Tip of the Week: A Step-By-Step Guide to Downloading Your Facebook Information

facebook_info_download_400.jpg

The longer you use Facebook, the more personal content you hand over to the social media empire. Sharing content is what drives the social media experience, but what if you want your content back? Surprisingly, Facebook makes this easy.

The reasons to download your personal content from Facebook can vary. Perhaps you just feel better about having a backup copy of your data stored locally. Or maybe you’re working on a picture collage and want to use several of the images you’ve uploaded to Facebook. Or, as is more often the case, perhaps you’re fed up with Facebook and you want to leave it for good, but before you close your account, you would like to download your data.

Whatever your reason may be for needing to download your personal data, Facebook makes it easy. After all, it’s not like Facebook has any reason to make this process difficult, since they technically own whatever content you upload, whether or not you download it back or even close your account.

To get started, log in to Facebook and go to Settings. Below General Account Settings you will see Download a copy of your Facebook data, click on it. Next, click Start My Archive.

This will allow you to select a place to store your information, just like you would with any Internet download. Whichever folder you select to download your Facebook data into, make sure that’s it’s secure, seeing as it will likely contain sensitive data.

What kind of information is included when you download your archive? Facebook explains, “This includes a lot of the same information available to you in your account and activity log, including your Timeline info, posts you have shared, messages, photos and more. Additionally, it includes information that is not available simply by logging into your account, like the ads you have clicked on, data like the IP addresses that are logged when you log into or out of Facebook, and more.”

Depending on how much you’ve used Facebook in the past, this can be a rather large download. Although, at the end of the day, downloading everything in one fell swoop is much more convenient than going through every single Facebook post, selecting what to and what not to download.

For more useful tips and technology best practices, be sure to subscribe to NuTech Services’s blog for a new tip every week!

woman_using_email_400.jpg

Tip of the Week: Improve Email Open Rates With an Attention-Grabbing Title

woman_using_email_400.jpg

It’s safe to say that nobody enjoys their email inbox getting clogged with messages. Unfortunately, communicating by email is a standard part of doing business. Of course, in order for these emails to communicate their message, they must first pique the interest of the recipient enough to be opened. Here is a guide to crafting email subject lines that get readers to open them.

\Depending on your audience and context of the email, there are a few different approaches to take. One rule to go by is to keep your subject lines as relatable and personable as possible.

According to Unbounce, a message with the subject line, “Steve, where are you?” achieved a 43 percent open rate, compared to a Mailchimp report citing the industry average to be 24 percent. This is due to both the personalization of the subject line, as well as the perception that, by not reading the email, the recipient will miss out in some way.

Another excellent method to reach an email subscriber is to include some detail about their recent activity with you. Asking them in the subject line what their follow-up experience has been like makes your message appear to be completely customized to them (and not spam). For example, if someone ordered a new product or service from your website, asking them how their experience with it has been can provide a personal connection, and can encourage them to take advantage of your business further.

Offering a special benefit or advantage to reading the email can inspire a great open rate as well. If your email offers to teach your audience some trick or surprising fact, the recipient will receive an instant benefit for opening your message and could quite possibly be convinced to take any action you suggest to gain further benefits.

When an email is used to convey some bad news to the reader, it is best to be honest and authoritative. If a service is experiencing issues, let them know about these problems, as well as the actions you plan to take to resolve them.

Ultimately, each message needs to be tailored to fit the expectations of the intended recipient. Communication is not a one-size-fits-all venture, and if users suspect that you’re not being genuine with them, they will push your message to the back-burner, or perhaps even to the spam folder.

This tailored approach, of course, begins at the subject line. With proper crafting and care, you can hook in your recipient and improve the odds of them actually reading your message and responding promptly.

What are some tips and tricks you use to personalize your emails? Let us know in the comments.

google_drive_pdf_400.jpg

Tip of the Week: How to Take a Picture of a Document With Your Android Device and Turn it Into a PDF

google_drive_pdf_400.jpg

Like many of Google’s productivity applications, Google Drive is available on both iOS and Android mobile devices. One of the neat features that users of Android can take advantage of is the ability to scan a PDF and store it in Drive, all by taking a picture of the document. Plus, if it has text on it which was created by a computer, you can use Drive’s search function to find it at a later date.

Granted, such a tool will have certain limitations that need to be worked around. If you use the iOS version of Google Drive, this option won’t be available to you. Plus, Drive doesn’t recognize handwriting as searchable text. Either way, Drive’s PDF scanner is useful for what it is, and it can help you keep track of signed documents within Drive.

Create PDFs for Google Drive
Follow these steps and you’ll be able to create PDFs in Drive by scanning them with your Android smartphone’s camera:

  • Open the Google Drive app.
  • Tap the red plus button in the bottom right-hand side of the screen.
  • Select the Scan option. It will look like a camera icon.
  • Take a picture of the document you want to upload.
  • Once you’ve taken the photo, you have a couple of options:n
    • Tap the checkmark icon to save it in your Drive.
    • Select the Redo icon if you want to take a better picture.
    • Tap the plus button to scan another page to the file.

    n

  • Once it’s been saved, you can use Drive’s search form to search the non-handwritten text in the document.

We’ve outlined a couple of situations where this feature might come in handy:

  • If you’re on a business trip and you need to scan and send a document, but aren’t near a computer
  • Storing receipts for later viewing and documenting
  • Any time you’re not near a printer with a scanning function

What are some other great ways that you can take advantage of this PDF converting feature? Let us know in the comments, and be sure to subscribe to NuTech Services’s blog for more great technology tips and tricks.

no_windows_ads_400.jpg

Tip of the Week: Get Rid of Those Pesky Ads on Your Windows 10 Lock Screen

no_windows_ads_400.jpg

Do you have Windows 10 on your workstation or PC? You’ve probably realized that it’s a pretty sweet operating system. Still, there’s a reason why so many people have been bothered by it, and it’s because of its practically omnipresent attempts to advertise to consumers.

One of the ways that Windows 10 will do this is by displaying ads on your lock screen. This is done through the Windows Spotlight feature found in your Personalization settings. Chances are that if you are using the default settings for your Windows 10 PC, these ads are enabled. Thankfully, it’s very easy to switch them off for good.

To start, open up the Settings app. You can do this through either the Start menu or by typing Settings into the search bar/Cortana at the bottom of your screen. Next, click on Personalization. This opens up several options for your background image, colors for the operating system, themes, and your Start menu. You want to click on Lock screen.

Once you’ve clicked on Lock screen, you’ll see a preview for what your lock screen will look like, as well as options for what Windows will display as your lock screen. You can select the Windows spotlight, which is showing the ads, or if you’d rather have something more personal and ad-free, you can pick Picture or Slideshow.

If you choose Pictures or Slideshow, Microsoft won’t be able to bother you with shameless ad-pushing to your lock screen, which nobody appreciates. When you’re choosing your new background, we recommend that you choose pictures of a sunny, tropic locale that you dream of visiting on your next vacation. Or, better yet, a slideshow of something that you’re particularly passionate about.

One other feature that you should consider switching off is the Get fun facts, tips, tricks, and more on your lock screen slider. This helps you avoid frustrating and annoying ads that may still find their way to your lock screen. Or, if you don’t mind the ads, you can provide feedback to Microsoft so that they can better serve your interests. Click the top-right icon to inform Microsoft of what you want to see more of, as well as what you don’t want to see.

For more great tips and tricks to help you get the most out of your operating system, give us a call at 810.230.9455 and subscribe to our blog.

b2ap3_thumbnail_alter_screen_brightness_400.jpg

Tip of the Week: Do Your Eyes Hurt? Try Adjusting Your Screen’s Brightness

b2ap3_thumbnail_alter_screen_brightness_400.jpgComputer monitors have been getting bigger and brighter for years; improving on picture quality, responsiveness, and energy efficiency. However, working in a dark room in front of a bright screen can lead to eye strain and even headaches. You can avoid these side effects by lowering the brightness on your screen. Furthermore, lowering your screen’s brightness can save you precious battery life on your laptop, so it’s worth keeping these tips in mind for that fact alone.

Adjust Screen Brightness on Your Laptop
Turning down the screen brightness on your laptop is simple, however, the process might be a little different depending on the make and model of your device.

Check out the line of F keys at the top of your keyboard; do any of them have a little icon that looks like a light bulb, a sun, or any other light source? Once you’ve found them, the one with more light around it increases your brightness, while the one with less light around it decreases the brightness. You may need to find your Fn or Function key, and hold it down to trigger the brightness options as well.

ib key

If you don’t see the brightness keys, it’s possible your laptop doesn’t have them, or has buttons on the front or side that control the brightness.

Manually Adjust Screen Brightness in Windows 10
Keep in mind that the aforementioned tip only applies to laptops. Therefore, if you want to decrease the brightness of your desktop PC, there are a few ways to do this. For one, you can click on the battery icon in Windows 10’s notification area, which lets you adjust the brightness. If you want to use the Settings app to do the same thing, that’s also an option. All you have to do is open Settings from the Start menu, select System, and choose Display. Then, it’s just a matter of adjusting the slider to what you want the brightness to be.

You can also click the search icon on your and simply type brightness settings“.

If you’re using Windows 7 or 8, you can adjust your screen’s brightness by going through the Control Panel. Select Hardware and Sound, and select Power Options. A Screen brightness slider will be available at the bottom of the Power Plans window.

Automatically Adjust Brightness When Your Battery’s Low
You can set your Windows 10 PC’s brightness to automatically adjust in relation to your remaining battery life. Open Settings > System > Battery save, and select Battery saver settings. Make sure that the Lower screen brightness while in battery saver is checked, and you can use the adjustable bar to choose the percentage at which the screen will dim. By default, it will be set at 20 percent battery remaining.

Bonus Tip: Don’t Forget Your Monitor Settings
Although in our opinion, it’s usually more difficult to navigate through the monitor settings with the buttons on the front or the side of your computer monitor, but in extreme cases, it doesn’t hurt to check them if your eyes are experiencing fatigue. Most monitors have several different settings, including brightness, contrast, and color adjustments that you can tweak to make it easier on the eyes. We wish we could give you some tips for this, but virtually every monitor and manufacturer have slightly different configurations.

By effectively managing your screen’s brightness, you can help keep your eyes focused and in less pain. Plus, your battery will last longer, which is a win-win situation for both your work and your device.

For more great tips and tricks, subscribe to NuTech Services’s blog.

b2ap3_thumbnail_autorefresh_your_browser_400.jpg

Tip of the Week: How to Set Your Browser to Automatically Refresh Itself

b2ap3_thumbnail_autorefresh_your_browser_400.jpgHave you ever been in a situation where you have to continuously hit the refresh button in your browser? Maybe you’re waiting for an online sale to go live, or you’re waiting on an online forum for a critical response. Or, maybe you’re just waiting for an important email. Either way, manually refreshing your browser multiple times can be both annoying and inefficient. We’ll show you how you can refresh it automatically.

Install Super Auto Refresh
You can use the Super Auto Refresh Chrome extension to save yourself from brutally assaulting your browser’s refresh button. You can do so by following the above link in the Chrome Web Store, and selecting + ADD TO CHROME.

ib browser

Once you’ve successfully downloaded and installed the extension, an icon will appear in the far-right side of Chrome’s address bar. Click it, and you’ll see a drop-down menu.

ib browser2

Next, you’ll need to select how often you want the page to be refreshed. You could have the page refresh as often as every two seconds, or as infrequently as every 60 minutes.

If you’ve reached the point where you don’t need the browser to refresh automatically anymore, you can stop Super Auto Refresh from doing so. Click the icon in the address bar, and select the red Stop tile.

One additional feature of Super Auto Refresh is that you can easily manage the tabs that you’ve enabled the extension on. Online Tech Tips explains how to do so:

If you click on the little green hamburger icon to the right of the word “Refresh,” a new tab will load that will list out all the pages that are currently set to refresh along with the set time intervals and the amount of time remaining before the next refresh. Note that if you close a tab and then reopen it later, the extension will remember and apply the same refresh settings.

We also want to mention that a page with Super Auto Refresh activated on it only applies to that particular tab. Other open tabs won’t automatically be refreshed. They will only do so if you activate the extension within the tab. You can easily open a new tab that’s unaffected by Super Auto Refresh by selecting the hamburger icon > New tab.

Please be aware that constantly refreshing a web page can eat up a significant amount of bandwidth, so make sure that you’re mindful of how you use Super Auto Refresh on your company network.

For more great tips and tricks, subscribe to NuTech Services’s blog.

b2ap3_thumbnail_animate_your_gifs_400.jpg

Tip of the Week: How to Make an Animated Image From Your Favorite YouTube Video

b2ap3_thumbnail_animate_your_gifs_400.jpgGIFs. What are they? If you’ve spent any time perusing the Internet, you’ve definitely come across a GIF or two. Essentially, a GIF (Graphics Interchange Format) is an animated picture that loops a few seconds of a video clip (without playing any audio). In addition to GIFs being fun, they can serve as a great way to enhance digital communications. How can you take advantage of GIFs?

Actually, GIFs can be shared easily enough. Regarding most forms of digital communication, you would download, upload, and share a GIF in the same way that you would with any digital image, like a JPEG and PNG file. It’s finding the perfect GIF, or making one, that takes a bit of luck and skill.

peak look down

Searching the Web for a GIF
You might be surprised to find out just how many GIFs exist on the Internet for your downloading pleasure. You can use Google Search to easily find the exact animated picture that you have in mind. To do this, simply type into Google’s search bar what it is you’re looking for and hit Enter. Next, select Images > Search Tools > Type > Animated.

From here, you’ll see a web page populated with relevant images. Note: you won’t be able to see what the animation looks like unless you click once on the image (be careful, clicking twice on an image will take you to the page it’s found on). To download the GIF for future use, simply right click it, and select Save image as… just as you would with any digital image.

Making Your Own GIF From YouTube
It’s astounding just how many GIFs there are on the Internet, but what if you can’t find the exact GIF you’re looking for? If this is the case, you can use a video clip posted to YouTube to make the GIF you need.

To do this, you’ll first want to go to YouTube and find a video containing the desired clip. Next, copy the URL of the video, located in either the form at the top of your browser, or below the video after selecting Share.

From here, go to gifs.com and paste the video’s YouTube URL in the provided form. Next, select Create GIF. This will take you to a new page displaying your YouTube video in what appears to be crude video editing software. As prompted by the text boxes, assign your GIF a title in the top form, and then move the slider to the spot in the video at where you would like your GIF to begin and end. You can also manually enter in the GIFs start time in the Start time form.

Next, you’ll want to select the duration of your GIF. By default, it will be set to five seconds, so be sure to adjust the clip’s time span more or less as needed. You can also fine tune the timing of your GIF even further by hovering over the Duration form and selecting the up and down arrows. If desired, you can also add captions to the GIF by selecting Add Caption to the left of the video and following the directions.

As you make adjustments to your video, you will see a preview of the GIF. Once you’ve got everything set to how you want it, select Create GIF. From here, Gifs.com will generate your file and take you to a new page displaying your GIF. To the right of the GIF is the GIF’s URL, file path (if you wish to download it and save it on your PC), and the embed code if you wish to add it to a website. You will also notice the various social media icons if you want to share your GIF creation over your favorite social media sites.

b2ap3_thumbnail_android_gmail_400.jpg

Tip of the Week: How to Access Multiple Gmail Accounts On Your Android Device

b2ap3_thumbnail_android_gmail_400.jpgIf you have an Android smartphone, you know that the device is closely tied to your own personal Google account. As such, in order to get the most out of your Android device, you should take advantage of its seamless functionality with Google applications. This includes making sure that your Gmail account is properly set up on your device. We’ll walk you through how to add additional Gmail accounts to Android’s Gmail app.

First off, why would you want to add a new Gmail account to your Android device in the first place? This could be helpful for a couple of reasons. For one, there are some folks out there who do, in fact, have multiple Gmail accounts. While it’s frowned upon by Google, they might make a free “burner” account in an attempt to limit the amount of junk mail they receive. Another reason could be to add a work account, if your business uses Gmail as its preferred email client. Doing so gives you anywhere access to your email, calendar, and Google Docs, especially while you’re on the road or traveling for business purposes.

Either way, it’s a good idea to know how to add a new account to your device. Here’s how it’s done.

Adding a New or Existing Gmail Account
First thing’s first; open the Gmail app. You’ll see your inbox, but what you really want to see is the side menu. Tap the hamburger menu (the three-line menu in the top-left corner), and scroll all the way down to the bottom of the page. Select Settings, and you’ll see a list of all your current accounts.

Next, tap on Add account. Select Google, and tap Next. Afterwards, it’s simply a matter of following the instructions on the screen.

Switching Between Accounts
Once you’ve finished adding your new account to the Gmail app, you can switch between your account inboxes easily enough. Simply open up the hamburger menu again, and you should see your accounts in the form of icons at the top of the menu. You can tap the icon, or you can select the down arrow next to your currently open account to select the one you want to use.

For more great tips and tricks for your Android smartphone, and technology in general, subscribe to NuTech Services’s blog.

b2ap3_thumbnail_smartphone_battery_life_400.jpg

Tip of the Week: 7 Tips to Extend the Life of Your Android’s Battery

b2ap3_thumbnail_smartphone_battery_life_400.jpg
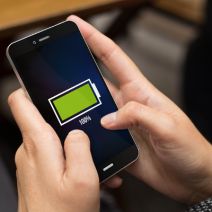
One experience shared by every mobile device user is batteries losing power faster than they’d like. Until someone invents a battery that never again needs to be recharged, this struggle will always be real. Here are seven ways to make your mobile device’s battery last longer.

Dim Your Screen
Go to Settings > Display and toggle Adaptive brightness.

Your screen is likely your device’s biggest energy hog. The longer it’s powered on and the brighter it is, the more power it will sap from the batteries. For example, you don’t really need your screen to remain powered on for a full minute after you’re done checking a notification. Therefore, make adjustments to your screen’s settings accordingly.

Turn Off Location Service (GPS)
Go to Settings > General > Location.

As long as your phone’s location service is enabled, it will use energy to stay connected to GPS satellites. Unless you’re actively using an app that requires GPS, like Google Maps, it’s likely that you won’t need GPS and you can go ahead and turn it off.

Disable WiFi When Out and About
Go to Settings > WiFi, Bluetooth, or Data Usage.

If you ever get a chance to connect your device to WiFi, do it and save yourself some precious data. However, when you’re traveling from place-to-place and you’re outside the range of any usable WiFi, then you’ll want to go ahead and disable your device’s WiFi. Otherwise, your device will use a significant amount of energy looking for and trying to connect to usable WiFi signals.

Turn Vibration Off
Hit the Volume Down key until you feel the phone vibrate, then hit it once more to silence all notifications.

When in social situations, having your phone vibrate for notifications is a great way to not annoy others. However, it requires significant battery power to get your phone to buzz and shake like that. By turning off your phone’s vibration setting, you’ll extend the battery of your phone just a wee bit more, especially if you’re one to receive constant notifications.

Manually Update App
Go to Play Store > Settings > Auto-update apps, and turn auto-update off or set it to update over WiFi only.

By default, your phone is set to automatically update its apps. While this works out fine if you’ve got a full battery, if you’re trying to conserve battery power, the last thing you’ll want is for your phone to connect to the Play Store and start downloading data.

Disable Background Data
Go to Settings > Data Usage.

Just because you’ve closed an app doesn’t mean that it’s not doing something behind the scenes. For some of your apps, they might be consuming more background data than you think (like GPS information). Disabling the collection of background data will save you battery power, but it also might cause some of your apps to not function properly when you go use them, so just be aware of that.

Airplane Mode
Go to Settings > Connections > More networks > Airplane mode.

Before you get desperate enough to conserve power that you turn off your phone entirely, try airplane mode. This is a handy feature that gives you access to several of your device’s useful apps, like clock, calendar, and contacts while cutting off its connection to networks like the Internet. If your phone isn’t trying to push data to all of its Internet-connected apps, then it will eat up much less power. Obviously, you won’t be able to send or receive messages or calls, but you’ll be able to reserve power until you need it.

These are just some of the battery-saving tips you can try, there are actually several more things you can try if you’ve gone through this list and still find your battery dying quicker than you’d like. What are some ways that you keep your batteries powered? Let us know in the comments.

b2ap3_thumbnail_guest_wifi_400.jpg

Tip of the Week: Improve Customer Experience With a Guest WiFi Hotspot

b2ap3_thumbnail_guest_wifi_400.jpgAs a business owner, you rely on your WiFi router to reliably broadcast a network connection to your entire office. This is generally a private network that you won’t want to share with just anyone. The only problem with this is that guests visiting your office might want to use the wireless Internet, and allowing them to do so can improve guest relations. So, what’s the solution to this dilemma? It’s simple: integrate a guest WiFi hotspot specifically for visitors.

When you consider the prevalence of public WiFi hotspots, you’ll realize that this is a great idea that can dramatically increase customer satisfaction. Fast food restaurants and cafes are seeing this, as customers come in to use their wireless, but in the process also wind up purchasing food or coffee. Guest WiFi hotspots work for the service-type industries, and translating this to the professional environment might be a bit of a stretch. Although, you’d rather have only trusted users accessing your organization’s private wireless network, so it’s best to set up a guest wireless network that they can use to access the Internet, but not the rest of the network.

Here’s a process that you can use to approach the idea of a guest WiFi hotspot.

How’s Your Internet Connection?
It goes without saying that your business wants a strong, stable wireless connection that it can use for Internet access. So, before you consider allowing even more users to connect to your wireless, you want to make sure that your Internet connection can withstand more traffic on it than normal. How many users will be taking advantage of it at any given moment? Is it going to be meant for just simple web browsing, or will it be used for streaming music, videos, and other content? Consider these questions carefully, and ensure that your Internet can accommodate more users than you anticipate. This will minimize any risks of the network speed grinding to a halt when you need it most. Some guest WiFi solutions even let you restrict bandwidth per user, allowing you greater control over your bandwidth.

Use Consistent Security Measures
Just because you have a wireless signal for guests, doesn’t mean it needs to go without security protocol. It should be set up to require a password that is provided by someone in your office. Otherwise, you might get any number of miscreants trying to leech your wireless signal without your consent. This gives your organization a semblance of control over the network while still having it available for users when the need arises. Similarly, you should keep an antivirus, firewall, content filter, and other security measures active on your network to prevent incriminating content from being browsed from your WiFi location. There are even WiFi solutions that enforce users to have antivirus running on their device before letting them connect, as added protection.

Contact a Professional IT Technician
When you think you’re ready to set up your guest WiFi hotspot, you will want to contact an IT professional who understands the individual needs of your business’s computing infrastructure. They will make sure that your hardware can handle the extra traffic, and discuss exactly what your business needs. NuTech Services can help your organization set up and utilize a guest WiFi solution that’s designed to keep your organization safe, while allowing your guests to benefit from the web. Give us a call at 810.230.9455 to learn more.