oreo_phone400.jpg

Tip of the Week: Android Oreo Is Double-Stuffed With Features

oreo_phone400.jpg

Earlier this year, Android released Oreo, version 8.0 of their popular mobile device operating system. Whether you’ve already updated to the latest version of this OS or are still waiting for your update, it has several new or improved features that you’ll want to consider using. Let’s look at five of our (many) favorite additions to the OS.

Autofill Passwords for Apps – Considering the widespread popularity of using an application over accessing programs within your browser, Google has decided to bring autofill beyond its use in the Chrome browser. The ability to autofill and store passwords for applications are a feature that many people will welcome.

Picture in Picture – Have you ever been in a video conference on your mobile device at the same time you needed to access an email or other information from an application? With Android Oreo, you can continue a video call or view a clip started in Chrome using the picture-in-picture mode by just tapping the home button when the video is playing.

New Emojis – Even though the use of emojis in business correspondence is marginal, they’re still one of the features that users are looking forward to with the Android Oreo release. Luckily, many mobile devices are used for both professional and personal communications, which means that you’ll have plenty of opportunity to use these fun additions to your library of emojis.

Smart Text Select – Anyone who regularly uses a computer likely considers the Select Text, Copy, and Paste functions to be very handy tools. To improve functionality, Oreo has introduced a Smart Text Select feature that is much easier to use than trying to drag and highlight text manually on your smartphone.

Snooze Notifications – Especially when you use a mobile device that for both work and personal uses, you’re probably going to receive notifications that you might not want to deal with immediately – but would like to check out a bit later when you get a chance. With Android Oreo, you can snooze notifications. Simply swipe to the right on the notification until a clock icon pops up. From there, select the amount of time you want to delay the notification by and go back about your regularly scheduled activity.

How do you feel about Android’s latest release? Have you found any other useful features? Or perhaps you still prefer to use iOS, regardless of how many new features Android adds? Sound off in the comments! We’d love to hear your opinion!

android_file_transfer_400.jpg

Tip of the Week: Drag and Drop Between Android and Windows

android_file_transfer_400.jpg

Smartphones have proven to be excellent devices for enhancing an employee’s ability to be productive while mobile. However, this approach often means that company work is now on an employee’s mobile device, instead of on your network. This issue can be easily resolved if the mobile device in question runs the Android OS. We’ll go over how for this week’s tip.

Android-to-PC File Transfers
Due to the fact that an Android device allows you direct access to its file system, it can essentially serve the same purpose as your standard external hard drive. Just as you would plug an external hard drive into a computer to move data, you can most likely use the charging cable for your device to connect it to your workstation.

Once your smartphone is connected and unlocked, you should be able to find a notification informing you that the device is charging. Tapping the notification will bring up a menu of the USB connection capabilities, for which one option is “Transfer files.” With that enabled, open File Explorer on your workstation. Your Android device should be accessible through the File Explorer menu.

Accessing your device this way will allow you to browse through your files and copy them over to your PC.

Safely Leveraging BYOD
Of course, security should always be your first concern when implementing a new process. Even a process as small and simple as transferring files from a mobile device needs to be approached mindfully for the business’ safety. A Bring Your Own Device, or BYOD, strategy may be tempting to implement to help cut the costs of equipping your entire staff with company mobile devices. However, if you elect to enact BYOD practices, you need to be sure that you are properly prepared to deal with any risks associated with them. That’s where we come in.

NuTech Services can help you to establish a BYOD strategy that meets the needs of your business–without exposing it to undue risk. Call 810.230.9455 to get started.

screen_mirroring_400.jpg

Tip of the Week: Tip of the Week: Mirror or Cast Your Android Device’s Screen

screen_mirroring_400.jpg

Sometimes, the small screen of your mobile device is just too small. Instead of buying a whole new device that’s bigger and better, you can remedy this by simply mirroring your phone’s screen to a larger screen. Here’s how to do it from your Android device to your Windows PC.

First off, a word about mirroring. We’re NOT talking about using your phone as a mirror to check your teeth for ‘passengers’ before an important meeting–though there are several apps that could help with that. Instead, mirroring is when what’s displayed on one screen is also displayed on a second screen in real-time. In the case of the goal we’re trying to achieve in this week’s tip, we’re showing you how to take what your Android device is displaying and mirroring it on the monitor of your Windows PC.

Now, your Android device does not come preloaded with this feature, which means you’ll have to pay the Google Play Store a visit.

There are actually a few different mirroring apps that you can download for free. One of the most popular apps is AirDroid. You can find it in the Play Store here.

Keep in mind that AirDroid requires root access and Wi-Fi in order to work properly, so it might not be possible for the average employee to do use. There are other apps that can be used, such as TeamViewer and various other screen sharing apps, but you’ll want to check with IT to ensure that one of them is a proper fit for your organization. Of course, you might already have a solution put into place in order to handle this function, so you might be pleasantly surprised.

An alternative to mirroring your device’s screen is to use a casting solution such as Google Chromecast. While this is primarily a consumer-based technology that can be used for streaming apps such as YouTube, Netflix, or other videos to a connected television, it also has business functions. For example, Chromecast supports a variety of business-related apps that can be cast from your mobile device or laptop to a television screen. You can view documents as a group or conduct meetings, depending on your business’s unique needs.

Mirroring your screen and casting applications can be a great way to help your business take its meetings to the next level. How is your organization conducting meetings? Could it use these technologies to change the way it functions for the better? If so, reach out to NuTech Services. Our trusted technicians will work with your organization to fulfill its goals. To learn more about business technology solutions, reach out to us at 810.230.9455.

smartphone_comparison_400.jpg

Samsung Galaxy vs Google Pixel, Which is Best for You?

smartphone_comparison_400.jpg

When it comes to Android mobile OS-run smartphones, consumers may wonder where the value is when they see so many name brands charging premium prices for their flagship devices. Two of the most popular devices, the Google Pixel and the Samsung Galaxy s7, seem to be in a league of their own in the Android market. Today we do a brief comparison:

Google Pixel & Google Pixel XL
Brand awareness plays a major part in whether or not a device is economically viable. In the past, Google has released their “flagship” devices under the Nexus monicker, and users have found them to be the cleanest Android-run devices on the market. The Google Nexus brand has been manufactured by several companies including Huawei, HTC, and LG as Google doesn’t find that the cost of starting their own smartphone manufacturing outfit to be viable. This time around Google once again partnered with HTC to create their newest namesake device, the Google Pixel.

Designed and marketed as the first truly Google phone, the Pixel comes in two sizes: one with a 5-inch display and a 2,700 mAh battery, and a larger version called the Pixel XL that features a 5.5-inch display and a larger 3,450 mAh battery. Otherwise the two devices are identical, making the choice between the smaller and larger versions more of a matter of preference than a deliberation between specifications.

Both devices feature a Qualcomm Snapdragon 821 processor with 4GB of RAM, and a 12.3 dual-LED camera, that is now considered by industry professionals as one of the best camera experiences available on a smartphone today. They both are made from aluminum and glass and come with a rear-mounted fingerprint reader for security.

The Pixel comes in three colors: Quite Black, Very Silver, and Really Blue. Customers can choose a device with an ample 32GB of onboard storage, or a 128GB version for those users in need of more storage space for their media. The device is available for all major carriers and can also be purchased on the Google Store, where financing is available.

Google Pixel
Dimensions – Aluminum & Glass design, 5.04 oz
Display – 5” AMOLED, 1080 x 1920 (~441 ppi)
Particulars – Android OS v7.1 {Nougat}, Qualcomm Snapdragon 821, Adreno 530, 4GB RAM, 32/128GB Internal Storage)
External Memory & SIM – None, Nano-SIM
Cameras – Rear facing: 12.3 MP, front facing: 8 MP
Battery – Non-removable 2,770 mAh
Other Information – Rear-mounted fingerprint reader, fast charging enabled, NFC enabled

n

Google Pixel XL
Dimensions – Aluminum & Glass design, 5.93 oz
Display – 5.5” AMOLED, 1440 x 2560 (~534 ppi)
Particulars – Android OS v7.1 {Nougat}, Qualcomm Snapdragon 821, Adreno 530, 4GB RAM, 32/128GB Internal Storage
External Memory & SIM – None, Nano-SIM
Cameras – Rear facing: 12.3 MP, front facing: 8 MP
Battery – Non-removable 3,450 mAh
Other Information – Rear-mounted fingerprint reader, fast charging enabled, NFC enabled

Samsung Galaxy s7 & Samsung Galaxy s7 Edge
If there has been an industry leader in the smartphone space, it has to be Samsung. Not only do they manufacture some of the most popular (and powerful) smartphones on the market, they produce components for several of their competitors’ devices. In a testament to their overwhelming popularity, of all the smartphones purchased in the first quarter of 2016, nearly a quarter of them were made by Samsung. Only time will tell if those numbers are sustained after their flagship smartphone, the Galaxy Note 7, was recalled and discontinued after hundreds of them were distributed with violently faulty batteries.

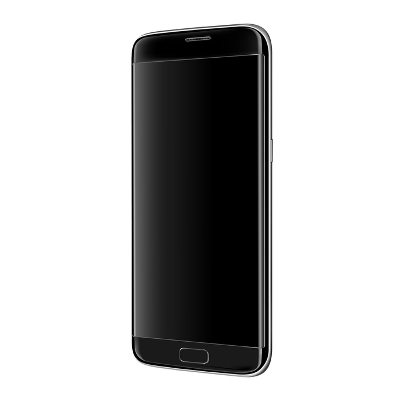
The Galaxy s7, however, is probably still the best smartphone on the market. The s7, and it’s sister product, the Galaxy s7 Edge, come with Super AMOLED displays, the most advanced chipset of any phone on the market and 4GB of RAM. If there is a feature you would like to see on a smartphone, the Samsung Galaxy s7, and s7 Edge, have it. They are dust and water resistant, they feature an always-on display, a great performing battery, and a return of expandable storage capabilities up to 200GB.

Like the Samsung Galaxy s7, the s7 Edge features a 5.5-inch Super AMOLED display, but the Edge features a rounded edge-to-edge design that some may favor. Each device features a fingerprint reader for security, fast-charging, and NFC for use with data transfer and payment platforms. It comes in six colors: Black, White, Gold, Silver, Pink Gold, Black Pearl, and Coral Blue; and, is available on every major smartphone carrier.

Samsung Galaxy s7
Dimensions – Corning Gorilla Glass 4 back panel
Display – 5.1 inches, 1440 x 2560 pixels (~577 ppi pixel density)
Particulars – Android OS, v6.0 (Marshmallow), upgradable to v7.0 (Nougat), Qualcomm MSM8996 Snapdragon 820 Exynos 8890 Octa,, 4GB RAM, 32/64GB Internal Storage
External Memory & SIM – microSD, up to 200GB (dedicated slot) – single-SIM model
microSD, up to 200GB (uses SIM 2 slot) – dual-SIM model
Cameras – Rear facing: 12 MP, Front facing: 9 MP
Battery – Non-removable Li-Ion 3000 mAh battery
Other Information – Fast charging enabled, NFC enabled

n

Sumsung Galaxy s7 Edge
Dimensions – Corning Gorilla Glass 4 back panel
Display – 5.5 inches, 1440 x 2560 pixels (~534 ppi pixel density)
Particulars – Android OS, v6.0 (Marshmallow), upgradable to v7.0 (Nougat), Qualcomm MSM8996 Snapdragon 820 Exynos 8890 Octa, 4GB RAM, 32/64/128GB Internal storage
External Memory & SIM – microSD, up to 200GB (dedicated slot) – single-SIM model
microSD, up to 200GB (uses SIM 2 slot) – dual-SIM model
Cameras – Rear facing: 12 MP, front facing: 5 MP
Battery – Non-removable Li-Ion 3600 mAh battery
Other Information – Fast charging enabled, NFC enabled

With the smartphone space becoming more and more convoluted, each of these devices provide a substantial upgrade over last year’s smartphones, while providing users the specifications and usability they seek in a new product. Their superior build-quality and industry-leading internals provide consumers the value they seek when shopping for the best smartphone for their dollar.

For more information about the latest mobile technology, call us today at 810.230.9455.

android_doze_400.jpg

Tip of the Week: Use Android Doze to Help Save Battery Power

android_doze_400.jpg

How often have you grumbled as you’ve reached for a charger at 2 in the afternoon as your smartphone clings to its last moments of life? If you’re anything like the typical user, quite often, but Android has attempted to reduce that number with the Android Doze feature.

Doze accomplishes this by disabling an application feature known as a wakelock. These wakelocks keep the device from entering its energy-conserving deep sleep mode, as deep sleep can interfere with some applications and functions.

While wakelock was originally intended to allow fitness trackers and similar applications to continue functioning with the screen deactivated, app developers began to apply wakelock to all of their applications, whether they needed it or not. This is precisely the reason that many apps are notorious for being battery-killers–we’re looking at you, Facebook.

So, the useful functionality of wakelock was spoiled by these app developers, essentially eliminating the power-saving capabilities of deep sleep mode. However, the implementation of Doze looks to fix all of that. By disabling wakelocks and network access after the phone hasn’t been used in a while, Doze prevents applications from pointlessly draining energy while still allowing these apps to update during periodic “maintenance windows.”

Android has even enabled users to customize their Doze settings, so that a user can dictate which apps are affected by the feature. To access this customization:

  • Open Settings.
  • Navigate to Battery.
  • Select Battery optimization from the Menu button.
  • Select All apps from the top-of-screen drop-down menu.

Doze will automatically set almost all of your applications to optimize your battery by default. If there is an app, however, that you need to have connected, you can always switch the setting to Don’t optimize for that app in particular.

Doze even has third-party apps designed to customize its functionality even further. With apps like Doze Settings Editor, a user is able to set Doze to turn off when a phone moves a certain distance–but only if the phone is running Android Marshmallow.

With all of this additional battery life available, do you think you’ll ever have to worry about missing an important call or notification? Let us know in the comments.

android_malware_400.jpg

Alert: New Malware Can Download 200 Malicious Apps in a Few Short Hours

android_malware_400.jpg

You don’t often hear about mobile operating systems being vulnerable to security threats (desktop vulnerabilities usually hog the spotlight), but when you do, they’re usually major problems that you need to be aware of. One such threat is called “Hummer,” a trojan that has installed unwanted apps and malware to more than a million phones all over the world.

About the Hummer Malware Family
The Hummer family of malware has increased in reach and scope since earlier this year. Cheetah Mobile reports that, at its peak, Hummer infected as many as 1.4 million devices daily. Thought to originate in China, Hummer infected over 63,000 devices daily in China alone. While the number of infections has begun to drop off, there still remain an astounding number of infected devices: about 1,190,000.

As reported by TechRepublic, here are the top five countries that are infected by the Hummer malware family:

  • India: 154,248
  • Indonesia: 92,889
  • Turkey: 63,906
  • China: 63,285
  • Mexico: 59,192

What It Does
The Hummer trojan roots the device that it infects, effectively unlocking the operating system and allowing for administrator privileges. Once it has done this, it begins to install malware and unwanted applications, games, pornographic applications, and other dangerous, if not annoying, programs. Since the Hummer trojan gains root access, traditional antivirus and other preventative measures aren’t capable of eliminating it from your device.

Perhaps the most annoying part of this malware is the fact that you can’t even uninstall the unwanted apps. The trojan will reinstall them continuously, which is both frustrating and cause for concern. Cheetah Mobile ran a test on the Hummer trojan and came to some shocking results: “In several hours, the trojan accessed the network over 10,000 times and downloaded over 200 APKs, consuming 2 GB of network traffic.” In other words, you can bet that you don’t want this trojan installed on your device.

How to Fix It
If you think that wiping your device will get rid of the trojan, think again. Cheetah Mobile claims that even a factory reset won’t remove it from your device. However, Cheetah Mobile’s Killer app is capable of removing the trojan. Alternatively, users can flash their device, but this is a complicated procedure that may not be worth the effort.

Hummer is just one of the many mobile threats out there that users of smartphones and other devices need to worry about. To learn more about how you can secure your organization’s mobile devices from Hummer and other threats, reach out to us at 810.230.9455.

b2ap3_thumbnail_android_gmail_400.jpg

Tip of the Week: How to Access Multiple Gmail Accounts On Your Android Device

b2ap3_thumbnail_android_gmail_400.jpgIf you have an Android smartphone, you know that the device is closely tied to your own personal Google account. As such, in order to get the most out of your Android device, you should take advantage of its seamless functionality with Google applications. This includes making sure that your Gmail account is properly set up on your device. We’ll walk you through how to add additional Gmail accounts to Android’s Gmail app.

First off, why would you want to add a new Gmail account to your Android device in the first place? This could be helpful for a couple of reasons. For one, there are some folks out there who do, in fact, have multiple Gmail accounts. While it’s frowned upon by Google, they might make a free “burner” account in an attempt to limit the amount of junk mail they receive. Another reason could be to add a work account, if your business uses Gmail as its preferred email client. Doing so gives you anywhere access to your email, calendar, and Google Docs, especially while you’re on the road or traveling for business purposes.

Either way, it’s a good idea to know how to add a new account to your device. Here’s how it’s done.

Adding a New or Existing Gmail Account
First thing’s first; open the Gmail app. You’ll see your inbox, but what you really want to see is the side menu. Tap the hamburger menu (the three-line menu in the top-left corner), and scroll all the way down to the bottom of the page. Select Settings, and you’ll see a list of all your current accounts.

Next, tap on Add account. Select Google, and tap Next. Afterwards, it’s simply a matter of following the instructions on the screen.

Switching Between Accounts
Once you’ve finished adding your new account to the Gmail app, you can switch between your account inboxes easily enough. Simply open up the hamburger menu again, and you should see your accounts in the form of icons at the top of the menu. You can tap the icon, or you can select the down arrow next to your currently open account to select the one you want to use.

For more great tips and tricks for your Android smartphone, and technology in general, subscribe to NuTech Services’s blog.

b2ap3_thumbnail_android_security_400.jpg

Tip of the Week: How to Take Back Your Android Device from Bloatware

b2ap3_thumbnail_android_security_400.jpgSmartphones are filled with all sorts of nifty apps. In fact, some of the most useful applications come pre installed on the device. However, not all apps are worth your time. These unwanted applications are called “bloatware,” and can impede the device’s ability to perform to your specifications.

Bloatware is not only annoying, but it can also be threatening to your device’s wellbeing. For instance, Lenovo’s pre-installed Superfish software caused quite the security scare several months back. Furthermore, it can take up space on your device and affect the amount of data you can store on it. In order to get the most out of your Android smartphone, you want to remove as many junk apps as you can. Of course, you should always approach this kind of project with caution. You don’t want to accidentally get rid of a core function of your device and render it inert.

There are several ways to remove or hide bloatware from your device. TechRepublic suggests five apps to do so. Some require that your device is rooted (i.e. you have Superuser control over your phone’s core files and OS), while some simply hide the bloatware from you.

TechRepublic’s Top Anti-Bloatware Apps

  • NoBloat Free: This app allows you to view bloatware on your device, and completely remove it. All you have to do is locate it under the System apps listing, tap it, and then select what you want to do with it from the listed options.
  • System App Remover: As explained by TechRepublic, System App Remover “is a free bloatware removal tool (with ads) that makes removing system apps and bloatware go much faster. Simply open the app, grant root access, check off all the apps you want to remove, and tap the uninstall button.”
  • Root App Deleter: Here’s yet another app that can delete your bloatware from your phone. However, unlike the others, you can choose to either hide it or delete it completely. Hiding it doesn’t clear up any space, so you can go that route if you don’t want to risk deleting something important.
  • Disable Bloatware: If you don’t want to remove bloatware completely, you can choose to hide it with Disable Bloatware. As a non-rooted application, you can take advantage of it even if your phone isn’t rooted. This hides your bloatware so it doesn’t distract you, but it doesn’t free up any space on your device.
  • System Apps: This is Android’s built-in application hiding function. With it, you don’t have to download an app to hide your bloatware. As previously mentioned, this doesn’t free up any space on your device, but it does prevent your bloatware from being a nuisance.

If you want to optimize your mobile devices for productivity and efficiency, but don’t want to risk your device’s integrity, you can give NuTech Services a call at 810.230.9455. We’ll help you clean up your devices so that they’re nothing but productivity machines.

b2ap3_thumbnail_android_clock_400.jpg

Tip of the Week: How to Prevent Lollipop’s Bug From Breaking Your Alarm Clock

b2ap3_thumbnail_android_clock_400.jpgIf you own an Android device, you’re no-doubt aware that Google issued an upgrade to Android’s OS not too long ago. This update, dubbed Android 5.0 Lollipop, presents several aesthetic upgrades to devices which were running a previous Android OS. However, there were also some functionality changes, a few of which were less than desired; like the unexpected changes to Android’s alarm clock.

Don’t Put This Tip “On Snooze”
Before the Lollipop upgrade, Android’s alarm clock application worked in silent mode. This was exceptionally useful, especially if you wanted to turn your phone’s sound off overnight to get a good night’s rest. However, in Lollipop, Silent mode is called Mute mode, where all sounds from calls, texts, and other notifications are silenced… including alarms.

alarm 1

You don’t need us to tell you that this new functionality change can affect your ability to get to work on time in the morning. Thankfully, there’s a pretty simple fix to this problem, even if it’s not the most obvious solution.

Since Lollipop doesn’t allow alarms to go off in Mute mode, there’s an extra hoop you have to jump through in order to get them to work properly. You can set your phone to only go off for what are called Priority Interruptions. Because alarms are always considered priority interruptions, you shouldn’t have to worry about the alarm being silenced.

To activate Priority Interruptions, turn up your volume to Sound or Vibrate. Next, select Only allow priority interruptions.

alarm 2

Doing this opens a menu beneath your selection. Then, click Settings.

alarm 3

This lets you view the Priority Interruptions settings. Don’t be fooled by the Silent choice here; Priority Interruptions only work in Sound or Vibrate mode. If you really want a Silent mode similar to the previous version of Android, you can uncheck messages, phone calls, and reminders in Sound mode. This lets it basically act the same as it used to, more or less.

alarm 4

If you’re successful in setting your Priority Interruptions, a star will appear next to your alarm clock symbol at the top of your screen. Afterwards, it’s best to make a test alarm to make sure that it goes off as planned. It’d be a shame to go through all of this trouble just to miss your alarm. Of course, if all else fails, you could always get a dedicated alarm clock from your local department store; or, get a pet. Whichever works for you.

Be sure to subscribe to NuTech Services’s tech blog for great tips every week.

b2ap3_thumbnail_android_battery_400.jpg

Tip of the Week: 3 Tricks to Get the Most Power Out of Your Android Device

b2ap3_thumbnail_android_battery_400.jpgSmartphones are exceptionally useful tools capable of enhancing your productivity, even while out of the office, but this comes at a steep cost. If your phone’s battery isn’t optimized to handle the workload, the multitude of apps will quickly drain it and you’ll be left with a dead device.

Thankfully, there are a ton of ways you can conserve your battery’s charge. To avoid being tethered to an outlet at all times, CNet has several suggestions for cutting down the amount of energy your battery wastes throughout the day.

Disable GPS-Based Services
Your phone will have its GPS enabled when you first receive it. This helps it communicate your location to satellites and cell phone towers. Unfortunately, all of this communication with the GPS phone chip eats up your device’s battery. Since many of these GPS features aren’t necessarily required for your device to function properly, you can get by just fine by turning them off.

Do this by going to Location reporting and Location history. These settings use your phone’s GPS alongside other Google applications to enhance your user experience, but they aren’t really necessary. Disable them by going to Settings > Location > Google Location Reporting.

in blog android

Turn Off WiFi Scanning
You probably use WiFi the most when you’re in the office or at home, but while you’re out and about, your device continuously scans for a new connection. This scanning constantly drains the battery, and automatically connecting to random WiFi networks while on the go can be a security threat.

To do this, make sure your autoconnect feature is turned off, and turn off WiFi scanning by going to WiFi settings > Advanced. If the WiFi scanning box is unchecked, you’re all set.

in blog android2

Keep Track of Your Data Sync
Android smartphones constantly sync to your Google account. This keeps your device’s data backed up and up to date, but the process of syncing your data might have unintended consequences… like a drained battery. Turning off your sync might solve this problem, but it’s more efficient to choose what data you’d like to sync.

Android allows you to filter the data sync process to certain files, like pictures and videos. Do this by heading to Settings > Accounts. Select the account to access the sync settings. You can then uncheck any items you don’t want synced, or turn it off completely if you want.

While there are plenty of ways to conserve your device’s battery, these are only three of them. For more tips and tricks on how to make your Android device as useful and efficient as possible, give us a call at 810.230.9455.

b2ap3_thumbnail_windows_media_android_400.jpg

Tip of the Week: Use Windows Media Player to Sync Your PC’s Files to Android

b2ap3_thumbnail_windows_media_android_400.jpgSo you’ve got yourself a new Android device and you want to transfer all of your favorite media from your PC onto the device. How do you go about doing this? While there all several different ways you can transfer your files, one of the easiest ways is to take advantage of a program that’s already installed on your PC: Windows Media Player.

Why WMP is the Practical Choice
It may be that you’ve not before considered WMP as an option to transfer your files onto your Android device. This is because Google, the makers of Android, would prefer oh so much that you use Google Play in conjunction with Google Drive, their cloud storage solution. While you can take the all-Google route to transfer and manage your media, and to be fair, a lot of users do, it might not be the best choice for everyone.

In particular, users that have a vast library of media to transfer and manage may frown on the monthly fees associated with Google Drive. Granted, Google’s rates are extremely reasonable and Drive storage is even free up to 15GB, but $1.99 per month for 100GB and $9.99 for 1TB can add up.

Another disadvantage about using the cloud for your mobile device’s media is that you will be dependant upon an Internet connection to access it. This isn’t an attractive option for people in areas with spotty coverage and users with a limited data plan that will quickly be consumed by accessing large files.

You’ve Got Some Free Options
Without having to download any new software, you’ve already got some free options on your PC that will transfer your files from your PC to your Android device. First off, you can simply connect the Android device to your PC via USB or wireless connection and then drag and drop a file from one device to the other. This is an easy way to transfer a file. You can even select all of your files and transfer them with one big drag and drop. However, users that have a constantly-changing media library will quickly become annoyed at having to go through this process every time they add a new file.

How to Sync Your Media Using Windows Media Player
If you have an ever-changing media library, you’re going to want to take advantage of an application that has a syncing feature, like Windows Media Player. To sync your Android device using WMP, open WMP and connect your device to the PC. If this is the first time connecting the device, then you may have to download and install a driver for it, which Windows will walk you through once a connection is detected.

With your device and PC successfully connected to each other and driver installed, go to the sync tab on the right side of the screen where you should see a graphic representing your device.

media android

Underneath the Sync tab is a box icon with a green checkmark. Click on it for a drop down menu to appear. From here, select Set up sync…

media android 2

Now you will want to go to the Device Setup menu. The default setting will allow the device and WMP to sync automatically, meaning that any change to either library will instantly be reflected in the corresponding library every time a connection is made. To activate this automatic sync feature, along with any other adjustments you wish to make, select the Finish button in the Device Setup menu.

Upon selecting the Finish button, your computer will jump into action and begin syncing your files. Once the sync is finished, you can disconnect your device and take all of your favorite media with you wherever you go. To access the media on your mobile device, you can use the standard media player on your device, or a host of other third party media players available on the App store.

The media player that someone uses to manage and play their digital content can vary greatly depending on the needs and preferences of the user. You might be more of an iTunes kind of person, or perhaps you’re happy with Google’s offerings. When selecting a media player, don’t forget about your faithful friend Windows Media Player. You may find yourself surprised that it can do exactly what you need it to.