keyboardShortcuts_474696794_400.jpg

Tip of the Week: Useful Google Chrome Shortcuts

keyboardShortcuts_474696794_400.jpg

We know that time is of the essence, especially in today’s fast-paced work environment. To help you fully leverage the technology at your disposal, we recommend that you read through this list of Google Chrome keyboard shortcuts and take them to heart. You never know when they might come in handy.

Handy Google Chrome Keyboard Shortcuts

We thought today we could use this blog to show off a handful of helpful Google Chrome keyboard shortcuts that you might find useful as you navigate the workday.

  • Ctrl + Shift + B: Show or hide the bookmark bar
  • Ctrl + Shift + O: Open your bookmarks manager:
  • Ctrl + Shift + T: Reopen a closed tab: 
  • Ctrl + Shift + W: Reopen a closed window
  • Ctrl + Click: Open a link in a new tab 
  • Ctrl + D: Bookmark your current tab
  • Ctrl + J: Open the downloads manager
  • Ctrl + T: Open a new tab
  • Ctrl + H: Open your History
  • Ctrl + Shift + Del: Delete your History
  • Ctrl + Shift + N: Open Incognito Mode

Of course, there are the standard keyboard shortcuts as well in addition to the above, but if you would like a comprehensive list of shortcuts, Google has compiled their own list here.

Did we forget any that you find particularly useful? Be sure to share them with us in the comments, and make sure you subscribe.

download_448199231_400.jpg

Tip of the Week: Alter Your Download Location in Chrome

download_448199231_400.jpg

Normally when you download a file from the Internet, it can be found in the Downloads folder. There are ways you can adjust this setting, though. You might not mind them going to Downloads for a short while, but there are other locations you might consider sending your files, like where they might actually belong. You can change the default location of your downloaded files to take one small step out of the process. We’ll show you how to do it with your Google Chrome web browser.

Change Your Downloads Location for Google Chrome

The first step is to open your Chrome web browser. Next, you’ll select the three-dot menu up in the top right corner of the screen. You can then select Settings.

The Settings window will open up in a new tab. From the left side of the screen, you should see an option for Advanced settings. Expanding this setting will reveal your Downloads options.

You’ll see some different options to play around with, including the ability to create a new folder to send your downloads to. You can also ask the browser to send new downloads to a preexisting folder, or have your web browser ask you where to send the new download whenever you initiate one. If you select this option, you’ll get the Save As dialog box whenever you start a download.

Once you have figured out where you want to send your downloads, you can open the folder location to see all your downloads as they occur. You can then move them around to wherever they might need to be by dragging and dropping them.

We cover all kinds of technology tips and tricks, so what are some interesting ones you’d like to see us discuss in the future? Make sure your opinion is heard in the comments.

chromeBug_467122515_400.jpg

Are Chrome’s Zero-Day Threats Actually a Good Thing?

chromeBug_467122515_400.jpg

With Google Chrome being one of the most popular web browsers out there, it’s no surprise that threats want to target it and take advantage of its users. However, up until recently, there have not been very many zero-day threats associated with Chrome. Zero-day threats are attacks that have never been seen before, affecting a new and previously unknown vulnerability. We want to remind you that it’s not always a bad thing when vulnerabilities are discovered in a browser or web application—in fact, it can actually be indicative of good monitoring practices.

Google Chrome’s History with Zero-Day Threats

For some context, let’s examine Google Chrome’s history with these zero-day threats, or rather, lack thereof. From the years of 2015 to 2018, there were no zero-day exploits actively used against Google Chrome, but the numbers have since increased over time. 2020 saw 14 zero-day threats, half of which were used against Google Chrome. 2021 saw an even greater number, with Google Project Zero’s tracking system identifying 25 zero-day threats, 14 of which belonged to Google Chrome.

While this might seem like a problem at first glance, the fact that vulnerabilities were not discovered before does not mean that they didn’t exist between 2015-2018. All it means is that most of them are getting caught and fixed now instead of flying under the radar, and this is a good thing.

Why Are There More Zero-Day Threats Now?

Why do experts think that zero-day threats are being discovered more often in Chrome? The reasons, according to Adrian Taylor of Google Chrome’s Security Team, are as follows:

  • Greater transparency between browser developers: Google Project Zero gives developers 90 days to fix the vulnerability before disclosing it, so if not, the public will eventually learn of it.
  • The end of support for Adobe Flash Player: Adobe was a popular mode of attack, but it has since left hackers with their only option being to attack the browser directly.
  • An increase in bugs required to attack the browser: There are more layers to break through, so more bugs are required, leading to more vulnerabilities to discover.
  • Browsers are more complex: With more complexity comes more bugs, and web browsers are no exception to this rule.

You can apply this idea to your business’ security infrastructure, too. After all, if you are not currently suffering from security problems, that doesn’t mean they don’t exist. We recommend that you take a close look at your security infrastructure and ensure that you are doing all you can to keep your business safe.

Plus, you will need to make sure that you are appropriately patching your systems as threats are discovered. No software solution will be immune to threats, so you should be addressing vulnerabilities as they appear; it sure beats doing it after a data breach.

To this end, NuTech Services can help. To learn more, reach out to us at 810.230.9455.

bookmark_454827911_400.jpg

Tip of the Week: Transfer Your Bookmarks Into Chrome

bookmark_454827911_400.jpg

Bookmarks can help you be productive with your web browser, but if you try to switch to a new one, you might find yourself without your bookmarks. Let’s say you want to switch to the established and well-respected browser, Google Chrome. We can help you import your bookmarks, and all it takes is a short and easy process!

Add Bookmarks from Other Web Browsers

Before proceeding, know that you need to have your previous browser installed on the device if you want to import bookmarks from it.

Chrome provides users with the ability to directly import bookmarks from other web browsers through its settings. To find them, you can click on the three-dot icon in the top-right corner of the browser. From here, select Bookmarks > Import Bookmarks and Settings. Next, select Import and select the browser you want to import from. Identify that you want the Favorites/Bookmarks imported from the checklist. If you see the blue checkmark, you can click on Done.

Add Bookmarks from an Exported HTML File

If you want to add bookmarks through an exported HTML file, you can import them this way, too. To do so, use the same process outlined above, but instead of selecting the browser to import from, select Bookmarks HTML file. Afterward, all you need to do is select the file you want to import and you’re golden.

Sync Bookmarks Across Devices

These options only work if you are using the desktop version of Google Chrome, so syncing your bookmarks across devices is the best way to get them on your mobile browser. You can do this by making sure you are logged into Google Chrome on both of your devices, then clicking on the three-dot icon in the top-right corner of the screen in Chrome. You can then select Settings. If you want to sync only the bookmarks, then disable the slider and check the box for Bookmarks.

Hopefully you found this tip helpful! Be sure to check back and see what other tips we have in store for you.

111704888_browser_chrome_extension_security_400.jpg

Evaluating the Security of Your Chrome Extensions

111704888_browser_chrome_extension_security_400.jpg

Google Chrome is currently used by 69 percent of global desktop Internet users, as of July of 2020. With such a large amount of people using Chrome, its security becomes even more important… which makes it all the worse that many people are unaware of the permissions that some of its extensions claim.

Let’s go over how you can review how much of your data these Chrome extensions can access, and how you can adjust these permissions more to your liking.

Fair warning: This will naturally require you to change a few settings, so don’t be afraid to reach out to your IT provider to confirm these changes are okay to make and for assistance in doing so.

What Permissions Have Extensions Been Granted?

Here’s the thing—the extensions that you have installed into the Chrome browser, much like the applications that can be installed on a mobile device, will require some of your browsing data in order to function. Many extensions and applications, however, take claim of far greater permissions than their functionality requires in practice. In fact, a recent analysis of extension permissions shows that over a third of all extensions do this!

Here are a few steps that allow you to evaluate your Chrome extension permissions and help you to avoid granting them too much access in the future.

Step One: Evaluate Your Current Permissions

First, you will want to find out how many of your installed extensions currently ask for too much. To do so, you’ll need to type chrome:extensions into the address bar and go through the Details of each extension that appears on the page.

There, you’ll find a line annotated with Site access. There are various access levels that an extension can have once it is installed, including no access at all. What this means is that your web activity isn’t accessible by the extension at all. The other levels include:

  • On click – This means that an extension can access and alter data in your active tab when you click on the extension’s shortcut.
  • On specific sites – This means that only certain websites allow the extension to access and alter what is presented in the browser.
  • On all sites – This means that there are no restrictions on an extension, allowing it to access and alter data at any time.

Certain types of extensions may need this kind of access, while others will not. It is up to you to determine what access is appropriate for each to need, based on what they use to operate.

Step Two: Adjusting Your Current Permissions

If an extension doesn’t need the level of permissions that it demands, do everything you can to address this by adjusting its settings. If the extension allows this, these permissions can be adjusted by simply selecting your preferred option under Site access. Whenever possible, following a principle of least privilege is the safest bet for your data.

Step Three: Keep Permissions in Mind Moving Forward

Once your extensions’ access permissions are in check, you don’t want to just fall back into your old habits with any new extensions you add. Remember, these extensions prompt you with a brief dialog box explaining its default accessibility settings… pay attention to them. Whenever you activate an extension moving forward you need to be sure to keep these permissions in mind. It may be the difference between installing an extension or finding another option.

NuTech Services can help you manage all your business technology through our proactive managed services and support. To find out more about our services, reach out to our team by calling 810.230.9455.

bing_google_war_400.jpg

Searching Bing for Google Chrome Takes Users to a Place They Don’t Expect

bing_google_war_400.jpg

With Google Chrome as its major competition, Bing needs all the help it can get just to claim a market share of the web browsing industry. Despite this, Microsoft’s search engine has encountered problems in the past with some of its top searches, including some that have caused data breaches.

What’s the Problem?
What’s the first thing that anyone who prefers Google Chrome does when they open Microsoft Edge? Simple–they download Google Chrome. Since Chrome isn’t available by default on Windows 10 devices, users have to download it, which means that they are reliant on Bing’s search results to find Google Chrome. The problem with this is that some malware sites have disguised themselves as sponsored ads for Google Chrome in Bing’s search results.

These sponsored ads would appear when a user searches for Google Chrome in the Bing search engine. Basically, instead of a legitimate sponsored ad leading to the Google Chrome download page, the malicious ad would instead bring the user to a phishing site disguised to look like the Google Chrome download page. This page would have a URL of ‘googleonline2018.com.’ If you try to access this page through Google Chrome, it’s actually blocked, but Bing and Edge don’t do this, making it a huge security issue.

These Issues Aren’t the First
Making the situation even worse is that this isn’t the first time Bing has encountered issues like this. Even as far back as April of this year, this same threat was reportedly identical to the recent version. The ad has been pulled as of this writing, but it’s strange that no explanation has been issued regarding this threat by Google, or even a confirmation that the issue has been resolved. All of these factors combine to create a situation where it’s not that unbelievable a situation like this could happen again.

Other Bing Problems
There are other problems related to Bing that have caused issues in the past, including a history of providing offensive or alarming content through its image search. For example, if you were to search for objectively neutral terms, there is a chance that, even with SafeSearch on, the image search will deliver racist search suggestions or other similarly-offensive content. Bing has also been known to push conspiracy theories through its suggested searches. Searching for the wrong thing could potentially expose users to material that they didn’t want to view in the first place, or content that could land viewers in hot water with the law.

To remain updated on similar situations to those explained above, as well as the latest security breaches and threats, subscribe to NuTech Services’s blog.

chrome_70-400.jpg

The New Version of Chrome has Interesting Changes

chrome_70-400.jpg

Chrome 70 has proven to be quite a divisive browser. While a lot of users are excited for the new changes to security, some are also worried about whether Chrome can maintain this security and its user-friendly interface. Here are some of the changes being made to Chrome 70 so you can choose whether this browser update is for you.

Extension Restrictions
One of Chrome’s largest advantages over its competition has to be its library of add-on extensions. Unfortunately, any kind of functionality with these additional “programs” can lead to security concerns. Google has had to slow down the production of extensions to create new requirements for developers to adhere to. One example is how cryptocurrency continues to be a major talking point, prompting extensions to include cryptocurrency mining and cryptojacking in their features. Google is shutting down these supplemental programs, as well as generally holding developers to higher standards than they previously were. It now demands that developer accounts be protected by two-factor authentication, as well as paying closer attention to apps that require lots of permissions or host their code remotely.

Security Measures
Chrome 70 is also packing in all kinds of new security features to keep phishing attacks away from end users. In particular, Chrome is trying to push education of its native password management tools, as well as warn users when the links they are about to access aren’t secure. In essence, this simply states that websites need to be secured if they want visitors, reinforcing the fact that websites need to prioritize security these days.

Login Concerns
While some changes have been accepted with open arms, others… not so much. While Chrome has allowed users to use the browser without logging into the browser, some have noticed that Chrome appears to log a user in, even if they are only using one service out of the many provided. This is primarily an issue because Google could potentially share the user’s data (think browsing history), which is not something that users traditionally take lightly. In the time since then, Google has announced that Chrome isn’t necessarily logging users into Chrome–it’s more of an in-between measure to show a user which of their accounts is currently logged in.

As with any new solution, there will be roadblocks and concerns that users might be faced with during the experimentation phase. What kind of experiences have you had with Chrome 70 so far? Let us know in the comments.

just_the_tips_400.jpg

Tip of the Week: Using Your Computer to Its Full Potential

just_the_tips_400.jpg

Your computer, and the many resources you use it to access, are made for utility. As a result, there is an assortment of useful features built into many commonly used systems and solutions. For this week’s tip, we’ll go over some of the shortcuts that you may not have known about.

For Windows
The Windows operating system itself comes with a few shortcuts that can make using your computer much more convenient.

A cluttered screen can be extremely distracting, but minimizing and maximizing each window each time you need a different one can add up to be a major time sink. Arguably even more so, it gets annoying pretty quickly. Windows provides a fix that sounds a little silly — to quickly minimize every window other than the one you want to keep, click and hold the bar at the top (where the minimize, full screen, and close buttons are located) and shake your mouse. All other active windows will minimize. Repeating this action calls your windows back to your display.

  • You can also use your taskbar to accomplish a similar result. Pressing the Windows key and the number of the application on your taskbar will open it, and then can minimize and maximize it.
  • If you have a file selected and you need to rename it, pressing F2 will allow you to do so without right-clicking and selecting Rename from the options.
  • If you want to speed up deleting a sentence you just typed, pressing Ctrl as you hit backspace will delete your text word-by-word, instead of character-by-character.
  • Windows also makes it easier to take specific screenshots of your active window: all you have to do is press Alt and Print Screen.

For Chrome
Google Chrome is a highly utilizable browser, with plenty of shortcuts and features baked in.

  • We’ve all had those searches we regret, and Google never seems to let us forget about them–until now, that is. Using your arrow keys, select the unwelcome suggestion, and press Shift + Delete to eliminate it.
  • If you’ve ever wanted to move multiple tabs to a new browser window, you know how quickly the back-and-forth gets old. By holding Ctrl, you can select multiple tabs and drag them to an existing window or create an entirely new window.

For Any Browser
If you aren’t a Chrome user, there are still plenty of shortcuts that will work for any of the popular browsers.

  • Selecting text in a web page can be frustrating, as you can easily grab an unwanted chunk by drifting your mouse too far one way or another. This can be avoided by clicking in the text where you want to begin highlighting, then pressing Shift as you click on the end of your desired segment.
  • You can quickly access the address bar at any time by pressing F6, or Ctrl + L.
  • Once you’re done with one of your tabs, middle-clicking it will close it.

How many of these tips did you know about? Are there any you know of that we missed? Share them in the comments!

chrome_shortcuts_that_work_400.jpg

Tip of the Week: These Shortcuts Can Make You A Google Chrome Power User

chrome_shortcuts_that_work_400.jpg

Do you use Google Chrome? While it’s a great option in and of itself, you can make your experience with Chrome much better simply by using many of its keyboard shortcuts. Here are some of the best shortcuts that you can use to get more out of your Google Chrome web browser.

  • Alt+Tab: Move through your open tabs.
  • Alt+Home: Open your homepage.
  • Alt+Left Arrow: Move backward a page.
  • Alt+Right Arrow: Move forward a page.
  • F11: Show the current website in full screen mode.
  • Esc: Stop a page from loading or a file from downloading.
  • Ctrl+(+) or (-): Zoom in or out on the screen.
  • Ctrl+0: Reset the zoom to normal.
  • Ctrl+1 through 8: Jump to the corresponding tab in your web browser.
  • Ctrl+9: Jump to the last open tab.
  • Ctrl+Shift+B: Hide or show your bookmarks bar.
  • Ctrl+D: Make the currently opened tab a bookmark.
  • Ctrl+H: Show history in a new tab.
  • Ctrl+J: Show downloads in a new tab.
  • Ctrl+F: Find something on the page.
  • Ctrl+N: Open a new window.
  • Ctrl+Shift+N: Open a new window in incognito mode.
  • Ctrl+R or F5: Refresh the page.
  • Ctrl+T: Open a new tab.
  • Ctrl+W: Close the currently open window.
  • Ctrl+Shift+T: Open the most recently closed tab.
  • Spacebar: Move down a page at a time.
  • Shift+Spacebar: Move up a page at a time.

Will you use these shortcuts to get more productivity out of your workday? We hope so! To learn more about how you can take full advantage of your organization’s business technology, subscribe to NuTech Services’s blog.

adobe_flash_google_400.jpg

Tip of the Week: How To Enable Flash In Google Chrome

adobe_flash_google_400.jpg

Flash is going the way of the dodo, with support from Adobe expected to end in 2020. Many popular browsers like Google Chrome have started to do away with Flash by default. However, there are still websites and online tools that use it. Here’s how you can enable it when you need to.

Keep in mind, Flash is being phased out due to compatibility and security issues, so under most circumstances it’s best to have it disabled unless you really need it.

The first step is to check the current Flash settings for your Chrome browser. To do so, navigate to a new browser tab and type chrome://flags into the search bar. You want to make sure that a pair of settings are set to Allow instead of Default. These settings are Prefer HTML over Flash and Run all Flash content when Flash setting is set to “allow.”

Next, open another Chrome tab and type chrome://components into the search bar. Look for the Adobe Flash Player selection and click the Check for Update button. Once you’ve done so, open Chrome’s Settings. Scroll down to the bottom of this page and select Show Advanced Settings. Scroll down further and you’ll see options for Content Settings in the Privacy tab.

In the box that pops up, scroll down until you see the option for Flash. Be sure that the Ask first before allowing sites to run Flash (recommended) is selected. If you’d rather just block Flash on your browser completely, make sure that the Block sites using Flash box is checked. You should never allow sites using Flash to run automatically, as it could be a security issue.

But what if you want to allow specific sites to allow Flash without being blocked? You can create exceptions to this by clicking on Manage exceptions, which is found under Content Settings – Flash. You then enter the URL and select Allow under the Behavior column. A shortcut to this can be found by clicking in the left-most section of your address bar, and under Flash, selecting Always allow on this site.

For more great tips and tricks, be sure to subscribe to NuTech Services’s blog.

google_chrome_issues_400.jpg

Tip of the Week: Make Chrome Run Faster With These 3 Adjustments

google_chrome_issues_400.jpg

If Google Chrome is your preferred web browser, then you might notice that, just like any other application, its performance may fluctuate. When you experience issues with Chrome, it’s important to keep in mind that you can take steps to remedy the problem.

Here are three ways that you can make Google Chrome work better.

Make Use of Chrome’s Task Manager
Much like your computer’s task manager, Chrome has a feature that allows you to view your computing resources and programs at a glance. With Chrome’s built-in task manager, you can see information on browser tabs and extensions, and how much processing power they are using up. This information can help you diagnose which tabs are slowing down your browser. To open it, click the three-dot menu in the top right corner of the browser and click More Tools. Next, select Task Manager. Or, if you want a more straightforward path, just use the shortcut Shift + Escape.

Once the window opens, you’ll see all of the tabs and extensions that are currently in use, along with statistics concerning just how much resources they are consuming. If you find the offending tab, you can select it and click End Process. If you use this method to end an extension or an open tab, it will stop functioning until you reload Chrome.

Take Advantage of Hardware Acceleration
Before digging too deep into this, we want to make sure that you’re aware that it’s not always recommended that you implement hardware acceleration for your browser, as it depends on how powerful your computer is. If you’re unfamiliar with hardware acceleration and want to know how it can improve your browsing experience, reach out to your IT department or contact NuTech Services.

Hardware acceleration works by moving some of the burden off of your PC’s CPU onto the GPU, which can potentially resolve some processing problems by placing the page-rendering burden on the CPU. For this setting, click on the three-dot menu and open Settings. Then go down to the bottom of the window and find Show Advanced Settings. Go down from here and find the System section. Select Use hardware acceleration when available and restart Chrome to activate it.

Reset Google Chrome
If you’re not sure if your efforts have actually led to a better performance from Google Chrome, you can try resetting the browser’s settings. To do so, go past hardware acceleration and you’ll see the option to Reset Settings. Confirm your choice. Keep in mind that Chrome might not reset things like bookmarks, browsing history, or saved passwords, but it will get rid of settings like your default start page, your new tab page, your pinned tabs, and your default search engine.

Does your business have problems making the most of its technology? For more great tips and tricks, reach out to us at 810.230.9455.

extensions_in_incognito_mode_400.jpg

Tip of the Week: Browse Incognito Mode Better By Enabling Your Extensions

extensions_in_incognito_mode_400.jpg

Fans of Google Chrome are familiar with using Incognito mode to cover their tracks and keep their Internet browsing private. Although, one downside of Incognito mode is that it disables your browser’s extensions by default. If this has been an annoyance for you, then you’ll be pleased to learn that switching on your extensions for Incognito Mode is easy to do.

Incognito mode might be a great way to browse the Internet with some semblance of privacy, but if it’s at the cost of your efficient browsing thanks to extensions, it’s somewhat unfortunate. Thankfully, there is a very simple way to make sure that your extensions work at all times, even when in Incognito mode.

Just follow these short directions and you’ll have extensions in your browser during Incognito mode:

  • Click Chrome’s menu button
  • Make your way to the More Tools
  • Click on Extensions
  • Go through the extensions and find the one that you want to enable in Incognito mode
  • Click on the Allow in Incognito Mode button

Well, there you have it. Now you can use your extensions even while in Incognito mode! Just keep in mind that there’s probably a very good reason why Google Chrome blocks extensions by default, so try to limit it to only extensions that you absolutely trust. The last thing you need is a security discrepancy caused by you trying to find a more convenient way to go about your daily business.

For more great tips and tricks to help you get the most out of your technology, subscribe to NuTech Services’s blog.

b2ap3_thumbnail_spoiler_alert_400.jpg

Tip of the Week: Use This Chrome Extension to Avoid Online Movie Spoilers

b2ap3_thumbnail_spoiler_alert_400.jpg
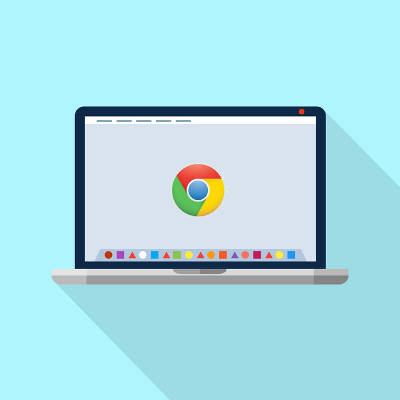
The Internet is a great and wondrous thing, giving us information about pretty much anything we could ever hope for. However, this is a dangerous thing for those who want to go about their entertainment “spoiler-free.” In other words, you want to be pleasantly surprised when you watch your favorite movies or TV shows. Sometimes the Internet isn’t so kind toward that goal. Well, here’s a somewhat viable solution: the Spoiler Alert extension for Google Chrome.

Especially with Star Wars, Episode VII: The Force Awakens just around the corner, there’s no time like the present to arm yourself against the savage assault of spoilerific Internet content. The extension for Spoiler Alert is capable of blocking certain web content in accordance with your specifications. While the extension asks you to sign up with your email and date of birth, it allows you to browse categories and block content related to specific TV shows and movies. CNet cites that the only movie currently available to block spoilers of is The Force Awakens, but hey, isn’t that all that matters?

Spoiler Alert also works for certain other events, like sports, new episodes of TV shows, and the like. This is particularly helpful for popular dramas that are huge hits in pop culture (think The Walking Dead), or for keeping you from viewing the score of the big game until you’ve watch it. You can even use it to avoid all of the political debates and debauchery, if you so desire.

However, Spoiler Alert is still far from ideal. As explained by Rick Broida at CNet:

One problem I discovered is that Spoiler Alert doesn’t seem to work past the initial page-load. So on Facebook, for example, if you scroll down far enough that the site loads more content, the extension doesn’t block anything in that additional load. That’s a problem. But this blocker is still in beta, so hopefully the developers can address that. In the meantime, I’m just happy to have at least some line of defense against our spoiler culture. Seriously, people, why would you want to know everything (or anything) about “The Force Awakens” before getting to the theater?

In some cases, Spoiler Alert only blocks headings, titles, and text, rather than images, but in other cases it’s capable of blocking the entire site, while offering the choice of entering at the risk of being spoiled. You can change these settings to suit your needs, though, like if you’ve already seen the latest episode of your weekly TV show. Another solution to this dilemma is to completely avoid Facebook, Twitter, and pretty much any online news aggregate, but that’s not really a viable choice. As a business owner, you probably spend a lot of time on the Internet doing research on new solutions and clientele. You shouldn’t have to have your fun ruined by Internet spoilers just because you’re doing your job.

In the meantime, Spoiler Alert might alleviate the problem to a degree, but the fact remains that the Internet is rife with spoilers that can potentially ruin the experiences of folks around the world. If you know of another way to keep spoilers away, feel free to share it in the comments; and please, no spoilers!

b2ap3_thumbnail_chrome_extentions_400.jpg

Tip of the Week: The 4 Most Useful Extensions for Google Chrome

b2ap3_thumbnail_chrome_extentions_400.jpgIf you’re one of the many people who prefer Google Chrome to other browsers, you know all about extensions and how they can improve your browsing experience. These are mostly add-ons that are designed to augment your browsing experience or adding new features. While some aren’t so useful, there are others that are invaluable under the right circumstances. To help you get the most out of Chrome, here are four useful browser extensions that you should take advantage of.

Text Mode
You don’t need us to tell you that the Internet is a distracting place. Your attention span is at the mercy of YouTube videos, cute cat pictures, and just about everything else humanly imaginable. This can be quite irritating if you’re working on a deadline and absolutely need to complete a big project on time. In order to help you take back your productivity unsullied by the Internet, Chrome’s Text Mode extension eliminates all images so that you can concentrate on the task at hand. Thanks to there being no images loading, you’ll notice that the browser’s speed is slightly increased, as well.

AdBlock
Online ads are annoying. It’s as simple as that. You don’t want to accidentally click an ad and have even more tabs open than normal. More importantly, you just want to browse the web in peace without pop-up videos or distracting ad text in your sidebar. AdBlock completely blocks these ads from your web pages, allowing you to get back to business without a new ad catching your eye.

Lightshot
All Windows PCs come with the innate ability to take screenshots using the PrtScn key. The free tool Lightshot allows you to take focused, clear screenshots of select areas of your screen. For instance, you’ve received a strange error message or noticed a spelling error, and you want to report this to the appropriate personnel. Lightshot also comes with the ability to draw on the image, insert text, and more. You can then proceed to either upload it directly to the Internet, or save it locally on your PC. This helps you give your IT support team a visual representation of what your problem is, allowing for a swift resolution.

Google Cast
Google’s Chromecast is an essential part of any techie’s entertainment repertoire, but in order to use it effectively, you need the Google Cast extension on your PC. Chromecast is a device that you can plug into your television’s HDMI port to send content to the big screen. A great use of this would be in your office’s conference room for a meeting, or simply in your living room for movie streaming. It’s compatible with all sorts of entertainment mediums, like Netflix, YouTube, Google Docs, and more.

Do you have a favorite Google Chrome extension? If so, let us know in the comments.

b2ap3_thumbnail_google_chrome_400.jpg

Tip of the Week: Load Cached Pages in Google Chrome for Offline Browsing

b2ap3_thumbnail_google_chrome_400.jpgYou might have experienced the frustration of reading an article online and having the Internet connection cut out on you. This is one of the most common problems while working with a shoddy WiFi connection. If this happens to you, you can view your browser’s cached pages in order to finish up what you were reading; so long as you’re not trying to view pages like Facebook, which update periodically throughout the day.

Here’s how you can view Google Chrome’s cached pages, even while offline.

What Exactly is Caching?
You might have heard the term in passing, but do you understand how the cache works? It’s basically a component that stores data when you visit a website. This allows that data to be loaded faster the next time you visit the page. The idea is to reduce bandwidth and processing power required to view the material.

How to Load Cached Chrome Pages
By taking advantage of the cache, you can read web content that you’ve previously accessed, even while offline. Chrome doesn’t automatically enable this feature, but there is an experimental add on that you can use from the mad scientists at Google. Type chrome://flags into the search bar.

flags

After reading Google’s disclaimer, locate the feature called Show Saved Copy Button. If you aren’t using the latest version of Chrome, try looking for Enable Offline Load Stale Button.

show button

Select Enable from the dropdown menu, which will prompt you to restart Chrome. When you next visit an offline web page, you’ll see a button that says Show Saved Copy. If you’ve previously visited the page, you’ll be able to load the cached copy of the website’s content.

offline

Keep in mind that due to the nature of website caching, you won’t be able to see any updates made to the page since you last visited it. This is the one true downfall of offline viewing. However, this is useful if you’re trying to finish reading an article where you don’t have Internet access.

Stay tuned next week for more productivity tips from NuTech Services.

b2ap3_thumbnail_chrome_flat_400.jpg

Tip of the Week: How to Set Up User Permissions For Google Chrome

b2ap3_thumbnail_chrome_flat_400.jpgAre you looking for a way to manage Internet use on a single computer that’s being used by multiple people? To help you keep your browsing history and settings intact and keep unwanted users from accessing the web, Google has a free add-on available for Chrome created for just this very purpose.

With this add-on, you gain the ability to essentially lock Chrome and only grant access to those you’ve given permission to use it. Although, this add-on is experimental, so be sure to keep potential issues in mind:

How to Install this Helpful Add-On for Google Chrome:
Open Chrome and enter chrome://flags in the search bar, now hit enter. From here, you will see a list of all the experimental add-ons available for Chrome. The one you want to track down is “Enable new profile management system.

profile management

With the long list of add-ons before you, you’ve got the option to find the needed add-on a little quicker by using the CTRL+F (find) function.

Once you’ve located the add-on, click Enable. Next, close Chrome and open it again. You will now find the extension to be active. You can tell that the add-on is active because the sign-in screen will have a similar look to the sign-in screen used for Windows.

To login to your Chrome browser, select the Google account that you want to use, or enter the login credentials of an another account. Once logged in, you will be all set to browse the Internet like you normally would. Be sure to logout when you’re done. This will prevent other users from browsing Chrome with your Google account and messing with your settings.

Limitations of the Add-On
This add-on works great if you’re logged in and working with a single Google account. However, this add-on is designed to only work in conjunction with a single Google account, which means you will be unable to use a Google App, like Google Drive, under an account different than the one associated with the add-on. Therefore, this add-on isn’t ideal for users that routinely cycle through different Google accounts in single browsing sessions.

If you’ve installed the add-on and you don’t like how it limits your use of multiple Google accounts, then you can simply remove it by going to chrome://flags, finding the add-on, and clicking Disable.

This add-on is a great solution to keep unwanted people from using Chrome on your computer, but it’s doesn’t come close to protecting people from messing with other applications and settings on your PC, or deterring hackers. For a more comprehensive network security solution, call NuTech Services at 810.230.9455.