computerTranslate_238459874_400.jpg

Tip of the Week: Translating a Gmail Message

computerTranslate_238459874_400.jpg

There are times when you might receive an email written in another language. Even if it’s unlikely, it helps to be able to translate a message for the rare time when you might receive one, particularly if your organization occasionally conducts business beyond your country’s borders. Let’s go over how you can use Gmail’s built-in translation functionality.

We should start by saying that we doubt the translation function will ever be 100% guaranteed accurate, but it should do well enough to give you an idea of what the other person has to say. If that’s all you need, then this tool might be just for you. Otherwise, consider a more comprehensive solution.

Translate Your Email in Gmail

First, you’ll see that the moment you receive an email that seems to be written in another language, you’ll see the translation open at the top of the page. If you see this button, you can translate the message into your preferred language using the Translate button. Click it and it will run the translation right away.

Now, if you don’t see the translation button, you’ll have to tweak some settings. Tap the three-dot menu for the message and find the translate Message menu. You’ll see this open up the Translate bar. Select the language from the drop-down list, or have Gmail detect the language on its own. Once you do, you can click on the Translate Message option to complete it. You can also revert it to the original language in the same way.

If you want to just turn on automatic translation, you can do it pretty easily. This option should be on the right side of the screen after you have translated your message, along with the language you have selected. You can disable automatic translations in the same way.

We hope you got some value out of today’s blog. Be sure to subscribe to learn more!

excelSpreadsheet_399797193_400.jpg

Tip of the Week: Explaining Excel Formulas

excelSpreadsheet_399797193_400.jpg

Just under its surface, Microsoft Excel offers a massive variety of functions and features…far more than we could ever realistically cover in this blog. However, there are a few that stand out as relatively essential, particularly to businesses. Let’s go through these functions, starting with how to use them.

How Excel Formulas Work

Once you have a cell selected, you can type one of these formulas into the cell or the formula bar. Keep in mind that all Excel formulas begin with an equals sign, before the type of formula is specified and the appropriate data points are identified. If properly formatted, your spreadsheet can thereby be automated to do a huge variety of tasks based on the data you’ve input.

Here are some common formulas that you could find useful in your business’ operations.

=SUM()

This allows you to total up the value of the cells you’ve selected, making it far simpler to add up long lists of numbers. Let’s say you had a list made up in Column B, beginning at Row 2 and ending with Row 46. To total these numbers, you’d type up =SUM(B2:B46), and that cell would display the total as a result.

=AVERAGE()

In the same vein, =AVERAGE does the same thing, except it produces the average amongst those selected cells. =AVERAGE(X1,Y2,Z3) would give you the average of X1, Y2, and Z3.

=CEILING() and =FLOOR()

These functions allow you to round numbers to the nearest multiple of significance that you’ve established. Dictating =CEILING(F2,5) with F2 being populated with 368 would round up to 370. On the other end of the spectrum, =FLOOR(F2,5) would round down to 365.

=CONCATENATE()

Excel can also track changes in text too, with =CONCATENATE allowing you to tie different text strings together. For instance, if G7 read The 3-2-1 Backup Rule and K12 read helps to ensure your data backup is safe, entering =CONCATENATE(G7,” “,K12) would tie the phrases together and give you The 3-2-1 Backup Rule helps to ensure your data backup is safe. You can also format the formula as =CONCATENATE(G7&” “&K12) for the same results.

=NOW()

This formula will populate a cell with the current date and time, which helps you keep track of when your data was put into the spreadsheet.

=TODAY(), et alia.

There are a number of functions that do a similar thing to =NOW(), such as:

  • =TODAY(), which populates a cell with the current date
  • =DAY(TODAY()), which populates a cell with the current day of the month
  • =MONTH(TODAY()), which populates a cell with the current month, represented as a numerical value between 1 and 12

=TIME(), et alia.

In a similar vein, various functions allow you to track the exact time that data has been added to your spreadsheet.

  • =TIME() inserts a set time, so long as you format it as a serial number with the hours, minutes, and seconds, which will be converted into a standard format. So, =TIME(13,41,28) would produce 1:41 PM.
  • =HOUR(NOW()) populates a cell with the current hour as a value between 0 and 23 (12 AM to 11 PM).
  • =MINUTE(NOW()) does the same with the current minute, between 0 to 59.
  • =SECOND(NOW()) does the same with the current second, again, between 0 to 59.

=VLOOKUP() and =HLOOKUP()

Vertical lookup and horizontal lookup enable you to seek out a specific value in one column or row and produce the data that is associated with it. Let’s say that you have a table that outlines your business’ assorted costs, perhaps giving you the total, how much is invested into different aspects, and such. These Excel functions allow you to select certain data points as a reference so you can ascertain the relationship between different values.

=IF()

Using =IF() gives you a quick and easy reference to check whether a set condition is true or false in reference to your data. Let’s say you’ve calculated out the returns on investment that some of your business initiatives have produced. Using =IF(), you can generate a clear yes or no answer to whether or not an initiative has seen the returns you wanted it to. Maybe you wanted to weed out any initiatives that saw less than 2% ROI, with the ROI of each occupying a cell in Column E. Using =IF(E1>0.02,”Yes”,”No”) and dragging that formula down to match the cells in Column E will give you an at-a-glance reference of whether or not one of your efforts was worth it.

=COUNTIF() and =SUMIF()

The more data you have, the more challenging even simple tasks—like taking a tally or adding up the values—can be. =COUNTIF and =SUMIF simplify this process for you.

  • =COUNTIF() allows you to set conditions by which selected cells will be counted. For instance, if you wanted to count how many months you had sold widgets out of the data present in Column J of the sheet, =COUNTIF(J1:J12, “widget”) would give you that total.
  • =SUMIF() operates in a similar way, although it adds any numbers that match the conditions you’ve set, rather than just counting the instances. So, we could determine the total number of widgets sold during our established timeframe by using =SUMIF(J1:J12, “widget”, K1:K12), provided that Column K was populated with total widget sales for each month.

Excel Can Do a Lot, Lot More Than This

What are some of your go-to Excel functions? Are there any you’ve heard about that you’d like to learn how to use? Let us know in the comments, or give us a call at 810.230.9455!

mobileNotification_295894631_400.jpg

Avoid MFA Fatigue Attacks by Minimizing Notifications

mobileNotification_295894631_400.jpg

While we strongly recommend that you put the security safeguard known as multi-factor authentication in place wherever it is available, it is important that we acknowledge that cybercriminals are frustratingly inventive. So much so, in fact, that a new form of attack has been developed to take advantage of MFA, referred to as MFA fatigue.

Let’s go over what an MFA fatigue attack is, and what you can do to fight back.

MFA Fatigue is a Very Specific Form of Social Engineering

Let me ask you a question: if one of the applications on your mobile device prompted you to log in once again, would you hesitate to do so? What if a notification appeared, asking you to confirm a two-factor authentication prompt? What if that notification kept appearing until you did, assuming that the system was just glitching?

This is precisely how MFA fatigue works.

The purpose behind MFA is to help keep your account secure even if your password has been compromised. By adding an additional proof to the required authentication process, MFA is supposed to make it harder for the person who compromised your password to actually access the account. However, when a cybercriminal puts in your credentials, you’ll still receive the prompt to confirm the login. Some of these threats even come in the form of SMS messages and voice calls to confuse the user further.

This brings us back to our initial question: would you question an authentication prompt, particularly if you were trying to do something else, especially if it kept popping back up again and again?

The cybercriminals responsible are betting that you won’t.

How to Spot MFA Fatigue

There are a few clear and unmistakable warning signs that an MFA fatigue attack is afoot:

  • If you receive approval requests without attempting to log into an application.
  • If you receive multiple requests from a single application.
  • If you receive authentication request notifications at odd hours.

How to Take the Teeth Out of MFA Fatigue

Fortunately, there are a few things you can do to help limit the efficacy of MFA attacks. A strong password is a great starting point, so long as you keep it secure. You and your team also need to be more cognizant of when you are receiving an MFA prompt and whether or not you requested it, denying all of those that are unidentified.

Limiting the number of attempts you can make through your MFA solution of choice within a predetermined time is also a helpful precaution.

Turn to Us for Assistance with Your Business’ Security

We’ll help you implement the protections and precautions that will help you keep your business secure. Give us a call at 810.230.9455 today!

416046837_notifications_400.jpg

Tip of the Week: Get Your Dismissed Notifications Back in Android

416046837_notifications_400.jpg

Picture this scenario: you’re going about your day and get an important notification, only for that notification to, well, get cleared. You want to go back and check it so you don’t miss it. This is thankfully quite easy to do by viewing your Android notification history.

First, you’ll have to take a couple of steps to set it up.

Turn On Your Notification History for Android

Android has a feature for notification history which is hidden away in the settings. This feature gives you the ability to see a list of your notifications. It’s not active by default, so it’s time to turn it on. Follow this simple process:

  • Access your Settings either by swiping down on your homescreen to get to the integrated shortcut, or by navigating through your applications to find them.
  • Once there, access your Notification settings, and from there, Advanced settings.
  • You’ll then see Notification history. Tap it to access it.
  • Once you do, you’ll be presented with a deactivated switch. Turn the switch to On, and you’ll have a list of the notifications you recently dismissed!

What About Apple Devices?

Apple does not have an equivalent feature; once your Apple notifications have been acknowledged, they are cleared and gone for good.

Have Any Other Ideas for Tips?

You use technology every day to be productive, and we want to help you get the most out of it. To learn more about what we can do for your business, contact us today at 810.230.9455.

routerPlace_99947271_400.jpg

Tip of the Week: Placing Your Router in the Ideal Spot

routerPlace_99947271_400.jpg

Whether in the home or office, getting work done nowadays is very reliant on a reliable Wi-Fi signal. This makes it important to have your router placed in the right spot. Let’s go over a few best practices so that you can set up your router in a place where it does you the most good.

Keep Your Router in a Central Location

Let’s face it—if you’re trying to cover the entirety of a building, putting your router at one end or the other is going to be counterproductive. Not only is the signal generally directed outward in all directions from the hardware, putting the router on one side of the building potentially doubles the number of walls the signal will have to penetrate to reach a device on the other side. Plus, that also means that half of your signal is being sent where nobody will be using it. Keeping your router in the middle helps to keep the signal as centralized to your business as possible.

Minimize the Obstacles the Signal Will Have

On the topic, the more your Wi-Fi signal needs to go through to get to your devices, the weaker it will be by the time it gets there. Avoid putting your router in an enclosed space (as aesthetically preferable it may be to do so) to help keep your signal as strong as possible.

Other electronic devices count as obstacles as well, as they can let out interference that, well, interferes with your Wi-Fi signal. Try to keep your router away from these if at all possible.

Position the Antennas Appropriately

Depending on where you need your signal to go, you’d be wise to adjust how your router’s antennas are positioned (if your router allows you to adjust them, that is). If you only need your signal to cover the floor that the router is also on, keeping the antennas vertical will be your best bet. If multi-floor coverage is required, angling them slightly (to about a 30-degree angle) may be best.

Truly optimizing your wireless connection may take a bit of fiddling, but keeping these practices in mind is bound to help. For more assistance with your business’ IT, give us a call at 810.230.9455.

172453146_quick_tip_400.jpg

Tip of the Week: Take a Screenshot in Windows 10

172453146_quick_tip_400.jpg

There is one key on the keyboard that might seem a little odd: PrtSc. It’s not immediately obvious what this key does or why you would want to use it, but we assure you that it is an extremely helpful keyboard shortcut once you understand how it works and why you might want to try it out. In reality, the PrtSc key is important for taking screenshots on your Windows device.

Windows has a lot of keyboard shortcuts, but PrtSc is perhaps one of the easiest to carry out. When you hit the PrtSc key, Windows will take a screenshot of your computer’s monitor, allowing you to save it as an image.

There are many practical reasons for taking screenshots, many of which you might not have considered. Let’s go over your options for taking screenshots on your Windows device.

Why Take Screenshots?

Screenshots are incredibly helpful for a variety of reasons, one of which is to help IT support determine what the root cause of your technology troubles is. Basically, it lets them see what you see on the screen so they can check off boxes for more common fixes before diving into more technical issues. Screenshots are also helpful for documentation purposes, allowing you to put together guides for workflows and processes for more visual learners.

The PrtSc Key

When you hit the PrtSc key, you might notice that there are no pop-ups or anything that appears on-screen to show that you have taken a screenshot. Basically, the PrtSc key captures an image of your desktop screen and copies it to the clipboard as an image. You can then paste it like you would if it were copied or cut text. The problem with this is that it takes a screenshot of the whole screen, not just one part of it, so for more focused screenshots, you have to get a little more creative.

Snip & Sketch

This solution is built right into Windows 10 and allows you to snip specific parts of your screen for a screenshot. To use Snip & Sketch, use the keyboard shortcut Shift + Windows Key + S. There are some options here: Rectangular Snip, Freeform Snip, Window Snip, and Fullscreen Snip. Pick whichever you think best suits your needs. Your selection will then be saved to the clipboard in the same way as PrtSc, allowing you to paste it into an application or edit it in the Snip & Sketch tool.

Third-Party Services, Applications, and Extensions

There are some third-party tools and applications that you can use to take screenshots that let you capture specific parts of your screen in much the same way Snip & Sketch allows. These other solutions may be perfectly effective for taking screenshots, but you should clear any of them with IT first just to make sure that the solution is one that is allowed on your network. Plus, you might already have better tools available to you, so it never hurts to confirm with IT before going all-in on a screenshot tool; and, of course, you have us to fall back on as well!

So, how are you going to use screenshots to take your business to the next level? Let us know in the comments, and be sure to subscribe for more great tips and tricks.

287215660_shortcuts_400.jpg

Tip of the Week: The Letters of the Alphabet, in Windows Shortcuts

287215660_shortcuts_400.jpg

The Windows operating system comes with more than its fair share of capabilities, many of which are accessible through the appropriate keyboard shortcut. Because remembering so many would be a challenge for some (and impossible for most) we’ve put together a list of those associated with the letters found on the keyboard, with a few extras tacked on for good measure. Make sure to take note of any you may find the most useful.

Windows Shortcuts, from A to Z

  • WinKey + A opens the Action Center.
  • WinKey + B highlights the notification area.
  • WinKey + C launches Cortana in listening mode.
  • WinKey + D toggles Show Desktop and the previous state.
  • WinKey + E launches File Explorer in the Quick Access tab.
  • WinKey + F opens the Microsoft Feedback hub.
  • WinKey + G opens the Game Bar tools, for personal use at home.
  • WinKey + H opens the Dictation toolbar.
  • WinKey + I opens your Settings.
  • WinKey + K opens the Connect pane to connect to wireless displays and devices.
  • WinKey + L locks the device.
  • WinKey + M minimizes all open windows.
  • WinKey + O locks the device’s orientation on tablets and mobile devices.
  • WinKey + P opens the Project pane.
  • WinKey + Q opens Search.
  • WinKey + R displays the run dialog box.
  • WinKey + S launches Cortana in typing mode.
  • WinKey + T cycles through the apps on the taskbar.
  • WinKey + U launches the Ease of Access/Display Center to manage attached displays.
  • WinKey + V opens the clipboard app to view things copied to it with Ctrl + C.
  • WinKey + X opens the advanced, Secret Start menu.

Bonus: Adjusting Your Program Windows

A neat workspace is a productive workspace, and if there’s a quick way to arrange your computer’s display, that’s all the better. Fortunately, Windows has a few built-in shortcuts to help quickly accomplish just that:

  • WinKey + Left/Right Arrow will take the active window and adjust it to fill the left or right side of the monitor it is displayed in. 
  • WinKey + Shift + Left/Right Arrow will move the active window over to another display.
  • WinKey + Up Arrow will maximize the active window. 
  • WinKey + Down Arrow will minimize the active window.

Believe it or not, this list is just a small sample of the available Windows shortcuts out there. There are plenty more to explore. We periodically go over a few on this blog, so make sure you’re subscribed so you can be alerted whenever we post something new!

220561040_helpful_tips_400.jpg

Tip of the Week: The Better Way to Take a Screenshot on Windows

220561040_helpful_tips_400.jpg

For the Windows user seeking to take a screenshot, there is no lack of options. Most notably, many keyboards today offer a Print Screen key that allows the user to capture an image of their entire display. Having said this, there are better options, such as the platform’s integrated Snip & Sketch tool, with its greater functionality and greater ease of use.

How to Use Snip & Sketch

Snip & Sketch is a utility built into Windows, providing a user with four screenshot-taking options, called up by pressing Windows Key+Shift+S. These options consist of the following:

  1. A basic box selection, allowing you to click and drag to encompass your selection
  2. A freeform selection, allowing you to draw out your boundary
  3. Window snip, allowing you to select an active monitor to screenshot
  4. Fullscreen snip, taking the place of the Print Screen key, allowing you to take a picture of all your monitors simultaneously

This way, you have access to a wider range of utilities that are commonly useful, particularly in the workplace.

With any luck, this tip will help your in-office communication improve. If you’re interested in learning some more helpful IT tips, make sure you check back here often—or give our team a call at 810.230.9455.

174935768_email_400.jpg

Tip of the Week: Rearranging Your Gmail Messages

174935768_email_400.jpg

Email remains a popular tool in the business setting because of its undeniable usefulness in the office—but having said that, it can have its negative impacts on your productivity simply due to how much it can take to manage it appropriately. With so many messages that are crucial for you to keep track of coming through email, let’s go over a fancy trick to help you manage your messages in Gmail.

How Gmail Can Be Hacked to Control Your Message Order

Granted, there are a lot of tools and features that Gmail offers that are intended to help you manage just this. Just consider the filters and labels that can help your sort and contextualize the messages that come in.

While these are undoubtedly useful tools, they don’t always prevent messages from slipping through and being missed. However, with a simple “hack” of sorts, you can effectively reorder your messages so that your most urgent communications can be moved to the top and highlighted for added prominence.

Postponing Messages

Let’s say that you open your inbox to discover an important message that you don’t want to lose track of, but it’s also buried amongst other messages that aren’t nearly as pressing in the moment. Gmail offers a literal Snooze button that allows you to simplify this.

Don’t get too excited—this snooze button won’t let you catch a few extra winks at your desk. Instead, pressing that button allows you to resend yourself an email at a time you dictate so that it reappears at the top of your inbox. Here’s how to use it:

  • (On a desktop/laptop) selecting the box next to an email and clicking the clock-shaped icon at the top of the window.
  • (In the mobile app) tapping on the icon at its left, accessing the three-dot menu, and selecting Snooze.

You will then be prompted to set a time for the message to come back, in the form of the Pick date & time option. Once you’ve sent the message away, it will return at the time you’ve dictated and sit conveniently at the top of your inbox.

What other handy Gmail tricks do you know? Share them in the comments!

179946009_email_organization_400.jpeg

Tip of the Week: Keep Track of Your Priority Gmails

179946009_email_organization_400.jpeg

Email is undeniably a useful tool, but it can be a real drag on productivity and a hindrance to manage. Then again, there are some messages that you absolutely need to keep track of as they contain sensitive information. Gmail makes keeping messages under your thumb simple.

Email Can Be Frustrating

Gmail offers a lot of tools to help people organize their email. Features such as filters and labels make dealing with the loads of mail that come in easier, but still some messages might slip through the cracks. Wouldn’t it be useful if your email platform could give you a second chance to be alerted to a direct email? Users can now use a simple trick to reorder messages, so the most urgent ones appear at the top of your inbox. Let’s take you through it. 

Snoozing Your High-Priority Messages

So you’ve identified an important message that you want to return to after you deal with the mountain of other messages. Gmail allows you to do this with the use of the Snooze button.

Unfortunately, it doesn’t really work like your favorite snooze button on your alarm clock. Gmail’s snooze button is simply to resend yourself an email later so that the priority messages are at the top. Here’s how to access this feature:

  • (On a desktop/laptop) selecting the box next to it and clicking the clock-shaped icon at the top of the window.
  • (In the mobile app) tapping on the icon at its left, accessing the three-dot menu, and selecting Snooze.

Once this is done, a prompt will appear that will allow you to set when the message should return. The Pick date & time option allows you to set anytime after now for you to get the message back. Once you send this message, it will come back and sit at the top of your inbox in orange. It is extremely useful for the person who gets a lot of emails, but doesn’t get a lot of important emails. 

For more great tips and tricks, return to our blog regularly. 

110764836_embedding_video_400.jpeg

Tip of the Week: Embedding a YouTube Video into a PowerPoint Presentation

110764836_embedding_video_400.jpeg

If you’re trying to share an idea in a presentation, adding a brief video clip can make it very simple to communicate with your audience. With this in mind, it is quite helpful that Microsoft PowerPoint makes it simple to embed a YouTube video directly into your presentation, whether you’re using PowerPoint 365 or PowerPoint 2016.

Embedding a YouTube Video in PowerPoint 2016

To embed a video into your presentation:

  1. Navigate to YouTube and find the video you want to include in your presentation.
  2. Find the Share option and select Embed from the menu that appears when you click into it.
  3. You’ll see a preview of your chosen video’s thumbnail, along with a series of code and some other options that allow you to control the point from which the video starts, whether your embedded video will provide viewers with controls, and the ability to enable a privacy-enhanced mode (which pertains more to videos that are posted on a website). Copy this code in its entirety.
  4. Back in PowerPoint, click into the Insert tab and select Video. Select Online Video from the provided drop-down.
  5. A box will appear. Paste the code you copied into the From a Video Embed Code field. Alternatively, you could attempt searching for the video you wanted to use using the YouTube search field.

Embedding a YouTube Video in PowerPoint 365

The process when using PowerPoint 365 is very similar:

  1. Find the video you wish to embed on YouTube. Copy its URL from the address bar.
  2. In PowerPoint, click on the Insert tab. Select Video, then Online video…
  3. Paste the URL into the Online Video dialog box.
  4. You can also add various effects to the video preview (not the video that plays) via the buttons in the Video Format tab.

Regardless of the version you’re using, Microsoft PowerPoint has an excellent reputation amongst those who know how to use it. It, like many other solutions, provides much-needed capabilities that no business can fully go without.

Whatever your needs may be, NuTech Services can help you see to them. Give us a call at 810.230.9455 to find out more about what we have to offer.

244341955_chrome_actions_400.jpg

Tip of the Week: Making Use of Chrome Actions

244341955_chrome_actions_400.jpg

As the most common Internet browser, Google Chrome is in a position where they always need to be coming up with new draws to maintain their hold on the market. Their latest efforts may help them to do so. Let’s take a moment and examine what Chrome is implementing, and how you can use it to your advantage.

Introducing Chrome Actions

Chrome Actions take the familiar address bar of the Chrome Internet browser and add some extra utility to it. Rather than specifying a webpage or network location to visit in the address bar (known as the “omnibar” to very few of us), Chrome now accepts very basic commands as input, and will follow these commands when they are entered.

For instance, opening a window in Incognito mode is as easy as simply typing “incognito” into the address bar.

As of yet, there are a few Chrome Actions that have been implemented:

  • Clear Browsing Data – type ‘delete history’, ‘clear cache ‘ or ‘wipe cookies’
  • Manage Payment Methods – type ‘edit credit card’ or ‘update card info’
  • Open Incognito Window – type ‘launch incognito mode‘ or ‘incognito’
  • Manage Passwords – type ‘edit passwords’ or ‘update credentials’
  • Update Chrome – type ‘update browser’ or ‘update google chrome’
  • Translate Page – type ‘ translate this’ or ‘ translate this page’

Of course, they come with the promise of more being added in future updates.

Is This Something You See Yourself Using?

Leave your thoughts in the comments and tell us why or why not. For more information and assistance pertaining to your business’ IT, give us a call at 810.230.9455.

323571630_Hamilton_400.jpg

How to Host a Hamilton Party Online

323571630_Hamilton_400.jpg

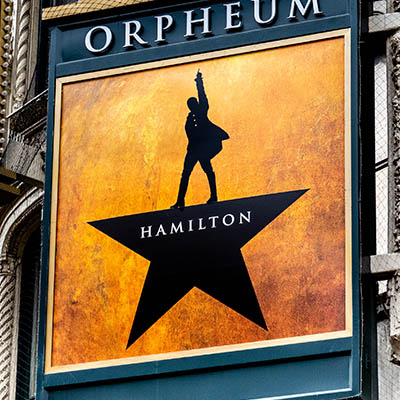
Hamilton had risen to be one of the most coveted theater tickets before the pandemic struck, having a low-end price tag of over $600, with a nine month wait. Now that the pandemic is in full swing, however, there is another option that enables you to catch the show.

On July 3rd, the Tony-winning Broadway musical was released on Disney+, meaning that history buffs and theater nerds alike don’t have to Wait for It. Even better, you can now watch Hamilton with all your friends. We Know, it’s pretty cool, especially since you don’t all need to be In the Room Where it Happens. Let’s go over how you can arrange that in this song-title-pun-filled blog.

Making Use of a Disney+ Watch Party

What is a Watch Party? Simple: it’s where you virtually gather with your friends and family to simultaneously stream a movie or show together, despite being in different locations. Many services, like Amazon Video, added this feature to help people make it through social distancing during the global COVID-19 pandemic without telling anyone to “Meet Me Inside.”

Hosting a Hamilton Watch Party

To enjoy this theater production of the life and times of Alexander Hamilton along with your socially distant friends, there are a few things that will be required of all participants.

Disney+

Naturally, everyone who wants to watch will need an individual Disney+ account. Unfortunately, the free trial offer for Disney+ is no longer offered. After all, once the second season of the Mandalorian was announced, they knew they could say “You’ll Be Back” to all their subscribers (we’ll see how the $30 rental for the live-action Mulan impacts this).

Subscribing only requires a quick visit to https://www.disneyplus.com/. You may also want to check online for any promotional codes that may be currently offered.

A Browser Plugin

Everyone also needs to install a Chrome browser plugin. There are some exclusive to Disney+, while others allow you to host watch parties via Netflix, Hulu, YouTube, and Prime Video as well. If you’re hosting, pick the one that works for you and make sure everyone has it installed ahead of time so there aren’t any delays. If you only care about doing a watch party with Disney Plus, you can use the Disney Plus Party plugin. If you want to host watch parties with Netflix, Prime Video, YouTube, and Hulu as well, you can check out Vemos.

These plugins will let you synchronize your video with the rest of the watch party and chat with one another. Add the plugin to the top of your browser and create an account.

Once that’s accomplished, you can start up Disney+ in your Chrome browser and start the movie. Then you can click on your new plugin and select the option to host. You’ll be prompted to name your viewing room. Meanwhile, the rest of your party will need to have installed the plugin, created an account, joined a movie, and entered the name of your room. That Would Be Enough for everyone to participate.

Then, as the host, you have the power to start the movie and have it play to everyone’s device. You can pause it so that people can Take a Break without asking “What’d I Miss?” or you can play the entire production Non-Stop.

Fair warning—some of these group viewing applications are only free for a set number of hours each week. Make sure you pick one long enough to view the whole thing, so nobody starts asking What Comes Next?

With any luck, this will allow you and your friends to watch Hamilton and keep everyone Satisfied.

Want more handy technology tips and tricks? Consider NuTech Services Your Obedient Servant. Each week, we update this blog with more tips and best practices, along with a Hurricane of useful technology information. With our help, you don’t have to feel Helpless when it comes to your business’ IT. We can be your Right Hand Man, just give us a call at 810.230.9455.

Let us know, how did we do with the song title puns? One Last Time, don’t forget to subscribe to our blog!

180541233_password_400.jpg

Are You Practicing Good Password Hygiene?

180541233_password_400.jpg

Passwords are not a modern invention by any stretch, but as we have dealt with them for so long, there are a lot of bad habits that many people have adopted. That’s why we felt that it was appropriate for us to call out some of these habits and discuss some better options for you to adopt.

How Hygienic are Your Passwords?

With so many of us relying on so many passwords every day, poor password hygiene can often seem to be a foregone conclusion. Think about your own passwords, right now, and see how they compare to this list of inherently insecure patterns that many people develop:

  • Personal details, like your name or birthday
  • Names of friends, family, or most infamously, your pets
  • Commonly used words (like “password” or a favorite sports team)
  • Simple keyboard patterns (like “12345” or “qwerty”)
  • Repeated login credentials (like username: David1973, password: David1973)
  • Making their passwords as short as possible

Now, before you zip away and try to figure out new passwords for all of the accounts that have these kinds of passwords protecting them, let’s take a few more moments to figure out how to actually come up with ones that will be secure.

To begin, let’s consider some “best practices” that should no longer be described as “best.”

Some Less-than-Best Practices

According to NIST (also known as the National Institute of Standards and Technology), the following practices aren’t all that effective any longer when it comes to secure password creation.

  • Alphanumeric Switching: So, we all (should) know that something like “password” isn’t nearly secure enough to be used as a password. As a result, many users would use “p455wO2d” instead, changing letters to numerals and occasionally playing fast and loose with their capitalization. While this isn’t always a bad strategy, using such a common password still makes it far less secure than it needs to be.
  • Length Requirements: It’s likely that you have encountered this as well, as a program has kicked back your chosen password while announcing that “it is too short/long for its eight-to-ten character limit.” According to NIST, these antiquated requirements literally short-change security, as longer passwords or passphrases are more difficult to crack but easier to remember than the short jumbles of random characters.
  • Banning Cut and Paste: For some reason, many username and password fields don’t allow content to be cut and pasted into them, almost as if the prospect of typing out someone’s account details will stop a hacker in their tracks. This also makes the use of password managers, a hugely useful tool in maintaining good password practices, less available. So long as they are used properly, password managers should always be encouraged, as they enable a user to store and use multiple passwords while only really remembering one.
  • Password Hints: We’ve all been asked to set hints for our passwords before, just in case we forget them. You know the ones: “Where did you graduate from high school?” or “What was your first pet’s name?” The trouble with these questions is simple: our online habits make this kind of information easy enough to find online, especially with social media encouraging us to share pictures of our pets, or announcing that we’re attending the “Educational Institution’s Class of Whatever Year’s Something-th Reunion.” Instead of relying on these hints, combine multiple forms of authentication to both offer additional means of confirming your identity and better secure your account.
  • Frequent Password Changes: Considering how many passwords we’re all supposed to remember, it only makes sense that users would fight back against frequent password updates by only changing a single detail about it and calling it changed. For instance, let’s return to David1973 for a moment. If this user were forced to change his password too often, it is likely that he would resort to simply adding an easy-to-remember (and guess) detail. Maybe this is the fifth time that David1973 has been told to change his password, so while his password started as “David1973,” it progressed to “2David1973” to “3David1973” and so on to “5David1973.” Of course, we aren’t arguing that passwords should never be changed, but make sure that these changes aren’t actually counterproductive.

How to Create a Secure Password

Rather than using a password, per se, we recommend that you instead use a passphrase. Let’s use a quote by author Elbert Hubbard as our example: “Positive anything is better than negative nothing.” 

Of course, this is a mouthful to type, in a manner of speaking, so it might make sense to use some alphanumeric switching to help abbreviate it into a complex phrase that is still easy to remember.

Doing so, “positiveanythingisbetterthannegativenothing” becomes “p0$!tiV3NE+hg>-tiV3_+hg”.

Then, if you use this password as the master access code for a password manager, the rest of your passwords/passphrases could foreseeably be randomly generated, increasing your overall security even further. To make your password manager even more secure, you should really devise your own complex phrase, rather than steal one from an author.

You never know, some enterprising cybercriminal might be a big fan of Hubbard’s works, too.

For more advice and assistance to help you make your passwords and accounts as secure as possible, reach out to NuTech Services by calling 810.230.9455 today!

132856638_bookmarking_400.jpg

Tip of the Week: Bookmarking Your Google Documents

132856638_bookmarking_400.jpg

Productivity is always an important consideration when it comes to your business’ processes. That’s why, for this week’s tip, we’re going over how to boost your productivity by adding some of your G Suite documents into your bookmarks bar.

If you use the selection of tools that Google offers as a part of its G Suite offering, you’ve probably found a few documents that you find yourself repeatedly returning to on a regular basis. Rather than navigating to them via the appropriate folder hierarchy in Google Drive, there is a simple shortcut that you can take advantage of in Google Chrome: creating a bookmark that navigates directly to the appropriate page.

This is a very simple process:

  • Access your Google Drive and open the document you want to save to your bookmarks.
  • In the Address Bar, you’ll see a star icon at the right side. Click it.
  • A small drop-down menu will appear where you can change the name of your shortcuts, and select the “Folder” that it will appear in. Select Bookmarks bar.
  • Click Done, and then the document will appear in the bookmarks bar.

There you have it, you now have a quick shortcut to one of your most-used documents. For more handy shortcuts and tips (along with some other topics), subscribe to our blog!

communication_304007464_400.jpg

Options for Effective Business Communications

communication_304007464_400.jpg

Today’s business is much more collaborative than it was in the past. This means that there are a lot more communications to manage. Small businesses may use technology to try and bridge the gaps and large businesses use it to manage huge and complicated workflows. Today, we take a look at the average business’ internal communications, and which tools are best for increased productivity.

Let’s start by examining the reasons for communications that businesses use to manage their internal processes.

  • Information sharing – There is plenty of news that needs to make its way around any business. There are many different forms of communication that can accomplish this. 
  • Collaboration – Today’s business needs to use collaborative strategies more than businesses of the past, and communication is a big part of any collaborative endeavor.

Now, let’s consider a few solutions that can help you to accomplish solid information sharing and collaboration.

Information Sharing

When you think of internal communications at work, the lion’s share of it will fill this need. Employees need to know certain things to maintain continuity of a business. This includes the publication of policies, procedures, plans, or potential changes to each. To accommodate the sharing of all this knowledge, businesses use the following tools: 

  • Email – Email is the most tried-and-true solution for internal business communications because it works on every level. It is available, familiar, and with today’s email platforms, features dynamic tools that can help anyone get their point across. 
  • Newsletters – Some companies choose to roll out a company newsletter for their staff. In these newsletters there are spotlights on points of emphasis. If you choose the newsletter as the tool you want to broadcast your internal communications, however, it has to be understood. 

Collaboration

Nowadays, collaboration is important for every business’ success. Business moves faster and if you don’t have some semblance of coordination between your employees in separate departments, it can cost more than time. It can be the difference between generating revenue and not. Here are some tools used to boost collaboration:

  • Productivity Suites – Today, there are a lot of collaboration-based applications out there. They are designed for specific business needs, but the most effective are the productivity suites like Google’s G Suite and Microsoft Office 365 because they give you the collaborative tools and shared storage that any team needs to be successful.
  • Chat Applications and Forums – Instant messaging apps have improved collaborations tenfold. Forums have been useful since the early days of the Internet. Today, developers have created apps that combine the two and offer hundreds of outside software integrations to help promote collaboration.

The IT professionals at NuTech Services have the expertise and access to solutions to help you solve any of your business’ operational problems. Call us today at 810.230.9455 to learn more.

187502498_Windows_400.jpg

Tip of the Week: Adding More Utility to the Windows Taskbar

187502498_Windows_400.jpg

The Windows Taskbar is meant to assist the user in opening and managing the programs they need to accomplish their goals. Did you know that you can tweak the Taskbar to add to the utility it already has? For this week’s tip, we’ll go over a couple of the things you can do with the Taskbar – specifically, things that make navigating your computer a little easier.

Using the Taskbar to Highlight Folders

If you’re like most users today, a large amount of the work you are responsible for only requires you to access certain areas of the company’s storage, which can quickly make navigating there a frustrating inconvenience. Fortunately, there is a Taskbar feature that can streamline this process considerably.

You can add direct links to folders (and their contents) to the Taskbar.

Here’s how it’s done:

  • Right-click any unused space in the Taskbar to open a menu of options
  • Hover over Toolbars and select New toolbar…
  • Find your desired folder in the directory that appears, select it, and click Select Folder

That folder should now appear in your Taskbar, with a list of its contents quickly and easily accessible to you.

Using the Taskbar to Quickly Access Websites

If your responsibilities more frequently require you to be on the Internet, you might find it useful to have a quick-access URL field in your Taskbar, enabling you to skip the step where you have to open a browser before beginning to navigate to a site.

  • Again, access your Taskbar options by right-clicking in any unused space
  • Again, hover over Toolbars, this time selecting Address

A URL field will have appeared in your Taskbar. Typing a URL into it and pressing Enter will open that website in your default browser.

Would you like to learn more about what the Taskbar can do? Let us know in the comments!

2.5_72712129_windows_400.jpg

Tip of the Week: How to Speed Up a Slow Windows 10 Device

2.5_72712129_windows_400.jpg

Windows 10 is a remarkable tool. Having said this, it can sometimes seem to slow to a crawl… not the ideal situation when you’re trying to be productive. That’s why we’re devoting this week’s tip to speeding up Windows 10.

However, as with any changes you are considering to your computer, you should lean on your IT resource to determine if it’s okay to make these adjustments. Better yet, IT may want to make them for you. One way or another, make sure you get the all-okay before switching anything on a work device.

Cleansing of Bloatware
Whether you picked something up during your browsing or the device’s manufacturer installed it during production, your computer can easily collect programs known as bloatware or adware. These programs, while not always harmful per se, can easily eat up system resources for nothing. Ask your IT resource to seek out these programs and eliminate them for you. This alone may result in some considerable boosts to your computing speeds.

Adjust Power Settings
While it may sound like a good idea, the Power saver plan that comes baked-into Windows 10 can actually make your experience as a user more of a pain. This is because this setting cuts your device’s processes to minimum so that energy can be conserved. Furthermore, desktops are plugged in as a rule, leaving little reason to use Power saver anyways. To improve performance on your Windows 10 laptop, stick to the Balanced power option when unplugged, and switch to High when power is available.

Kill Windows Tips and Tricks
Yes, it’s ironic that we’re recommending that you disable Windows Tips and Tricks in a tip-based blog post, but there are a few compelling reasons to do so. Most pertinent to our current conversation, the fact that Windows is analyzing your usage with these capabilities enabled means that your device’s performance is going to suffer.

In order to disable these invasive bits of advice, click the Start button. Under your Settings, access System and from there, Notifications & actions. Under the Notifications section, you will find the option to Get tips, tricks, and suggestions as you use Windows.” Deactivate this option, and you won’t have anything more to worry about.

Finally, the Cliché: Restart Your Device
Yes, this suggestion has become a joke in and of itself, as the IT field’s go-to question. However, there’s a really good reason for this: restarting a device can often solve its issues. This is because it clears out the use of the computer’s resources, wiping unneeded memory usage and stopping equally unneeded background processes. Restarting your workstation effectively gives it a fresh slate, allowing it to run much better than it did when it was bogged down.

Let us know if there are any other tips you want us to share in the comments, and don’t forget to subscribe!

restart_windows_10_400.jpg

Tip of the Week: How to Prevent Windows 10 From Restarting While You’re Working

restart_windows_10_400.jpg

How many times has this happened to you: you’ve walked back to your home or work PC after taking a break, only to find that Windows 10 installed new updates and automatically restarted? Thanks to Windows 10’s notoriously aggressive update behavior, any work that wasn’t saved was lost forever. It can be very frustrating to lose a project that you’ve spent hours on, through no fault of your own. Luckily, there are steps you can take to easily create a restart schedule.

In the fall of 2016, Microsoft issued an Anniversary Update to the Windows 10 OS. With this update, Microsoft included a new feature called “Active Hours.” Active Hours was created to let users specify the times when they’re more likely to be using their computers. In order to set up an Active Hours restart schedule, ensure that your computer has the Anniversary update installed (check your PC settings to see if it has already present). If you need help installing Windows 10 Anniversary, you can download this Update Assistant on Microsoft’s website: https://www.microsoft.com/en-us/windows/features.

After Windows 10 Anniversary is properly installed, follow these steps to setup Active Hours on your PC:

    n

  1. Click on the Start menu and then the Settings. As a shortcut, you can also use Windows key + i on your keyboard.
  2. Next, select Update & Security.
    ib win 10 1
  3. Under the Windows Update tab, which will show up automatically, you’ll see a link to Change active hours. Click that.
    ib win 10 2
  4. From there, you can set your active hours (note: time lengths exceeding 12 hours will be marked as invalid).
    ib win 10 3
  5. Click Save to confirm your changes.

Now your PC will not install updates during those specified hours. But again, at most, you’re only covered for a 12-hour period. So, what about those times when you need to pull an all-nighter to complete a project? Not only can Windows 10 updates interrupt your productivity, they can also take a long time to install. To further prevent unwanted installations and restarts, you can also adjust your restart settings.

To change your restart settings, you’ll need to stay in the Update & Security section of your PC settings. Next:

    n

  1. Click on Restart options, which is located under Change active hours.
    ib win 10 4
  2. Turn the feature On.
    ib win 10 5
  3. Next, set the day and time when you’d like Windows to finish installing updates. There is no need to save anything. As long as the switch is set to On, you’re all set.
    ib win 10 6

If you find that the On/Off switch is grayed out and you aren’t able to adjust it, this means that there are no new updates available at that time. In other words, you won’t have to worry about updates finishing up and forcing your PC to restart. Be sure to keep an eye on your restart options if you are planning to burn the candle at both ends.

There you have it. Windows 10 will no longer be able to bully you into halting your productivity. For more tips on how to avoid downtime for your hardware, give NuTech Services a call at 810.230.9455.

multiple_file_storage_400.jpg

Tip of the Week: 5 Easy Ways to Move Several Files at Once

multiple_file_storage_400.jpg

File storage is a staple in the office, and chances are that even your work desktop is jam-packed with files and folders that could use a bit of sorting. This might include moving all of your files to different locations, but you don’t have to move each one individually. We’ll go over the many different ways that you can move files, many of which can save you considerable time and effort.

Click and Drag
If your files are located in one location, like your desktop, you can simply click and drag your mouse to display an area-of-effect box. Any files within this box will be selected. You can then drag any individual file to the desired location and you’ll move all selected files there. This is helpful if you have several files jumbled together on your desktop, and you want to move them all in one go.

Select the Checkboxes
In Windows 10, a little checkbox will appear when you hover over a file on the desktop or within a folder. If your files are scattered all over your desktop, you can simply check each of the boxes for the files that you want to move, then drag and drop any of them into the folder where you want them to be located. This will move every single item you checked to the designated location, saving you considerable time and effort.

Click and Shift
You can easily select files that are stored horizontally and adjacent to each other by using the Click and Shift method. First, select the first file that you want to move. Then, hold down the Shift key, and select the last one that you want to move. Anything stored in between the two will be selected. After that, it’s just a matter of dragging one of them to the desired folder or location.

Hold Ctrl
If you hold down the Ctrl key, you can click on files that you want to move, and they’ll be selected. Then, all you have to do is move your files to the appropriate folder.

Select Them All
If you decide that you really need to clean up your desktop, or move all of your files to a new location, you can use the Select All keyboard shortcut to do so. It’s the same as it is in any word processor: Ctrl + A. You’ll see all of your files in the current window, or your desktop, selected. Just drag them where you want and you’re all set.

Keep in mind that many of the same keyboard shortcuts will also work with Mac OS X as well. Just substitute the Command key for the Ctrl key and many of them will provide the same experience.

Fun Fact: You know how Windows is bundled with Solitaire? No, we aren’t assuming that you are playing it at work. Microsoft decided to bundle their OS with Solitaire as a way to get users more accustomed to dragging and double-clicking objects with their mouse.

For more great tips, reach out to NuTech Services at 810.230.9455; or, subscribe to our blog to receive new tricks straight to your email inbox.