office_setup_design_400.jpg

Tip of the Week: Maximize Workflow By Rethinking Your Office Layout

office_setup_design_400.jpg

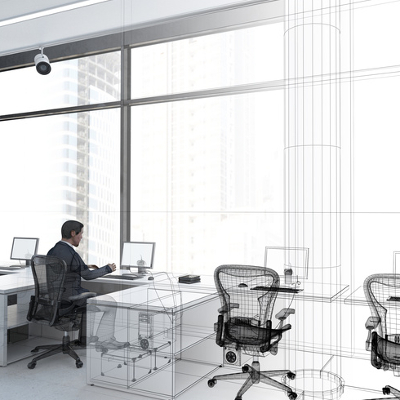
Of all the potential causes for a deficit within the office environment, the physical office itself isn’t likely to first come to mind. Even so, the value of establishing certain practical design and organization strategies have shown to improve employee morale, collaboration, and productivity. While these solutions may not be for every office, if your company is experiencing hindrances in productivity, these tactics may be beneficial implementations to incorporate within your business.

Keep it Clear
Are the desks in your office cluttered with papers, equipment, and other items that are keeping employees from completing their work? If so, it may be time to distribute more storage solutions to encourage your employees to keep their desk clear and relatively distraction free. Otherwise, you could institute the many solutions available to help your business go paperless. Document management solutions can allow many employees to access, edit, and collaborate on the same document without the expense and mess of multiple paper copies.

If office clutter is caused more by the equipment your employees use, there are a variety of solutions that can assist in reducing the amount of real estate this equipment takes up. Office telephony is clunky and expensive and may easily be replaced by a space- and cost-efficient, hosted VoIP solution. As far as wires are concerned, if not properly managed, they can quickly become a distracting waste of space. Fortunately, there is a trend in manufacturing to assist in managing and concealing wires at the workstation. If data storage, whether it’s incorporated into each employee’s workstation or housed in a large on-premises drive, is creating a space deficit, a cloud solution can reduce the amount of in-house storage needed to maintain operations.

Provide Spaces to Collaborate
If your business needs to keep its lines clear to contact clients, limiting the availability of VoIP communication, or if a face-to-face conversation is simply the more effective option when it comes to collaborating on a project, it is best to have a space dedicated to communal work. This can be as simple as a large table set aside for groups to utilize, or as complex as mobile workstations and adjustable equipment. A highly effective approach to encourage positive, organized group work is a concept known as a war room.

A war room is simply a dedicated space designed to engage the spatial memory of those using it. By putting a certain piece of information in a certain space, it becomes easier to remember. By filling a room with whiteboards (or even rolling whiteboards) and movable furniture, you create the ideal space for a group to meet and create a plan that can be referenced and adjusted as needed.

Prepare for the Worst
If disaster struck your office, be it fire, flood, or failure of some essential equipment, would you still have a way to safely access your data in order to continue your operations? These circumstances, along with any others that would qualify as a disaster, are why one of your most important office setup considerations should be completely removed from the office. To fully protect your data, the most advisable course of action is to use an off-premises, isolated backup solution that can restore your data, should it ever be lost.

While many considerations are totally yours to act upon when setting up a workspace, NuTech Services can provide the expertise to be sure any of your technical systems will meet the very high standards you need them to reach. Give us a call at 810.230.9455 for help with any of your technology needs.

breach_of_your_security_400.jpg

Tip of the Week: How to Know if You’ve Experienced a Data Breach

breach_of_your_security_400.jpg

Your data is vital to the success of your business, and as such, it needs to be protected. Can you identify the warning signs that someone has managed to get past your protections to access your data?

According to the Identity Theft Resource Center, or ITRC, there were 781 data breaches in 2015 within the United States alone. This marked the second-highest number since 2005, when the ITRC began to track these occurrences. Of particular interest, the ITRC report noted that, in 2015, the business sector saw the highest percentage of publically reported breaches with almost 40 percent of all reports coming from business organizations. What’s more, motive analysis saw that more and more thieves sought financial gain through accessing sensitive personal data.

Presumably, the report for 2016 should show more of the same.

Business owners should therefore be extremely cautious and prepared when it comes to possible data breaches, not only in terms of preventing them but also in terms of identifying them within their organizations. What follows are some best practices to assist you in determining if a data breach has occurred on your systems.

First, determine what is normal within your systems.
After all, you will need to know what is right to identify if something is going wrong. This can be largely accomplished by familiarizing yourself with the typical goings-on of your employees at different times of day, and with different levels of access.

Keep an eye out for unusual activity.
There are numerous warning signs that a data breach has occurred in your systems. These warnings might be as subtle as a piece of equipment suddenly becoming slower. They may include:

  • Unusual/unapproved programs: If there are suddenly unauthorized programs appearing on the company’s workstations, you may have a breach. You must be diligent in keeping an eye out for such red flags, as well as encouraging employees to do the same by insisting that they report any sudden appearances of new software that were not mandated by the company.
  • Unexplained “employee” activity: Have records suddenly shown users logging on to the system at odd times and from odd locations? Are your accounts being altered without your knowledge or approval? Have employees suddenly had unexplainable difficulties in remembering their passwords? These are also indicators that your system has been breached.
  • Other breach attempts: Have you had to fend off an overt cyber attack recently, such as a Distributed Denial of Service attack? If so, these attempts may have served a secondary purpose as a smokescreen to conceal a more insidious attack. It’s becoming a best practice to assume that an attack isn’t over, even when it’s over (because it may not be).

Educate your employees.
The first and last line of defense against most cyber threats is educated vigilance, including from your end users. Make sure your employees are also aware of the signs of a data breach, as well as other security threats. NuTech Services can help you to keep your systems safe from these attacks as well. To see what we can set up to keep you secure, reach out to us at 810.230.9455.

smb_mobile_400.jpg

Tip of the Week: Every Mobile Device Policy Needs to Cover These 3 Areas

smb_mobile_400.jpg

Smartphones, laptops, tablets, and other mobile technology are practically necessities in today’s modern workplace; especially if you want to keep productivity flowing at all times. However, implementing mobile devices into your workplace infrastructure is more complicated than it sounds, especially if you want to preserve security. Here are three topics to consider when implementing mobile devices in the workplace.

Data Security
One of the key concerns that any business using mobile devices needs to account for is security. When you add new devices to your business’s network, you’re adding endpoints that could potentially fall victim to hacking attacks. The more devices that are connected to a network, the more patches and updates that need to be installed in order to maintain security. Basically, adding new devices means more work, and more work can lead to cut corners, which inevitably leads to compromised devices.

A mobile device management solution is capable of securing all of your organization’s devices, be they smartphones or laptops. It’s the easiest way to manage access to mission-critical data, whitelist and blacklist apps, and remotely wipe devices that have been compromised.

Connectivity
When you’re taking mobile devices out of the office, you need to consider how your employees (and yourself) are going to connect to sensitive corporate data. While you could just connect to your cloud solution through a public Wi-Fi connection, this is discouraged, as public Wi-Fi can often be compromised. You never know who else could be on the network, watching your every move.

In instances like these, a virtual private network (VPN) is a valuable tool. With a VPN, you can access your network’s data over an encrypted connection, meaning that as long as you are connected to a wireless network, the data sent to and from your device will be secured so that any onlookers won’t be able to do anything with your data. The data sent to your device is encrypted and then decrypted upon arrival, so if any hackers try to steal it in transit, they’ll only get a jumbled batch of letters and numbers.

Cloud Access
Of course, you’ll need access to your organization’s data, especially when you’re out of the office and using several different devices. To do so, you need a cloud solution that allows your business to share and collaborate on files in real time, across multiple platforms. Most importantly, you want to ensure that your team can open crucial data that’s needed to keep operations moving forward, even when out of the office. A dynamic cloud solution–either public, private, or hybrid–is the key to solving this pain point. Depending on your business’s specific needs, you’ll want one that prioritizes the functionality and security your business requires.

For all of your business’s mobile device security needs, you can contact NuTech Services. We’ll work with you to ensure that your devices aren’t putting your business’s data at risk. To learn more, reach out to us at 810.230.9455.

check_your_wifi_strength_400.jpg

Tip of the Week: What to Do When Your Device Won’t Connect to Wi-Fi

check_your_wifi_strength_400.jpg

Wi-Fi deadspots are very real, and tend to be annoying, fickle things. Despite maybe a wireless signal being strong enough for everyone else in a room to receive it, something may be interfering with the device. As a result, the Wi-Fi simply isn’t sufficiently strong enough to connect the device to the Internet. Fortunately, there are a few troubleshooting steps that may be taken to resolve the connection’s cutback.

Step One: Check Your Positioning
The first step to any Wi-Fi troubleshooting is to make sure that the router is located far enough away from any other electronic devices, as these devices can negatively influence the strength of the signal. This is especially true when these devices are positioned between the router and the workstation it is connecting to. Walls and floors can also affect the signal–the thicker the obstruction, the weaker the signal.

A relatively simple fix, especially when the router needs to be shared by multiple floors, is to elevate its position on the lower level. This reduces the amount of space the signal will have to cover before passing through the ceiling/floor (ideally without issue), as well as the amount of obstacles it has to contend with to reach the users on the level it is on.

Step Two: Antenna Adjustments
If a router (or PC) has an external antenna, it may be beneficial to adjust the antenna’s position until the signal’s sweet spot is found. Opinions of optimal antenna orientation vary, so it’s likely that the user will need to find the ideal alignment through some good, old-fashioned trial and error.

If that still isn’t effective enough to resolve the deadspot issue, there’s always the option of replacing the antenna itself. By simply unscrewing the included antenna and replacing it with a stronger model (or if absolutely necessary, a stand-alone antenna and extension cord combo), you can hopefully extend your reception out of your poorly-placed dead zone. After these adjustments are implemented, a device can pick up a signal that–under normal circumstances–would be out of reach.

If the equipment in question doesn’t have an adjustable antenna, there are USB adapters available to plug into a device that can work similarly to how the standalone and extension cord setup can, thanks to their longer USB connection cords.

If these adjustments still don’t deliver satisfactory results, it may be worth it to consider investing in a Wi-Fi extender. Rather than trying to maneuver a router and receiver to make a better connection, using a Wi-Fi extender means there only has to be a clear signal to each device from the extender’s position. This is a very effective solution if an immovable obstacle (say, for example, a wall) is blocking the signal, as the extender can create a detour around the obstacle, preserving the signal quality.

Step Three: Upgrades and Updates
Finally, check the router and adapters themselves. While age shouldn’t have too much effect on their performance, it could eventually develop into a problem if left unaddressed. Therefore, like all other office solutions, the costs associated with regularly upgrading equipment will likely be well worth the investment. However, if the equipment in question is too new to warrant a complete replacement, or hasn’t had its firmware upgraded in a while, it’s worth checking with the manufacturer or online for any updates that have been made to the device’s firmware or drivers.

With these practices at your disposal, your Wi-Fi isn’t likely to cause many problems in your office again. If you still can’t get your Wi-Fi to work as intended, NuTech Services would be happy to help. To learn more, reach out to us at 810.230.9455.

cleaning_your_computer_400.jpg

Tip of the Week: How to Clean Your PC Like an IT Pro

cleaning_your_computer_400.jpg

Just as anything else will, a computing device will need some TLC to keep it physically clean and in tip-top shape. In order to clean your system safely, you will need proper tools, and the know how to properly clean your PC.

For a basic cleaning, a can or two of compressed air and lint-free wipes should suffice. For jobs that will require a little more elbow grease, you will need to add a few more items to this list–a small screwdriver, cotton swabs, and isopropyl alcohol (make sure it’s isopropyl, and not ethyl-based).

Cleaning Out the Desktop
Before you get started, keep in mind that you’ll be dealing with some pretty sensitive hardware. We highly recommend having an experienced technician handle this for you.

First and foremost, you’ll want to completely power-down your system. This includes not only powering down the machine but also killing power to the surge protector it is plugged into and removing the power supply cord from your system. Wipe down the case exterior using a static-free dust cloth and get rid of dust that has been caught in the external vents, preferably by using your compressed air once the case has been opened. For dust bunnies of above-average size and other assorted crumbs, carefully go through and wipe them away with cotton swabs before using the compressed air to rid the system of the remaining dust.

As you use the compressed air, be sure not to sustain the stream for too long, as it could damage some of the more sensitive components of your system. You should also be very careful of what you touch in the system and avoid any bare or soldered wire to avoid serious electric shock. As you will almost certainly be generating static, make sure that you touch the metal and plastic frameworks frequently enough to keep you fairly equalized.

Once you’ve finished with that, close the case back up and go over it again with your dust cloth.

While it may be tempting to just take a vacuum to the buildup of dust in your system, don’t. The bristles on the vacuum are notorious for generating static, which can easily damage the delicate internal parts that your system relies on to function.

Making Your Screen Spic and Span
There is little more annoying than fingerprints and smudges streaking up your screen, especially when you are trying to focus on your work. Fortunately, cleaning the screen of your display is fairly similar to cleaning a window, with a few special considerations.

If you utilize an LCD display, applying a half and half mixture of distilled water and white vinegar to a microfiber cloth and gently wiping the screen works wonders to rid it of debris. If you still operate a CRT monitor, an ammonia-free glass cleaner will do just fine while preserving the screen’s coating. Make sure that you don’t spray the device with whatever liquid you use in either case. Instead, apply the cleanser directly to the cloth and wipe down the screen that way.

Keeping the Keyboard and Mouse Clean
Of all of your computer’s components, the keyboard and mouse will be the ones that are exposed to the most debris and bacteria as they are handled almost constantly during computer use. To do a basic cleaning, unplug your keyboard from the rest of the system and turn it upside-down, gently shaking it to dislodge any crumbs and other particles that are trapped between the keys. Another option is to use a can of compressed air, spraying between the keys at a 45-degree angle. Once you’re confident that most of the accumulated mess is cleared away, gently flip it over and shake it out again before carefully wiping it with an antibacterial wipe and drying it with a microfiber cloth.

If your keyboard is a membrane type keyboard, it is possible to remove the keys to get a good, comprehensive clean. Before you do so, be sure to create a record of the keyboard’s layout so your keys may be replaced properly.

To remove the keycaps, use the small screwdriver to gently pry them from their housing. However, because they can be difficult to put back on, leave larger keys (like the space bar, shift, and enter) on the keyboard as it is being cleaned. Use compressed air, cotton swabs, and isopropyl alcohol to clean out the grime that was hiding under the keys. Once you’re satisfied, snap the keycaps back in place and test thoroughly.

As far as the mouse goes, the overwhelmingly more common LED-sensor models will only need to be wiped down with a lint-free cloth and a few quick swabs of rubbing alcohol.

A Clean Workstation is a Happy Workstation
Keeping your computer clean can provide many benefits beyond just the aesthetic value. Equipment will likely run better, last longer, and be less apt to make you sick through exposure to simmering bacteria and germs. For more ways to optimize your technology experiences, make sure you keep checking back to our blog.

lesser_known_shortcuts_400.jpg

Tip of the Week: Be More Efficient With These Windows 10 Shortcuts

lesser_known_shortcuts_400.jpg

A mouse can be very handy when it comes to navigating around the documents you have to work on, but it can also slow you down. Fortunately, key command shortcuts exist for situations just like these, and as Windows 10 has continued to improve, more shortcuts have been included to accomplish more tasks with improved efficiency.

Quick Access to the Start Menu
Take, for instance, the Start menu. Almost anyone who has sat at a computer knows that by clicking the Windows icon in the bottom left-hand corner, a comprehensive menu of your available content is revealed. However, for those those cases when a mouse is unavailable and a trackpad (if working on a laptop) is inefficient, you can navigate the Start menu exclusively with your keyboard. Press the Windows key to open the menu and navigate up and down the column with the arrow keys. You may also begin a search by just typing, once you have opened the Start menu.

For users seeking a more advanced experience, there’s an additional menu, the Power Users menu, that offers utilities like your device’s Event Viewer, Device Manager, and Command Prompt module.

Greater Accessibility of Your Apps
You can also press the Windows Key in combination with a number key to open the associated apps that appear on your taskbar. If the app is already open, it’s a quick way to minimize and maximize a window. Adding the Control key to the combination will open a new window for an app. For example, if you want a separate Chrome window, and Chrome is the fifth app on your taskbar, you would press Ctrl+Windows+5. Alternatively, to open a new app from your taskbar, you can use Windows+T to highlight your first toolbar app by selecting which app to launch with the arrow keys and Enter.

Utilizing a Virtual Desktop
If you are one to heavily use virtual desktops in your day-to-day, you can quickly create one by pressing Windows key+Shift+D. Once you are finished, Windows key+Ctrl+F4 will close the virtual desktop back down.

With these shortcuts now in your arsenal, you have the tools to help you stay productive–with or without a mouse. For more tips, tricks, and handy information, keep coming back to NuTech Services’s blog!

after_hours_recovery_400.jpg

Tip of the Week: 3 Easy Exercises Designed for Office Workers

after_hours_recovery_400.jpg

You wouldn’t think that sitting at a desk all day could have many detrimental effects to the body, but the opposite is actually true: remaining stationary throughout the day, especially in a slouching position, can cause considerable stress and discomfort. This discomfort, in addition to decreasing morale, can be a distraction that cuts into the productivity of workers throughout the day.

If you’re experiencing the ill health effects of poor desk posture, try these exercises at home–you’ll see why in a moment–to relieve many of the negative symptoms by stretching out your cramped and compressed muscles.

Get rocking…
On all fours, carefully rock back and forth. When rocking back, your hips should move down towards your feet, extending your back for a stretch across the lower portion of your spine, relaxing the stretch when returning to the forward position. For an added bonus in your upper back and neck, nod your head as you rock, bringing your chin to and from your chest.

… and rolling.
Starting off by laying on your stomach with your arms above your head, alternatively lift your arms and use their weight to roll over a few times on each side. Be sure to use the weight of your arm to roll, rather than bracing against the ground and pushing yourself over.

Also, get back to the basics.
With remarkably few exceptions, human beings start moving on all fours. Use that as an inspiration during your next exercise and crawl forwards and backwards, focusing on moving your hips as much as possible. While moving backwards, get a good stretch in your neck by turning your head from side to side.

Hopefully, it is now clear why these exercises are better done at home. Unless your office has a dedicated exercise area, there simply is not space for employees to do such things, never mind how distracting such activities would be for the other employees to work around. Therefore, since these activities are intended to assist office workers in remaining comfortable and focused, this is a bit of work that people should really take home with them.

An uncomfortable employee is an unproductive employee–fortunately, the opposite is also true. Encouraging your employees to take care of their bodies will not only help them feel their best, but also help them remain more productive for your business.

For more office productivity tips, keep checking back to the NuTech Services blog.

access_old_clipboards_400.jpg

Tip of the Week: Access Old Clipboard Content With ClipDiary

access_old_clipboards_400.jpg

The Copy and Paste feature has long been a staple of computing, but it’s easy to lose something that may have once been stored on the clipboard. Most people who have used a PC understand this pain and will be happy to hear that recovering the lost “copy” might be easier than they thought. A third-party tool called ClipDiary allows users to retrieve information lost in this way, but without it, it’s notoriously difficult.

The Copy/Paste Conundrum
Let’s say that you copy some important text to your clipboard with the intention of using it somewhere–perhaps a username or password. You close the app containing this information and open the app that you need to enter it into, but then you get distracted by the Internet. Maybe it’s a cat video or a page of memes. Regardless of what it is, all you know is that you want to share it with the world via social media. You copy the URL of the page, and that’s when it hits you: you have copied over the information on the clipboard that you needed to use elsewhere.

Now you have to go back into the app you’ve already closed and copy the original information, or worse–completely rewrite the whole thing. Depending on your situation, you might realize that this is a bigger pain that it needs to be. Think about it like not saving the progress on a favorite video game, or forgetting to put a bookmark in a novel.

The unfortunate reality is that there isn’t a “secret” file within Windows that holds your copied content, so there’s no way by default for you to access any deleted copied content. Instead, you can install an app called a clipboard manager, like ClipDiary, which allows you to retrieve your copied content.

Introducing ClipDiary
If you’ve experienced the aforementioned Copy/Paste dilemma, or it’s a mistake that you can see yourself making in the future, try installing ClipDiary: http://clipdiary.com/

ClipDiary lets you dodge this bullet. Just enter the keystroke Ctrl+D to open ClipDiary. The app will display your clipboard history and allow you to copy items back to your clipboard.

The problem we explained in detail is just one of the ways which Copy/Paste woes can translate into missed productivity, and how ClipDiary can help. For some other similar tales, check out this blog from ClipDiary’s website:

http://clipdiary.com/clipboard-articles/using-clipboard-history-and-clipboard-manager.php

ClipDiary also comes with some pretty useful features:

  • Insert saved data directly into any application
  • Fast copy data back to the clipboard
  • Paste text without formatting (as plain text)
  • Find data you once copied to the clipboard
  • View the list of clips in the clipboard history viewer window
  • Recover data accidentally replaced in the clipboard
  • Improve your productivity and save lots of time with the clipboard manager

If you choose to check out ClipDiary, let us know what you think. It might turn out to be the most useful tool you’ve never heard of.

best_practices_for_security_400.jpg

Tip of the Week: 5 Steps You Can Take to Foil the Plans of Hackers

best_practices_for_security_400.jpg

Hackers have the ability to cripple systems and steal important (or sensitive) data, and if you’re not careful your business could become their latest victim. Here are five ways that you can make it more difficult for hackers to infiltrate your systems and steal your data.

Protect Important Security Credentials
Hackers naturally target the credentials of important figures within an organization. This could entail stealing the usernames or passwords from someone who has access to crucial, mission-critical information, like the administrator of your IT department or your business’s C-Suite staff. Therefore, it’s important that you ensure these credentials are protected by encryption, and that they’re as long and complex as possible. If you store them anywhere, it should be in an encrypted password manager, where only they can access them.

Restrict Admin Access
Similar to the above point, you want to restrict access to certain locations of your network on a per-user basis. This means keeping the average joe from peeking at information like financial credentials and personally identifiable information, among other things. The fewer people who have access to important information, the less likely it is that this data can be stolen. Therefore, your users should have access to only information that they need to do their jobs properly, and nothing more.

Augment Password Security with Best Practices
If you’re using a password manager, you can implement all sorts of password best practices to further augment your organization’s security. For one, password managers make it so that you can feasibly use different complex passwords for every single one of your online accounts. This is important, seeing how long, complex passwords that utilize upper and lower-case letters, numbers, and symbols are very difficult to remember on their own.

Cut Down on Shadow IT
Hackers love to take advantage of forgotten-about technology solutions to infiltrate networks. While you might be patching all of your organization’s crucial software solutions, you might be neglecting that open source word processor that an employee downloaded one day. You should emphasize to your team that if they need a solution to do their job properly, they should go through the proper channels (like through IT or management) before implementing an unapproved solution.

Train Your Staff on IT Best Practices
While it’s helpful that you understand IT best practices, this can only get you so far. You should make IT security a part of company culture by thoroughly educating your staff on how to stay safe online. Teach them what to do if they suspect that they’ve been hacked, and help them avoid dangerous threats, including malicious links, spam phishing attacks, and unsolicited email attachments.

To learn more about cyber security, reach out to NuTech Services at 810.230.9455.

wifi_is_dangerous_400.jpg

Tip of the Week: Why You Should Be Wary of Using Public Wi-Fi

wifi_is_dangerous_400.jpg

Wireless Internet connections, often referred to by the moniker Wi-Fi, have become a popular offering from public businesses. Even organizations that have no real need for an Internet connection to conduct business, like restaurants and coffee shops, now offer Wi-Fi for their customers. However, public Wi-Fi can be dangerous, especially for the business professional.

The biggest problem, however, is that most people who use public Wi-Fi are fully aware of the risks, yet, still continue to use it. The Identity Theft Resource Center claims that 78.5 percent of users who connect to free Wi-Fi understand that there are major risks involved, and only 26.7 percent use a VPN to keep themselves safe. Free Wi-Fi is dangerous, and we’ll show you how using a series of examples.

Anyone Can Access It
Unless the Wi-Fi router is protected with a passcode, chances are that the network is vulnerable to hacking attacks and other threats. Even then, if the router isn’t configured properly, the passcode doesn’t necessarily help. Since anyone can access it at their leisure, nothing is stopping a hacker from connecting to the router and spying on others who might be connected to the network.

It’s worth mentioning, although we use the term ‘hacker,’ even a mischievous child with a bit of curiosity and know-how could get access to your files if the connection isn’t secure.

Free Wi-Fi is Highly Used
This goes without saying, but the more people who use an Internet connection, the lower the quality of the connection, and the more likely it is that a hacker will be on it. Hackers know that free Wi-Fi draws crowds, so they use the search for the convenience to find new targets for their treachery.

Data Isn’t Encrypted
You can think of encryption as an extra layer of protection for any data that’s sent to and received from the Wi-Fi connection. When routers have encryption, hackers have a more difficult time stealing data of substance.

What You Can Do
While unsecured public Wi-Fi routers aren’t something that you have direct control over, you can certainly take steps to be mindful of using them when you’re out and about. Here are three best practices for avoiding a potentially risky Wi-Fi network in a public place.

  • Only connect to networks that require security codes.
  • Set your phones and devices so that they don’t automatically connect to any new Wi-Fi network.
  • Use a virtual private network (VPN).

If your business needs its employees to stay safe while on the move, reach out to us at 810.230.9455. We’ll help your team understand the best way to work around potentially threatening situations.

double_search_tips_400.jpg

Tip of the Week: 3 Expert-Level Search Tips to Help You Find Exactly What You’re Looking For

double_search_tips_400.jpg

These days, being able to find the exact information you need online is a valuable skill. However, sometimes a website’s search capabilities aren’t robust enough to be of much use. For this week’s tip, we’ll show you how to combine a website search feature with your browser’s search tool so you can easily find exactly what you’re looking for.

To begin, let’s go over one of the most valuable tools for online searching, quotation marks. If you need to locate a specific phrase, then enter it into a search engine like Google Search and bookend the phrase with quotation marks. Google will then show you results meeting your criteria exactly, word for word, instead of giving you a bunch of random results pertaining to each individual word of the phrase (which would be the case if you didn’t use quotation marks).

While using a major search engine like Google Search to find what you’re looking for is one thing, using the search feature of an individual website is completely another. For example, not every website allows you to use quotation marks to narrow down a search within its pages.

If you run into this problem, try instead using the website’s search feature to look for one of the two keywords, like “email,” and then use your browser’s search function to search for a second keyword, “hosting.”

To access your browser’s search function, simply select Ctrl+F. A drop down menu will then appear where you can enter the second word you’re looking for. Next, hit Enter and the browser will automatically highlight every instance of the second word you’re looking for that’s located on the open webpage.

When these two searches combine, you’ll essentially be able to weed through all the irrelevant search results provided by the website and use your browser to find exactly what it is you’re looking for.

Another Way to Search: One way that you can skip having to use a website’s search tool altogether (and keep in mind that not every website offers a search tool) is to search the content of an individual website using Google Search.

To do this, type into the Google Search form “site:” followed by the website URL, minus the “http://” and the “www.” Following this entry, add what it is you’re searching for. So the form should read something like this:

site:website.com email hosting

Add Quotation Marks: To help narrow down your search even further, Google allows you to search individual websites this way and use quotation marks so you can find an exact phrase. For example, site:website.com “email hosting” will provide much more specific results than site:website.com email hosting.

Ultimately, utilizing Google this way may be more effective than combining the website search and your browser search as previously suggested. Although, you’ll still want to keep this double search tip in mind for when you do use a website’s search tool and find that it’s not working for you. Also, keep in mind that not every website makes its content available to Google Search; using a website’s search tool for a site like this will yield results that Google won’t.

If you’ve found this tip helpful, let us know in the comments and check back with NuTech Services’s blog every week for more great tips!

net_worth_tracking_400.jpg

Tip of the Week: How Tracking Your Net Worth Can Benefit Your Long-Term Goals

net_worth_tracking_400.jpg

Tracking your net worth might not be the same as tracking how many much money you have in your account, but it’s a good start. By tracking your net worth, you’ll have a good idea of how your finances fare in the big picture of things. Doing this may even help you worry less so that you can focus more on improving your situation.

Finding Your Net Worth
To many people’s relief, their net worth takes into account much more than just their paycheck. You can basically think of your net worth as the grand total of all of your assets, minus your liabilities; or, rather, what you have minus what you owe. It’s actually quite easy for your net worth to increase over time, since you’ll owe less and obtain more.

Therefore, the first step toward determining your net worth is putting together a list of what you currently own, versus what you currently owe.

What You Own

  • Home (its current value)
  • Other real estate
  • Automobiles and other vehicles like RVs and ATVs (leased vehicles don’t count)
  • Jewelry and collectibles
  • Household items, like furniture, appliances, etc.
  • Retirement accounts, bonds, stocks, mutual funds
  • Cash value of life insurance
  • The balance of checking and savings accounts
  • Cash

What You Owe

  • Home mortgage principal
  • Other mortgage principal
  • Auto loans
  • Student loans
  • Credit card debt
  • Other loans

Once all of these items are in order, you need to plug this information into an online net worth calculator:

http://cgi.money.cnn.com/tools/networth/networth.html

http://www.creditcardfinder.com.au/net-worth

Tracking Your Net Worth
Now that you’ve attained your net worth, you can use a spreadsheet to track the growth–or (gasp) decline–of your net worth. Here are four ways that focusing on your net worth can be beneficial.

  • Financial progress: It’s in our human nature to evolve and make progress, and keeping track of your net worth gives you some solid statistics that you can focus on. It’s always great to look back on the previous month and see how much your financial situation has improved.
  • Confidence building: Keeping track of your net worth can be empowering. For example, saving an extra $1,000 in your emergency fund, or increasing your 401K with a bigger contribution can make you feel proud of yourself, and can help you stay focused on accomplishments rather than your debts.
  • Keeps you from focusing on assets: On the other hand, you need to keep yourself aware of more than just how much you currently have. Having $200k in assets is great, but you should also keep your $100k of debt at the top of your mind.
  • Acquiring loans: Your net worth could become a major factor when you apply for a loan in the near future. You want to ensure that you keep track of your net worth so that you aren’t unpleasantly surprised in the event that you need a cosigner for a loan.

Can tracking your net worth be help achieve your financial goals? Try it out and let us know in the comments how it goes.

working_remotely_400.jpg

Tip of the Week: 4 Easy Ways to Make Working Remotely Work for You

working_remotely_400.jpg

Working remotely is made much easier thanks to today’s modern technology solutions. Many organizations have at least part of their workforce working remotely, but without the proper support, remote work wouldn’t be possible. With the latest technology and a couple of best practices, the remote worker can be just as productive, if not more so, than the in-house worker.

Here are four ways that you can maximize your productivity while working remotely.

Have a Dedicated Office
In the office, you might have your own cubicle or workspace. However, when you work remotely, the world is your office. As long as you have Wi-Fi, you could turn a restaurant booth into your desk, or a living room into a home office. Yet, this can often lead to counterproductive or distracting circumstances. Rather than let these distractions take over your workday, you should instead invest in a dedicated home office, where you have plenty of space and privacy. This is the place you want to go to if you need to get pressing work done. This also helps you avoid busy public places, like restaurants.

Set Specific Rules for Family and Visitors
Working remotely means that you’ll need a dedicated workspace, and as such, you should keep distractions out of it; this includes family or visitors, who may drop in unannounced. You should set clear boundaries to when they can (and can’t) drop by. Furthermore, you should keep your daily chores to a minimum while you’re working remotely. It might be tempting to do the dishes or clean up a bit so that you don’t have to do it later, but you’re working remotely to do your job, not clean.

Work Until the End of the Day
Sometimes you might get the impression that, since you’re working remotely, you could cut out early at the end of the day and nobody would notice. While you might be right, doing so could become a slippery slope that could affect your daily productivity. Before you know it, fifteen minutes could turn into a half-hour, then an hour, and so on. Be sure that you don’t abuse the privilege.

Implement the Right Technology Solutions
Since your remote workers aren’t in the office, they’ll need the proper technology to do their jobs as if they were in the office. This includes making your infrastructure as accessible as possible, but not without ensuring its security. A virtual private network and Voice over Internet Protocol can help your remote team stay connected to the office. If your business needs assistance making your infrastructure mobile-friendly, NuTech Services can help.

For more information about how to keep your remote workers productive, contact us at 810.230.9455.

useful_windows_10_tips_400.jpg

Tip of the Week: 4 Windows 10 Tips You’ll Use Again and Again

useful_windows_10_tips_400.jpg

It’s been almost one year since the release of Windows 10. Are you taking advantage of everything Windows 10 offers? Here are four of the best Windows 10 features that you’ll want to start using right away.

Virtual Desktops
If you’ve never used a virtual desktop before (not to be confused with desktop virtualization), it’s a feature that allows you to open up multiple desktops that can be used for different things. This is ideal if you want to organize and spread out the way that you use your apps and windows, and helps to keep your main desktop free from the clutter. To open a new virtual desktop, click the Task View icon next to the Cortana search bar. Select the New desktop feature on the right corner of the screen. Then, if you’d like to move an open app to a different virtual desktop, it’s only a matter of clicking and dragging it to where you’d like the window to be.

Advanced Screenshots
Windows 10 lets you take screenshots in a quick and easy way. To do so, just hold down the Windows key + Prt Scn. This captures your entire screen, and will place the file in a Screenshots folder. Or, alternatively, you can press Alt + Prt Scn to copy the screenshot to your clipboard, and then paste it into your preferred image editor. Another great way to edit your screenshot is to use Windows 10’s built-in Snipping Tool to customize it.

We’d also like to add that communicating with tech support is made much easier by using screenshots of your specific trouble. A visual representation helps technicians figure out the exact problem, and take steps toward resolving it.

Record Your Screen
Windows 10’s latest Xbox app allows users to record their desktop screens, which can be useful if you want to put together a quick tutorial or record a task being completed for future reference. To get started, launch the Xbox app, then press Windows + G while you’re in the app that you want to record. You’ll be shown a message that says, “Do you want to open the Game bar?” Check the “Yes, this is a game,” option, and click the record button. Even if it’s not a game, you’ll be able to record something quickly and easily.

Battery Saver Mode
On Windows 10 mobile devices, you can customize how the battery saver mode works. Specifically, you can control when it turns on. Normally, the battery saver mode will kick on around 20 percent, but you can change it to suit your preference. All you have to do is go through Settings > System > Battery saver.

Of course, if you can’t take advantage of these tips because you don’t have Windows 10, it’s not too late to claim your free version of Windows 10 from Microsoft. Just a few days from now (July 29, 2016) you’ll be unable to get it for free. Of course, before doing so, you’ll still want to consider the pains of the migration process. If you don’t do your research, your business could suffer from unexpected downtime and incompatibility with legacy applications.

Now that you know of these four tips, how will you use Windows 10? Let us know in the comments, and be sure to subscribe to our blog for more great tips and tricks.

multiple_file_storage_400.jpg

Tip of the Week: 5 Easy Ways to Move Several Files at Once

multiple_file_storage_400.jpg

File storage is a staple in the office, and chances are that even your work desktop is jam-packed with files and folders that could use a bit of sorting. This might include moving all of your files to different locations, but you don’t have to move each one individually. We’ll go over the many different ways that you can move files, many of which can save you considerable time and effort.

Click and Drag
If your files are located in one location, like your desktop, you can simply click and drag your mouse to display an area-of-effect box. Any files within this box will be selected. You can then drag any individual file to the desired location and you’ll move all selected files there. This is helpful if you have several files jumbled together on your desktop, and you want to move them all in one go.

Select the Checkboxes
In Windows 10, a little checkbox will appear when you hover over a file on the desktop or within a folder. If your files are scattered all over your desktop, you can simply check each of the boxes for the files that you want to move, then drag and drop any of them into the folder where you want them to be located. This will move every single item you checked to the designated location, saving you considerable time and effort.

Click and Shift
You can easily select files that are stored horizontally and adjacent to each other by using the Click and Shift method. First, select the first file that you want to move. Then, hold down the Shift key, and select the last one that you want to move. Anything stored in between the two will be selected. After that, it’s just a matter of dragging one of them to the desired folder or location.

Hold Ctrl
If you hold down the Ctrl key, you can click on files that you want to move, and they’ll be selected. Then, all you have to do is move your files to the appropriate folder.

Select Them All
If you decide that you really need to clean up your desktop, or move all of your files to a new location, you can use the Select All keyboard shortcut to do so. It’s the same as it is in any word processor: Ctrl + A. You’ll see all of your files in the current window, or your desktop, selected. Just drag them where you want and you’re all set.

Keep in mind that many of the same keyboard shortcuts will also work with Mac OS X as well. Just substitute the Command key for the Ctrl key and many of them will provide the same experience.

Fun Fact: You know how Windows is bundled with Solitaire? No, we aren’t assuming that you are playing it at work. Microsoft decided to bundle their OS with Solitaire as a way to get users more accustomed to dragging and double-clicking objects with their mouse.

For more great tips, reach out to NuTech Services at 810.230.9455; or, subscribe to our blog to receive new tricks straight to your email inbox.

shooting_trouble_troubleshooting_400.jpg

Tip of the Week: 6 Truths to Guide Your PC Troubleshooting Efforts

shooting_trouble_troubleshooting_400.jpg

We’ve all ran into problems that weren’t easily solvable, even by technically-proficient people. In fact, it’s often the case that simple problems can be escalated far beyond where they deserve to be. Sometimes all it takes is a little outside perspective, and some out-of-the-box thinking, to fix an issue.

The next time you run into a seemingly unsolvable problem, try out these six troubleshooting tips and see how you fare.

  • Keep it simple: In some cases, the most difficult problems can be solved by doing something simple. You could try resetting the hardware or application, checking to see if the machine is plugged in, and if all else fails, try shutting the machine down completely, and rebooting it. There’s no point in going through a ton of work, if the problem can easily be resolved by a reboot.
  • Trust only your own word: Have you ever tried to fix something, but you couldn’t get anything done because someone else has already tried everything under the sun to resolve the issue? In situations like this, don’t listen to them; go with your gut, as they could be troubleshooting the issue the wrong way.
  • It’s probably the user’s fault: According to ZDNet, about 80 percent of problems are due to user errors. There’s an old adage: “problem exists between keyboard and chair.” Basically, the idea is that the end-user is to blame, so it’s important to admit that you may be at fault on occasion.
  • Try to replicate the issue: The easiest way to get to the bottom of a problem with your technology is to replicate the issue. Often times, knowing how a situation was created can offer valuable insight into how to resolve it. You can ask your end-users to show you what they did, and what the problem is.
  • Know when to fix or replace: Your IT budget should always be at the top of your mind, as unexpected and unnecessary hardware replacements could convolute your business for months. You should understand how much it will take to fix something, but only fix it if replacing the technology isn’t a better option. Remember, hardware refreshes are great ways to improve the quality of operations.
  • When all else fails, throw in the towel: If you can’t fix a problem, it’s important that you know when you should stop giving it a shot yourself. You can’t waste valuable time and resources digging deep into why your technology isn’t working, especially when you have a business to run. Instead, it’s more efficient to outsource the maintenance and management of your technology to a third-party managed service provider; one who specializes in caring for the technical requirements of small and medium-sized businesses.

For assistance with your business’s technology solutions, you can always reach out to NuTech Services. Our skilled technicians are trained in a myriad of related topics, and we can help your team get the support they need, when they need it. You’ll waste minimal time and your operations will soar. To learn more, give us a call at 810.230.9455.

woman_using_email_400.jpg

Tip of the Week: Improve Email Open Rates With an Attention-Grabbing Title

woman_using_email_400.jpg

It’s safe to say that nobody enjoys their email inbox getting clogged with messages. Unfortunately, communicating by email is a standard part of doing business. Of course, in order for these emails to communicate their message, they must first pique the interest of the recipient enough to be opened. Here is a guide to crafting email subject lines that get readers to open them.

\Depending on your audience and context of the email, there are a few different approaches to take. One rule to go by is to keep your subject lines as relatable and personable as possible.

According to Unbounce, a message with the subject line, “Steve, where are you?” achieved a 43 percent open rate, compared to a Mailchimp report citing the industry average to be 24 percent. This is due to both the personalization of the subject line, as well as the perception that, by not reading the email, the recipient will miss out in some way.

Another excellent method to reach an email subscriber is to include some detail about their recent activity with you. Asking them in the subject line what their follow-up experience has been like makes your message appear to be completely customized to them (and not spam). For example, if someone ordered a new product or service from your website, asking them how their experience with it has been can provide a personal connection, and can encourage them to take advantage of your business further.

Offering a special benefit or advantage to reading the email can inspire a great open rate as well. If your email offers to teach your audience some trick or surprising fact, the recipient will receive an instant benefit for opening your message and could quite possibly be convinced to take any action you suggest to gain further benefits.

When an email is used to convey some bad news to the reader, it is best to be honest and authoritative. If a service is experiencing issues, let them know about these problems, as well as the actions you plan to take to resolve them.

Ultimately, each message needs to be tailored to fit the expectations of the intended recipient. Communication is not a one-size-fits-all venture, and if users suspect that you’re not being genuine with them, they will push your message to the back-burner, or perhaps even to the spam folder.

This tailored approach, of course, begins at the subject line. With proper crafting and care, you can hook in your recipient and improve the odds of them actually reading your message and responding promptly.

What are some tips and tricks you use to personalize your emails? Let us know in the comments.

no_windows_ads_400.jpg

Tip of the Week: Get Rid of Those Pesky Ads on Your Windows 10 Lock Screen

no_windows_ads_400.jpg

Do you have Windows 10 on your workstation or PC? You’ve probably realized that it’s a pretty sweet operating system. Still, there’s a reason why so many people have been bothered by it, and it’s because of its practically omnipresent attempts to advertise to consumers.

One of the ways that Windows 10 will do this is by displaying ads on your lock screen. This is done through the Windows Spotlight feature found in your Personalization settings. Chances are that if you are using the default settings for your Windows 10 PC, these ads are enabled. Thankfully, it’s very easy to switch them off for good.

To start, open up the Settings app. You can do this through either the Start menu or by typing Settings into the search bar/Cortana at the bottom of your screen. Next, click on Personalization. This opens up several options for your background image, colors for the operating system, themes, and your Start menu. You want to click on Lock screen.

Once you’ve clicked on Lock screen, you’ll see a preview for what your lock screen will look like, as well as options for what Windows will display as your lock screen. You can select the Windows spotlight, which is showing the ads, or if you’d rather have something more personal and ad-free, you can pick Picture or Slideshow.

If you choose Pictures or Slideshow, Microsoft won’t be able to bother you with shameless ad-pushing to your lock screen, which nobody appreciates. When you’re choosing your new background, we recommend that you choose pictures of a sunny, tropic locale that you dream of visiting on your next vacation. Or, better yet, a slideshow of something that you’re particularly passionate about.

One other feature that you should consider switching off is the Get fun facts, tips, tricks, and more on your lock screen slider. This helps you avoid frustrating and annoying ads that may still find their way to your lock screen. Or, if you don’t mind the ads, you can provide feedback to Microsoft so that they can better serve your interests. Click the top-right icon to inform Microsoft of what you want to see more of, as well as what you don’t want to see.

For more great tips and tricks to help you get the most out of your operating system, give us a call at 810.230.9455 and subscribe to our blog.

social_network_security_400.jpg

Tip of the Week: How to Avoid Oversharing on Social Media

social_network_security_400.jpg

Social media, as wonderful a tool for connecting and communicating as it is, does have its dangers. Fortunately, these risks may be mitigated through careful deliberation and pragmatic posting habits, but only if you know what they are. What follows are some easy habits to encourage a heightened state of security both digitally and in the physical world.


  • Share with Caution: There are some pieces of information that really have no business on a social network, as they could be used to the benefit of identity thieves. One really obvious example is the unique-to-the-individual Social Security Number, but it isn’t totally wise to share your home address or phone number, either. Birthday information and other personal details should only be shared if the site offers private profiles – but even then, think twice and be sure to triple-check your privacy settings frequently, and only add those who you know personally. If all a thief needs to verify that they are you is your date of birth or your dog’s name, you might be opening yourself up.

A side note: Even if you trust your privacy settings and your list of contacts, never post your address and/or a post sharing your agenda until after the fact. Announcing that your home will be empty on social media for a given amount of time is inviting criminal activity into your residence.

  • Limit Employment Details Online: Sites like LinkedIn, while phenomenally helpful with professional networking, can also provide identity thieves with a blueprint of your life thus far to exploit. Unless actively seeking employment for a time, leave just enough to entice those who view your profile to contact you directly to seek more information. Take advantage of privacy settings on those sites as well.
  • Do an Online Audit: The online world is vast. Your information could be in more places than you think. Friends and contacts of yours could post information about your real-time whereabouts that others could exploit, or your information could exist outside of the real-time social media sphere, in cached browsers and the like. Do a quick search for yourself online and remove anything you can. Google Street View will reveal details about your life that can easily implicate your financial situation, a quick request through their “Report a Problem” feature will solve that with a blurred image, rather than your home and belongings.
  • Continue with a Social Audit: How well do you know all of your personal social media contacts? Would you welcome them into your home? Share intimate details about your life with them? Call them friends? If any of the corresponding answers are negative, these people probably don’t need access to your full account and information. Limit access to your info (with certain exceptions, if you must) or ideally remove people from your social media sphere.

Social media can be both a fun personal venture as well as a valuable professional networking resource, but like any other tool, it must be handled with care. For more information, tips, and best practices to apply to your social media habits, read more of our posts or call NuTech Services at 810.230.9455.

drive_tips_400.jpg

Tip of the Week: 3 Ways to Take Full Advantage of Google Drive

drive_tips_400.jpg

Google Drive is a great way to get work done. It provides several applications that are similar in nature to Microsoft Office, like a word processor, spreadsheet software, and a presentation maker. Just like any other type of software, Drive has keyboard shortcuts and other tricks that can be leveraged for more productivity. Here are some of our favorites.

Share Larger Files That Can’t Utilize Your Email Solution
In addition to being a productivity suite, Google Drive is a solid cloud storage option. If you’re using all of these solutions for your business, chances are that you’re also using Gmail for Business as your preferred email client. Gmail has a 25MB size cap for its attachments, which might make it difficult to send and receive large documents. Thankfully, if you’re integrating Gmail with your Google Drive, you can accomplish much larger file-sharing sizes (up to 10GB). All you have to do is upload your file to Google Drive and share it out with Gmail.

Google Drive Keyboard Shortcuts
Many of the standard keyboard shortcuts work with Google Drive, but there are also several specific shortcuts that allow for exclusive functionality within Drive. Here are some of the best keyboard shortcuts available with Google Drive. Just keep in mind that these shortcuts are for Drive itself, not the apps that you might create a file with.

  • Shift + t: Create a new Google Docs document. This is great if you need a quick way to open a new document, but don’t want to go through the process of doing it manually. The document will be made in the current folder you’re viewing in Drive.
  • Shift + p: Create a new presentation with Google Slides. This works in exactly the same way as the above shortcut for Google Docs.
  • Shift + s: Create a new spreadsheet in Google Sheets. Again, this works like the above two shortcuts.
  • / (backslash): Search through your Drive folder. This is a good alternative to manually clicking on the Search form at the top of the page.
  • i: Show or hide the activity panel. This will show you the most recent activity on all documents in your current folder.
  • n: Rename your selected item. This can be handy for cutting out several clicks in the renaming process, or opening the file only to rename it.

Keep An Eye on Revision History
Google Docs and your other files in Drive allow you to view their revision history. This helps to keep users accountable for the edits and changes that they make to documents, but this also presents a unique ability to look at what has been changed from previous versions of the document. To view your revision history, click on File > See Revision History. You’ll be shown a color-coded rendition of the document which correlates to changes made, by whom, on specific dates and times. The right panel displays the various revisions, which you can restore if you so desire.

For more great tips and tricks, be sure to subscribe to NuTech Services’s blog.