b2ap3_thumbnail_autorefresh_your_browser_400.jpg

Tip of the Week: How to Set Your Browser to Automatically Refresh Itself

b2ap3_thumbnail_autorefresh_your_browser_400.jpgHave you ever been in a situation where you have to continuously hit the refresh button in your browser? Maybe you’re waiting for an online sale to go live, or you’re waiting on an online forum for a critical response. Or, maybe you’re just waiting for an important email. Either way, manually refreshing your browser multiple times can be both annoying and inefficient. We’ll show you how you can refresh it automatically.

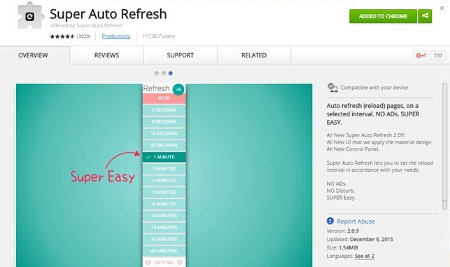
Install Super Auto Refresh
You can use the Super Auto Refresh Chrome extension to save yourself from brutally assaulting your browser’s refresh button. You can do so by following the above link in the Chrome Web Store, and selecting + ADD TO CHROME.

ib browser

Once you’ve successfully downloaded and installed the extension, an icon will appear in the far-right side of Chrome’s address bar. Click it, and you’ll see a drop-down menu.

ib browser2

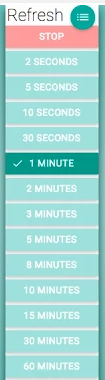
Next, you’ll need to select how often you want the page to be refreshed. You could have the page refresh as often as every two seconds, or as infrequently as every 60 minutes.

If you’ve reached the point where you don’t need the browser to refresh automatically anymore, you can stop Super Auto Refresh from doing so. Click the icon in the address bar, and select the red Stop tile.

One additional feature of Super Auto Refresh is that you can easily manage the tabs that you’ve enabled the extension on. Online Tech Tips explains how to do so:

If you click on the little green hamburger icon to the right of the word “Refresh,” a new tab will load that will list out all the pages that are currently set to refresh along with the set time intervals and the amount of time remaining before the next refresh. Note that if you close a tab and then reopen it later, the extension will remember and apply the same refresh settings.

We also want to mention that a page with Super Auto Refresh activated on it only applies to that particular tab. Other open tabs won’t automatically be refreshed. They will only do so if you activate the extension within the tab. You can easily open a new tab that’s unaffected by Super Auto Refresh by selecting the hamburger icon > New tab.

Please be aware that constantly refreshing a web page can eat up a significant amount of bandwidth, so make sure that you’re mindful of how you use Super Auto Refresh on your company network.

For more great tips and tricks, subscribe to NuTech Services’s blog.

b2ap3_thumbnail_no_internet_400.jpg

Tip of the Week: 3 Ways to Be Productive When Your Internet Connection Fails

b2ap3_thumbnail_no_internet_400.jpgModern businesses are reliant on certain parts of their infrastructure to keep operations functioning. For example, if your building’s electricity were to go down, what would you do? What about if you lost Internet access? Would your business be able to keep your employees busy, or would the downtime experienced be enough to cause panic?

One might understand why a lack of power could lead to downtime, but an Internet connection? Many modern organizations run their infrastructure out of the cloud, which requires an Internet connection to access. If this is the case, productivity grinds to a halt, and you won’t be able to access critical files or applications. The fact of the matter is that your business should be prepared to deal with worst-case scenarios like this, even if they’re unlikely. You should have a plan for how to handle a loss of an Internet connection.

So, what exactly can you do if your business’s office loses power or your Internet is down for a significant period of time? You only want to send your employees home for the day if they can’t get any work done at all. If you anticipate that the power outage or downed Internet will only last for an hour or two, that’s time that can be spent on other in-house tasks that you might put off from time to time.

Here are a few ideas that might help you get through the day without letting downtime kill your bottom line.

Hold Staff Meetings
If your staff meetings don’t require the use of technology, what better time to hold them than when the Internet or electricity is on the fritz? This way, you can address important initiatives, team building, or problems within the office, without allowing your team to waste time. Think of it as a really convenient inconvenience!

Organize or Clean the Office
You know what they say; if you have time to lean, you have time to clean! If you’ve been looking for an opportunity to organize files or clean up a certain part of your office, there’s no better time to do so than during downtime. If your team needs an excuse to stay in the office to make their rent, mortgage, car payment, etc, put them to work.

Perform Employee Evaluations
Similar to how you can hold staff meetings during an outage, you can also do employee evaluations. Take some time to critically evaluate your employees and let them know how they’re doing. Ask them what’s working for them, what can be improved upon, and why. By the time you’ve finished, you’ll have a better idea of how your team is doing, and what you can do to make it better.

When All Else Fails, Send Your Employees Home
If the downtime just seems like too much to bear, there’s always the option of having your employees go home for the day. However, this might not feel like an option, especially if you have important work that needs to be done. You need to ask yourself if letting them stick around is worth it or not. For some businesses, a workday without the Internet may be shot and calling it a day may make the most sense for your bottom line.

While making the best of downtime might be your only option, at NuTech Services, we consider downtime to be an emergency. If your network or a critical part of your IT infrastructure goes down, leaving your employees high and dry, our technicians go into emergency mode.

Want to learn how we can help your business prevent downtime? Give us a call at 810.230.9455 for an IT assessment and give us the opportunity to show you how to always be productive and profitable.

b2ap3_thumbnail_upgrade_checklist_400.jpg

Tip of the Week: How to Know When Your Technology Needs to Be Replaced

b2ap3_thumbnail_upgrade_checklist_400.jpgYour business takes advantage of several different types of technology every day, but there comes a time when your tech needs to either be upgraded or replaced with better tools. This is part of the natural order of things; no technology solution can (or should) last forever, but if you don’t catch issues before they become major problems, you could be putting your data at the risk of hardware failure, software hiccups, or even hacking attacks.

By keeping these questions in mind, and making common-sense decisions concerning your technology, you’ll never miss a critical upgrade again. By asking yourself these questions before you implement new tech upgrades, you can know with certainty that the solutions you implement will be beneficial for your organization.

Software
When considering changing your business’s software solution strategy, you should make sure to ask yourself the following questions about your organization’s infrastructure:

  • Is your current operating system supported? If your business’s servers and workstations aren’t receiving patches and security updates, you could be exposing your organization’s infrastructure and sensitive data to dangerous online threats like malware, viruses, and more.
  • Do you have any legacy software that’s dependant on specific operating systems? One primary reason that businesses don’t immediately upgrade to the latest tech is that many organizations still use legacy software that might not be compatible with the latest operating systems. When businesses go too long without making an effort to move to new technology solutions, it gradually becomes more difficult. Therefore, you need to ask yourself if there’s any legacy software holding you back, and what other reasons there are for you not being able to get on the latest version.

Upgrading Hardware
If you’re considering upgrading your business’s hardware solutions, consider the following before taking any drastic measures:

  • How old is your hardware? When was the last time your business performed a hardware refresh? If you haven’t recently replaced your equipment, you could be risking your networking infrastructure to a hardware failure, which could result in downtime and data loss. Older technology has been proven to fail more often than the latest tech. Many businesses choose to forsake the hardware refresh to save money, but in reality, this does nothing but prolong the inevitable and put your data on the line.
  • Are any of your workstations or servers operating below specifications? Contrary to popular belief, upgrading to a more recent operating system doesn’t always resolve complications with your business’s technology. If you’re experiencing problems like slow network speeds or other technical difficulties, you could be dealing with issues that may not necessarily need a hardware upgrade to resolve.
  • Has your business been experiencing growth? Fast-growing businesses often have trouble with their technology as the demands placed on their network expand. This makes perfect sense; a network’s hardware naturally must be upgraded as more strain is put on it. Otherwise, the network speed could slow to a halt, and your ability to access data and applications could be affected.

If you’re unsure of whether or not your business should be upgrading its technology, NuTech Services can help. We’re experienced with helping small businesses make conscious decisions about the future of their IT infrastructures. To learn more, give us a call at 810.230.9455.

b2ap3_thumbnail_chromecast_stories_400.jpg

Tip of the Week: 4 Google Chromecast Features that May Surprise You

b2ap3_thumbnail_chromecast_stories_400.jpgGoogle is known for coming up with fun new technologies that change the way society consumes entertainment and performs their day-to-day responsibilities. One of Google’s best new gadgets is the Google Chromecast, which can change the way you view media and share content while both at home and in the office.

Google’s Chromecast is a neat device that allows you to turn your television into a smart TV. Chromecast uses your WiFi network to stream content from the Internet to your TV. You can then use a mobile device, or any laptop or desktop that’s connected to your WiFi, to control the Chromecast. A Chromecast can even be used in the office to add a sense of flair to any room with a TV, and to make collaboration easier for presentations and other media.

Without further ado, here are four great uses for your Chromecast device.

What a Chromecast Can Do

  • Stream music: If you’re hosting a get-together at your home, the Chromecast lets you stream music directly to your TV. Apps like Spotify now work seamlessly with Google Chromecast, making it a great way to lighten up any situation. Plus, some smooth jazz or soothing music might be just enough to calm your staff or impress a prospective client who wanders into your office.
  • Stream video: Whether you want to stream a simple YouTube video, watch television shows through Hulu or Netflix, or watch a movie, you can do so with Chromecast. There are plenty of entertainment apps that are ready to use through Chromecast, so it’s only a matter of finding one you want.
  • View pictures: If you want to liven up your TV when you’re not using it to stream media or content, you can have it display backdrops in between sessions. The Chromecast pulls images from all sorts of online libraries, including NASA, 500x, and several others.
  • Mirror your device’s browser: Whether you’re using your Chromecast for entertainment or work purposes, you can mirror your device’s screen to your TV. All you have to do is open your Chrome browser and use the Chromecast extension to cast the screen. This is particularly useful for sharing documents or presentations.

There are countless other uses for the Chromecast, but instead of spoiling everything about the device, we think it would be fun for you to find them out for yourself. With so much entertainment and content at your fingertips, you’ll be able to spice up both your home life and your office.

Bonus tip: One of our favorite Chromecast apps is VideoStream, an extremely simple app that lets you drag video files to your Chrome browser and play them on your Chromecast-connected TV.

Do you have a Chromecast? What’s your favorite use for it? Let us know in the comments, and subscribe to our blog for more great technology-related tips and tricks.

b2ap3_thumbnail_animate_your_gifs_400.jpg

Tip of the Week: How to Make an Animated Image From Your Favorite YouTube Video

b2ap3_thumbnail_animate_your_gifs_400.jpgGIFs. What are they? If you’ve spent any time perusing the Internet, you’ve definitely come across a GIF or two. Essentially, a GIF (Graphics Interchange Format) is an animated picture that loops a few seconds of a video clip (without playing any audio). In addition to GIFs being fun, they can serve as a great way to enhance digital communications. How can you take advantage of GIFs?

Actually, GIFs can be shared easily enough. Regarding most forms of digital communication, you would download, upload, and share a GIF in the same way that you would with any digital image, like a JPEG and PNG file. It’s finding the perfect GIF, or making one, that takes a bit of luck and skill.

peak look down

Searching the Web for a GIF
You might be surprised to find out just how many GIFs exist on the Internet for your downloading pleasure. You can use Google Search to easily find the exact animated picture that you have in mind. To do this, simply type into Google’s search bar what it is you’re looking for and hit Enter. Next, select Images > Search Tools > Type > Animated.

From here, you’ll see a web page populated with relevant images. Note: you won’t be able to see what the animation looks like unless you click once on the image (be careful, clicking twice on an image will take you to the page it’s found on). To download the GIF for future use, simply right click it, and select Save image as… just as you would with any digital image.

Making Your Own GIF From YouTube
It’s astounding just how many GIFs there are on the Internet, but what if you can’t find the exact GIF you’re looking for? If this is the case, you can use a video clip posted to YouTube to make the GIF you need.

To do this, you’ll first want to go to YouTube and find a video containing the desired clip. Next, copy the URL of the video, located in either the form at the top of your browser, or below the video after selecting Share.

From here, go to gifs.com and paste the video’s YouTube URL in the provided form. Next, select Create GIF. This will take you to a new page displaying your YouTube video in what appears to be crude video editing software. As prompted by the text boxes, assign your GIF a title in the top form, and then move the slider to the spot in the video at where you would like your GIF to begin and end. You can also manually enter in the GIFs start time in the Start time form.

Next, you’ll want to select the duration of your GIF. By default, it will be set to five seconds, so be sure to adjust the clip’s time span more or less as needed. You can also fine tune the timing of your GIF even further by hovering over the Duration form and selecting the up and down arrows. If desired, you can also add captions to the GIF by selecting Add Caption to the left of the video and following the directions.

As you make adjustments to your video, you will see a preview of the GIF. Once you’ve got everything set to how you want it, select Create GIF. From here, Gifs.com will generate your file and take you to a new page displaying your GIF. To the right of the GIF is the GIF’s URL, file path (if you wish to download it and save it on your PC), and the embed code if you wish to add it to a website. You will also notice the various social media icons if you want to share your GIF creation over your favorite social media sites.

b2ap3_thumbnail_android_gmail_400.jpg

Tip of the Week: How to Access Multiple Gmail Accounts On Your Android Device

b2ap3_thumbnail_android_gmail_400.jpgIf you have an Android smartphone, you know that the device is closely tied to your own personal Google account. As such, in order to get the most out of your Android device, you should take advantage of its seamless functionality with Google applications. This includes making sure that your Gmail account is properly set up on your device. We’ll walk you through how to add additional Gmail accounts to Android’s Gmail app.

First off, why would you want to add a new Gmail account to your Android device in the first place? This could be helpful for a couple of reasons. For one, there are some folks out there who do, in fact, have multiple Gmail accounts. While it’s frowned upon by Google, they might make a free “burner” account in an attempt to limit the amount of junk mail they receive. Another reason could be to add a work account, if your business uses Gmail as its preferred email client. Doing so gives you anywhere access to your email, calendar, and Google Docs, especially while you’re on the road or traveling for business purposes.

Either way, it’s a good idea to know how to add a new account to your device. Here’s how it’s done.

Adding a New or Existing Gmail Account
First thing’s first; open the Gmail app. You’ll see your inbox, but what you really want to see is the side menu. Tap the hamburger menu (the three-line menu in the top-left corner), and scroll all the way down to the bottom of the page. Select Settings, and you’ll see a list of all your current accounts.

Next, tap on Add account. Select Google, and tap Next. Afterwards, it’s simply a matter of following the instructions on the screen.

Switching Between Accounts
Once you’ve finished adding your new account to the Gmail app, you can switch between your account inboxes easily enough. Simply open up the hamburger menu again, and you should see your accounts in the form of icons at the top of the menu. You can tap the icon, or you can select the down arrow next to your currently open account to select the one you want to use.

For more great tips and tricks for your Android smartphone, and technology in general, subscribe to NuTech Services’s blog.

b2ap3_thumbnail_smartphone_battery_life_400.jpg

Tip of the Week: 7 Tips to Extend the Life of Your Android’s Battery

b2ap3_thumbnail_smartphone_battery_life_400.jpgOne experience shared by every mobile device user is batteries losing power faster than they’d like. Until someone invents a battery that never again needs to be recharged, this struggle will always be real. Here are seven ways to make your mobile device’s battery last longer.

Dim Your Screen
Go to Settings > Display and toggle Adaptive brightness.

Your screen is likely your device’s biggest energy hog. The longer it’s powered on and the brighter it is, the more power it will sap from the batteries. For example, you don’t really need your screen to remain powered on for a full minute after you’re done checking a notification. Therefore, make adjustments to your screen’s settings accordingly.

Turn Off Location Service (GPS)
Go to Settings > General > Location.

As long as your phone’s location service is enabled, it will use energy to stay connected to GPS satellites. Unless you’re actively using an app that requires GPS, like Google Maps, it’s likely that you won’t need GPS and you can go ahead and turn it off.

Disable WiFi When Out and About
Go to Settings > WiFi, Bluetooth, or Data Usage.

If you ever get a chance to connect your device to WiFi, do it and save yourself some precious data. However, when you’re traveling from place-to-place and you’re outside the range of any usable WiFi, then you’ll want to go ahead and disable your device’s WiFi. Otherwise, your device will use a significant amount of energy looking for and trying to connect to usable WiFi signals.

Turn Vibration Off
Hit the Volume Down key until you feel the phone vibrate, then hit it once more to silence all notifications.

When in social situations, having your phone vibrate for notifications is a great way to not annoy others. However, it requires significant battery power to get your phone to buzz and shake like that. By turning off your phone’s vibration setting, you’ll extend the battery of your phone just a wee bit more, especially if you’re one to receive constant notifications.

Manually Update App
Go to Play Store > Settings > Auto-update apps, and turn auto-update off or set it to update over WiFi only.

By default, your phone is set to automatically update its apps. While this works out fine if you’ve got a full battery, if you’re trying to conserve battery power, the last thing you’ll want is for your phone to connect to the Play Store and start downloading data.

Disable Background Data
Go to Settings > Data Usage.

Just because you’ve closed an app doesn’t mean that it’s not doing something behind the scenes. For some of your apps, they might be consuming more background data than you think (like GPS information). Disabling the collection of background data will save you battery power, but it also might cause some of your apps to not function properly when you go use them, so just be aware of that.

Airplane Mode
Go to Settings > Connections > More networks > Airplane mode.

Before you get desperate enough to conserve power that you turn off your phone entirely, try airplane mode. This is a handy feature that gives you access to several of your device’s useful apps, like clock, calendar, and contacts while cutting off its connection to networks like the Internet. If your phone isn’t trying to push data to all of its Internet-connected apps, then it will eat up much less power. Obviously, you won’t be able to send or receive messages or calls, but you’ll be able to reserve power until you need it.

These are just some of the battery-saving tips you can try, there are actually several more things you can try if you’ve gone through this list and still find your battery dying quicker than you’d like. What are some ways that you keep your batteries powered? Let us know in the comments.

b2ap3_thumbnail_bad_cell_phone_etiquitte_400.jpg

Tip of the Week: 4 Social Taboos Smartphone Users Should Never Break

b2ap3_thumbnail_bad_cell_phone_etiquitte_400.jpgCellphone etiquette goes hand-in-hand with common sense. Here are four cellphone etiquette tips that every device owner should know.

Don’t Use Your Phone During Mealtime
Mealtime is a social time for pretty much every culture around the globe. During this time, it’s expected that you are fully present and engaged in conversation–which is super hard to do if you’re glued to your phone. Even the quick glance at the screen to check notifications can be construed as rude.

Solution: Turn your phone off during mealtime, or at least, keep it off the table.

A restaurant in Iowa, Sneaky’s Chicken, offers a 10 percent discount for diners who don’t bring their treasured phone to their meal. Also, Bucato, in Los Angeles, has a dedicated “cell-phone section.”

Use a Voice Level That’s Appropriate for Your Setting
While it’s okay to use your phone in a room with other people, it’s not okay to talk on your phone using such a high volume that others around you can’t focus or must talk over you. The problem here often comes from phone calls with poor connections, causing the caller to feel the need to talk louder so they can be heard. Then there are those who feel the need to speak in abnormally high volumes when using the phone, no matter the situation or quality of their connection, much to the chagrin of those in the same room. Awareness of the volume of one’s own voice is the best deterrent here, which for some people, is easier said than done.

Solution: If you need to speak at higher-than-normal volume when using the phone, step outside or go to the next room

Hang Up Before Checking Out
While it’s perfectly acceptable to shop and use your phone at the same time, it’s rather rude to continue talking on your phone while a cashier is ringing you out. Even if you don’t plan on having a grand conversation with the person behind the register, talking on the phone still communicates that you essentially don’t think very highly of them and their time. Plus, it just makes things awkward for the poor cashier if they have to interrupt your conversation in order to ask you a question about your purchase.

Solution: In a scenario where you must stay on the phone while the cashier is ringing you out, at the very least, apologize for the inconvenience and be attentive to them just in case they need to ask you a question.

Don’t Leave Long Voicemails
Just because you can explain every detail possible in a voicemail, doesn’t mean that you should. When a voicemail goes beyond the one minute mark with no prospect of coming to an end anytime soon, it can overwhelm a person. This is especially the case if the message goes into great detail, requiring you to scramble to find a pen and paper; then you don’t get to a pen in time and have to listen to the long message all over again. Grrrr.

Solution: If you’ve got a lot to share, make the voicemail primarily about having the person call you back. Otherwise, it’s best to just leave your name, what you’re calling about, your callback number, and nothing more.

Surprisingly, as common sense as these tips are, we see cellphone users break them all the time. When it comes to preventing annoyances such as these, spreading knowledge about proper cell phone usage goes a long way. Therefore, if you know of any offenders of cell phone etiquette, share this article with them–in a subtle way.

What are some of the most annoying cellphone usage habits that you’ve observed (or are guilty of)? Let us know in the comments.

b2ap3_thumbnail_email_gaffs_400.jpg

Tip of the Week: 4 Common Email Mistakes and How to Avoid Them

b2ap3_thumbnail_email_gaffs_400.jpgEmail is a staple in offices around the world, but many organizations are finding it easier than ever to make simple mistakes that can be easily avoided with proper training procedures. It’s a best practice to ensure that your team is adequately trained on how to efficiently use your chosen email client to its maximum potential. Here are four of the most common email mistakes that the average employee can make, and how they can easily be avoided in the future.

Avoid Major Spelling and Grammar Errors
The importance of spelling and grammar in both internal and outgoing communications cannot be stressed enough. While a minor error here or there is acceptable, anyone who wants to be considered a professional in their industry should take the time to put together messages that are both grammatically correct and easy to read. This is especially true when dealing with prospective clients. You want to be seen as the expert, and showing that you’re a well-rounded and educated individual will reinforce this thought.

Most email clients like Outlook and Gmail have a built-in spell checker that can be used for a quick idea of how many corrections need to be made, but it’s often better to compose an email in a word processor like Microsoft Word. This lets you use the powerful spell checker that the program provides, and allows you to use a copy/paste tactic where there’s minimal room for error.

Don’t Accidentally CC the Wrong People
If you’re dealing with a medium-to-large workforce, you might find it easier to communicate with all of your employees by simply clicking the “carbon copy” option when issuing statements via email. However, this comes with a risk. When you’ve received a CC of a message, and you have some input, you want to make sure that you don’t reply to all, especially if it’s something that’s only meant to be seen by the recipient. Always be aware of what you’re sending, and who you’re sending it to.

Or, better yet, don’t complain about one of your coworkers through email at all. Email should be a formal type of communication in the workplace, and you shouldn’t be using it like it’s your personal account. If someone is checking up on your email messages, it could come back to haunt you later. Still, letting off some steam in the workplace is often a necessity, so if you feel you absolutely have to get something off your chest, do it in person rather than through email.

Make Sure Your Email is Finished Before Sending It
This seems like a given, but you’d be surprised how often some folks forget to finish an email before hitting the “send” button. Again, you want to ensure that you’re retaining your professional presence with both your staff and your prospective or current clients, and sending half-finished emails isn’t going to help this goal. It’s relatively easy to hit the “send” button before your message is actually complete, especially if you’re multitasking and distracted by your other responsibilities.

This is especially why it’s important that you give your message a thorough proofreading that helps you ensure that the message is complete and ready to be sent. It’s an important part of the email process, and shouldn’t be overlooked if you’re in a hurry.

Be Absolutely Sure Who You’re Sending Your Message To
While the other mistakes we’ve mentioned thus far have somewhat trivial repercussions, sending a message that potentially reveals sensitive information to the wrong person could have far-reaching complications. If it’s internally, it’s possible that it’s no big deal, and can be resolved by simply asking the recipient to disregard the email. However, if the message is sent to an external party, and it contains sensitive information, you should immediately put yourself in damage control mode.

In the event that you accidentally send company information to an unknown email address (which you shouldn’t), it’s important to assess how important this information was and take action as soon as possible. For example, if you sent passwords or usernames (which you shouldn’t), promptly change the credentials. You should also make an attempt to notify any party involved, especially clients. While it might be embarrassing, it’s better than the alternative.

For more best practices and tips, be sure to subscribe to our blog.

b2ap3_thumbnail_keyboard_cleaning_400.jpg

Tip of the Week: How to Save Your Keyboard After Spilling Your Drink On It

b2ap3_thumbnail_keyboard_cleaning_400.jpgYou know that you shouldn’t keep a beverage near your computer, but how good are you at actually abiding by this best practice? Due to the busyness of our modern lives, it’s likely that most office workers eat more meals at their computer than away from it. Inevitably, this will lead to a drink spilt on your keyboard, which can put you in a rather sticky situation.

When your keyboard takes an unintended plunge, what can you do about it?

First off, don’t just sit there with your keyboard sopping wet and try typing into Google, “How to clean Mountain Dew off my keyboard.” The liquid will only seep further into your keyboard, making it extremely difficult to type. Actually, a sugary substance like Mountain Dew will cause your keys to stick, which means that your Google Search query would actually look something like this:

not good ib1

Don’t lollygag when faced with a liquid-on-your-keyboard crisis or you’ll just make the problem worse. Instead, take immediate action by following these five steps:

Power Off Your Computer and Disconnect the Keyboard
By far, your computer is way more important than your keyboard (and quite possibly your outfit that also took a Mountain Dew bath). Therefore, as soon as you can, be sure to either disconnect your keyboard. Most modern keyboards are USB, so they can be unplugged with the computer on, but other keyboards use round connectors. Unplugging the round connectors while the PC is on could cause damage, so if you aren’t sure just shut the PC down before disconnecting the keyboard. Act quickly, the liquid may seep into the keyboard’s circuits and cause some problems (and not the good kind like we saw from Coca-cola’s spilt-soda-on-computer scenario).

Flip the Keyboard Upside Down and Give it a Good Shaking
When you encounter a spill, your first instinct is to get up and grab a towel. Before you do that, flip your keyboard over and shake it. Basically, when dealing with a spill, you’ve got precious little time to locate a towel while the ill-fated beverage seeps deeper and deeper into your circuits.

Wipe Down Your Keyboard
After gravity has done its job and drained as much liquid as possible, now is the time to use a dry cloth to wipe down your mess. Do what you can to get in between the keys, but don’t do anything drastic like apply too much force or pop off the keys, yet. For now, the goal is clean up, not detailing.

Let it Dry Overnight
Next, find a dry place to let your keyboard sit upside down overnight. When you come back to it the next day, look for any additional moisture that may be left and give it a wiping.

Check for Stickiness
Before plugging in your now-dry keyboard, press on every key to check for stickiness. This will most likely be the case if you split a sugary substance, like Mountain Dew. To clean out the stickiness, you’ll have to remove the keys to really clean underneath. Computer Hope offers some solid advice on how to do this:

Removing a standard keyboard key is simple. Start by pressing down on the key in front of the key you want to remove and insert a flat object such as a car key… or a small flathead screwdriver below the key. Once below the key twist it or push down until the key pops off. If you want to remove more than one key, repeat this process until all keys are removed.

Once you’ve got your keys removed, using a tool like a Q-tip will really help with those small and hard-to-reach places, with both your keyboard and your ear canal.

Lastly, with your keyboard fully cleaned and dry, plug it in and give it a spin. If you were fast-acting enough to catch the mess, then you might have been able to save it. Although, if the spill was too great, then your keyboard might be toast and you’ll have to replace it. You’ll know for sure when you sit down with your cleaned keyboard and try it out.

We hope that you’ve found this week’s tip helpful. For more great technology tips, subscribe to NuTech Services’s blog and check back every week.

b2ap3_thumbnail_lost_devices_can_be_a_major_problem_400.jpg

Tip of the Week: My Company Device Has Been Lost or Stolen, Now What?

b2ap3_thumbnail_lost_devices_can_be_a_major_problem_400.jpgMobile devices are one of the hottest items for thieves to target. According to reports from Consumer Reports and LoJack, 2013 saw the theft of two million laptops and three million handsets. What this means for you is that having your mobile device stolen is probably a lot more likely than you would think.

The loss of a mobile device means much more than just losing a piece of pricy technology (which can be replaced). It also means the loss of the data stored on the device, and easy access to all the accounts associated with the device if the thief doubles as a hacker (which could lead to identity theft). Not having access to one’s data is why, in a recent survey by IDG Research, 50 percent of phone-theft victims said they would pay a ransom of $500 just to get their phone back, while another one-third would pay $1,000.

Obviously, having your mobile device lost or stolen is a big deal, especially if the device contains corporate data. If you happen to find yourself in this predicament, what are you going to do next? Let’s assume for a moment that you didn’t have the foresight to install any of the great security apps on your device, allowing you to track down the phone’s location or remotely shut it down. Without the assistance of any preventive security solutions, a thief will only have a lockscreen standing between them and your data.

Here are four steps that will let you control the damage caused by a lost or stolen mobile device.

Contact Your Mobile Service Provider
Contacting your phone’s service provider about the theft is a good move because, depending on the make and model of your phone and the details of your service contract, your service provider may be able to remotely access your smartphone and “brick it” (render it useless). At the very least, notifying your service provider will prevent the thief from making calls using your account. Also, it’s important that you quickly contact your mobile service provider about the missing device. Otherwise, the thief will be able to bypass this “bricking” feature by removing the SIM card and still have access to the data stored on your device.

Change All of Your Passwords
If the thief happens to gain access to your smartphone or laptop, they’ll easily be able to open all accounts associated with the device. We don’t have to tell you how devastating this can be, especially if your bank account or corporate network were to be accessed. One of the best ways to keep a thief like this out of your accounts is to login to all of them and change the passwords. You’ll want to do this sooner than later so that the thief doesn’t have enough time to figure out your passwords.

Report the Theft to the Authorities
While it’s unlikely that reporting the theft of your mobile device will lead to a full-scale investigation, it will give them information they can use to spot patterns, which might be enough to eventually get your device back. You never know.

Notify Everybody Affected
The toughest part comes next: notifying everyone that the device is gone. It can be embarrassing to contact everybody about your negligence, but you may be actually legally obligated to do it. The reason why it’s so important to do this is because the data connected to the lost device could lead to stolen identities. As humbling as it will be to write that email to your clients, they will appreciate the fact that you’re taking proactive measures to protect their sensitive information. To help smooth things over, paying for a year’s worth of identity theft insurance will go a long way.

By taking these four steps, you should have a good grasp on damage control. Moving forward, the best way to protect yourself and your business from this all-too-common event of mobile device theft is to reach out to NuTech Services at 810.230.9455. Call us to learn more about proactive mobile security solutions designed to give you a fighting chance.

b2ap3_thumbnail_person_network_400.jpg

Tip of the Week: Sharing Files Between 2 PCs is as Easy as Dragging and Dropping

b2ap3_thumbnail_person_network_400.jpgWhat’s the best way to share files between your different personal devices and computers? It turns out that you can share files over your home’s network, and you don’t have to be an IT technician to do it.

To be sure, there are many different ways to share files between your different devices. You can send an email from one device to another. You can upload the file to a cloud data storage service. You can even use an external data storage device like a USB thumb drive. While all of these methods will do the trick, some are more inconvenient than others (like using a thumb drive), while others (like the first two examples) require an Internet connection and reliance on a third party.

Instead, you might be surprised to learn that you can just as easily (if not more easily) move files over your home network to your different devices by dragging and dropping what you need to a shared folder. This functions similarly to how your computer network at the office is set up with its server units and multiple workstations. However, you don’t need a home server unit to share files across your different devices at home. Instead, if you’ve got two computers connected via your home’s Internet router, then you’re all set to easily share files between the two machines.

Share Files Using My Network Places
To do this, open My Network Places, locate a file associated with the computer that you want to share files with (designated by the PC’s assigned name), and then drag and drop your content into the shared file. To access the shared content with the computer that you just shared it with, locate My Network Places on your other computer and open the file that corresponds with the actions you just took.

Or Create a Windows Homegroup
If for some reason you’re unable to share the files you need between your two computers using My Network Places, then you can set up a Windows Homegroup. To do this, type “homegroup” in the Windows search box and then hit Enter. From here, Windows will let you know if there are any homegroups on your network. If it can’t find one, click Create a homegroup.

Next, select what kind of content and devices that you want to share in this homegroup and then select Next.

homegroup ib 1

Windows will now generate a password that you will want to use for other computers to access the newly created homegroup. Be sure to record and share this in a secure manner if you’re adding multiple users to the homegroup.

Lastly, using the other computer on your home network, search for “homegroup” in the Windows search bar. This should bring up a dialogue box letting you know that a new homegroup has been added to your network. It will display the name of the computer you’ve originally used to create the homegroup. Now, just click Next > Enter the password > click Next again > and you’ll have both of your computers set up on the homegroup for easy file sharing.

If you need professional assistance with any of your computer networking needs, give NuTech Services a call at 810.230.9455.

b2ap3_thumbnail_tips_to_enhance_productivity_400.jpg

Tip of the Week: Try the 52-17 Rule to Get the Most Productivity Out of Your Workday

b2ap3_thumbnail_tips_to_enhance_productivity_400.jpgThere are countless ways to boost your productivity in the office… at least, that’s what the Internet says. How do you separate the productivity champs from the chumps? It’s simple, really; just look for the tried and true methods that have been backed by thorough research. One such study, performed by Julia Gifford of Draugiem Group, claims that workers can be more productive by not trying to do as much office work as possible.

This is hardly the first productivity strategy proposed by professionals. What makes this different from others? Well, it’s backed up with results. Using the tracking application DeskTime, the researchers at Draugiem Group examined how their best, most productive employees spent their time in the office. Surprisingly, it boiled down to how much time wasn’t being spent doing work.

52 Minutes of Work, 17 Minutes of Rest
While it might seem incredibly inefficient, the results of this study turned out to be a cycle of 52 minutes of hard work, followed by 17 minutes of rest. This is similar to the Pomodoro technique, another relatively well-known process which includes 25-minute work intervals with five-minute breaks, followed by one 15-minute break after the fourth increment. Overall, the 52-17 rule seems to be geared more for those who are confident they can stay focused on a single task for almost a solid hour.

The Importance of Rest
Rest is an absolutely critical part of any function performed by humans; therefore, its importance cannot be overemphasized. In fact, many researchers studying the science behind workplaces find that rest is absolutely imperative to the success of all participants.

Entrepreneur Chris Winfield claims that he cut his work week in half because he took consistent breaks throughout the workday. As you can imagine, finding the right balance between work and rest can be a tricky subject. Meetings and other time-sensitive appointments are difficult to fit into an individual’s schedule. For Winfield, he was able to cut his 40-hour work week down to 16.7 hours (not counting the time he spent in meetings). This is a considerable difference, especially because he was still getting everything done that he wanted to.

The End Result: Increased Flexibility
As you can imagine, scrunching your work week to less than half of the original size opens up several opportunities. The only way this is possible is with proper prioritization of important tasks. By ensuring that high-priority tasks are tackled in the most effective way possible, you’ll be able to approach the rest of your work in a clear, stress-free manner. Winfield claims that his approach changed the way he looked at the work week:

The final piece to my puzzle was moving from a five-day workweek, where I had to stop by 5 p.m., to a seven-day workweek, where I could work when it suited me. This took me from 40 to 45 hours available to get my 40 Pomodoros in, to having 168 hours each week. Since I only need 16.7 hours net, that means I only work 10% of my time. What a difference.

Granted, Winfield didn’t count the 20-to-25 hours of meetings and phone calls toward his total time, yet, he still managed to save his sanity by taking small breaks.

If you aren’t quite sold on either the Pomodoro technique or other work-break increment strategies, there are several other alternatives to look into. For one, you can look into using the latest and greatest technology solutions to improve the overall efficiency of your time spent working. Give us a call at 810.230.9455 to learn more about what productivity solutions can help your business.

b2ap3_thumbnail_android_security_400.jpg

Tip of the Week: How to Take Back Your Android Device from Bloatware

b2ap3_thumbnail_android_security_400.jpgSmartphones are filled with all sorts of nifty apps. In fact, some of the most useful applications come pre installed on the device. However, not all apps are worth your time. These unwanted applications are called “bloatware,” and can impede the device’s ability to perform to your specifications.

Bloatware is not only annoying, but it can also be threatening to your device’s wellbeing. For instance, Lenovo’s pre-installed Superfish software caused quite the security scare several months back. Furthermore, it can take up space on your device and affect the amount of data you can store on it. In order to get the most out of your Android smartphone, you want to remove as many junk apps as you can. Of course, you should always approach this kind of project with caution. You don’t want to accidentally get rid of a core function of your device and render it inert.

There are several ways to remove or hide bloatware from your device. TechRepublic suggests five apps to do so. Some require that your device is rooted (i.e. you have Superuser control over your phone’s core files and OS), while some simply hide the bloatware from you.

TechRepublic’s Top Anti-Bloatware Apps

  • NoBloat Free: This app allows you to view bloatware on your device, and completely remove it. All you have to do is locate it under the System apps listing, tap it, and then select what you want to do with it from the listed options.
  • System App Remover: As explained by TechRepublic, System App Remover “is a free bloatware removal tool (with ads) that makes removing system apps and bloatware go much faster. Simply open the app, grant root access, check off all the apps you want to remove, and tap the uninstall button.”
  • Root App Deleter: Here’s yet another app that can delete your bloatware from your phone. However, unlike the others, you can choose to either hide it or delete it completely. Hiding it doesn’t clear up any space, so you can go that route if you don’t want to risk deleting something important.
  • Disable Bloatware: If you don’t want to remove bloatware completely, you can choose to hide it with Disable Bloatware. As a non-rooted application, you can take advantage of it even if your phone isn’t rooted. This hides your bloatware so it doesn’t distract you, but it doesn’t free up any space on your device.
  • System Apps: This is Android’s built-in application hiding function. With it, you don’t have to download an app to hide your bloatware. As previously mentioned, this doesn’t free up any space on your device, but it does prevent your bloatware from being a nuisance.

If you want to optimize your mobile devices for productivity and efficiency, but don’t want to risk your device’s integrity, you can give NuTech Services a call at 810.230.9455. We’ll help you clean up your devices so that they’re nothing but productivity machines.

b2ap3_thumbnail_security_checklist_400.jpg

Tip of the Week: Use This Security Checklist to Protect Your Network

b2ap3_thumbnail_security_checklist_400.jpgAs a business professional, you have a responsibility to ensure that your company’s network and data is protected from hacking attacks. It can be difficult to remember to take all of the necessary precautions, but with our help, you can easily outline all of the measures that should be taken to maximize security for corporate data.

Start by going down this handy checklist:

Are You…

  • … Maximizing Password Security? A password that’s difficult to crack is one of the best (and easiest) assets your business’s network can take advantage of. If threats can’t make it past your password, they can’t do much damage. When changing your password, remember to use strings of complex characters, including both upper and lower case letters, numbers, and symbols.
  • … Using Two-Factor Authentication? When using two-factor authentication, you’re basically making the process of signing into your accounts more difficult by adding another security step to your login process. This means that a hacker must obtain even more information, like your mobile device. This extra step makes it vastly more difficult for a hacker to get into your account.
  • … Updating with the Latest Patches and Updates? The latest patches and security updates help keep your systems up to date and protected from recently discovered vulnerabilities and malware, improving your infrastructure’s overall security and dependability.
  • … Protected by a Firewall? A firewall is your first line of defense from incoming and outgoing threats. It analyzes the traffic moving to and from your network, keeping threats from infiltrating it in the first place, and quarantining them for proper elimination.
  • … Using a Spam-Blocking Solution? Spam is both an annoying waste of time and a potential threat. Spam messages often have viruses and malware attached to them, so it’s best that they stay out of your inbox in the first place. This is what a spam-blocking solution accomplishes. It can save you time and increase your network’s security.
  • … Protected by an Antivirus Solution? When the average consumer thinks about security, this is their go-to solution. An antivirus is designed to detect and destroy threats to a system’s security, effectively preventing catastrophe.
  • … Using a Web Content Filter? If you suspect your employees of having questionable web browsing habits, you can implement a content filtering solution. This solution will keep their time at work free of inappropriate, or simply unsafe, web browsing.
  • … Regularly Scanning Your Network for Threats? If your business isn’t regularly checking your network for undetected threats, you might find that you have some issues to take care of.

While this list might seem long and time-consuming to fill, it doesn’t have to be. NuTech Services has the ability to serve up and manage any security solutions you need to keep your network safe. Just give us a call at 810.230.9455 to learn more.

b2ap3_thumbnail_android_clock_400.jpg

Tip of the Week: How to Prevent Lollipop’s Bug From Breaking Your Alarm Clock

b2ap3_thumbnail_android_clock_400.jpgIf you own an Android device, you’re no-doubt aware that Google issued an upgrade to Android’s OS not too long ago. This update, dubbed Android 5.0 Lollipop, presents several aesthetic upgrades to devices which were running a previous Android OS. However, there were also some functionality changes, a few of which were less than desired; like the unexpected changes to Android’s alarm clock.

Don’t Put This Tip “On Snooze”
Before the Lollipop upgrade, Android’s alarm clock application worked in silent mode. This was exceptionally useful, especially if you wanted to turn your phone’s sound off overnight to get a good night’s rest. However, in Lollipop, Silent mode is called Mute mode, where all sounds from calls, texts, and other notifications are silenced… including alarms.

alarm 1

You don’t need us to tell you that this new functionality change can affect your ability to get to work on time in the morning. Thankfully, there’s a pretty simple fix to this problem, even if it’s not the most obvious solution.

Since Lollipop doesn’t allow alarms to go off in Mute mode, there’s an extra hoop you have to jump through in order to get them to work properly. You can set your phone to only go off for what are called Priority Interruptions. Because alarms are always considered priority interruptions, you shouldn’t have to worry about the alarm being silenced.

To activate Priority Interruptions, turn up your volume to Sound or Vibrate. Next, select Only allow priority interruptions.

alarm 2

Doing this opens a menu beneath your selection. Then, click Settings.

alarm 3

This lets you view the Priority Interruptions settings. Don’t be fooled by the Silent choice here; Priority Interruptions only work in Sound or Vibrate mode. If you really want a Silent mode similar to the previous version of Android, you can uncheck messages, phone calls, and reminders in Sound mode. This lets it basically act the same as it used to, more or less.

alarm 4

If you’re successful in setting your Priority Interruptions, a star will appear next to your alarm clock symbol at the top of your screen. Afterwards, it’s best to make a test alarm to make sure that it goes off as planned. It’d be a shame to go through all of this trouble just to miss your alarm. Of course, if all else fails, you could always get a dedicated alarm clock from your local department store; or, get a pet. Whichever works for you.

Be sure to subscribe to NuTech Services’s tech blog for great tips every week.

b2ap3_thumbnail_workers_engaged_400.jpg

Tip of the Week: Keep Your Employees By Keeping them Engaged

b2ap3_thumbnail_workers_engaged_400.jpgAs far as you’re concerned, managing a business is a highly engaging job. However, your staff might feel differently about their jobs. According to a recent study by Deloitte Global Human Capital Trends, only 13 percent of employees are legitimately engaged in their work. A disengaged worker is a serious problem for any workplace.

Obviously, a disengaged worker will give a subpar performance, or, “half-assing it,” if you will. However, if they are still able to meet quotas, then this disengagement problem won’t be felt immediately, but it will cost you in potential revenue. In that, a bored worker won’t “give the job their all” and make you profits that go beyond your expectations.

The study goes on to point out that a disengaged worker can be more harmful to a company than you might expect; more than 25 percent of disengaged workers will negatively affect their co-workers. In other words, their negativity will spread, causing more of your workers to disengage with their jobs. If left unchecked, these poor attitudes will eventually bring the morale of your office crashing down, like the Hindenberg.

For your consideration, here are more sobering statistics from the study:

  • 86 percent of companies suffer from an inadequate leadership pipeline.
  • 79 percent have retention and engagement troubles (i.e. high turnover rate).
  • 75 percent have significant trouble attracting the employees they need.

Judging by these numbers, it becomes obvious that employers carry the bulk of the responsibility when it comes to motivating their workforce. By not taking proactive measures to engage your employees (instead, assuming that “If I love my job, then my employees must love theirs,”), then you may one day find yourself blindsided when a poor attitude spreads and the majority of your staff are disengaged. This makes the office a rather drab place to conduct business.

What Causes a Worker to Lose Interest?
While every person has their own reasons for “checking out” from their job, one common reason is that the job fails to provide the worker with personal meaning and fulfillment that they were perhaps looking for when they first applied. You know the story; a bright-eyed job applicant interviews with high hopes. You hire them, expecting that enthusiasm to channel into their job performance; but, at the end of the year, their work has become sloppy and they’ve caught a poor attitude from your other miserable, disengaged workers. If this is a familiar scenario for your office, then it’s on you to motivate your team by rekindling the spark that originally caused them to want to apply for the job.

Another theory about what causes workers to disengage with their job isn’t that they’re doing too little, but rather, they’re doing too much. In fact, two-thirds of all employees in the U.S. feel like they’re doing too much work for too little pay. This grim statistic factors into another reality about the US workforce, which boasts a 26 percent worker turnover rate. It stands to reason that a worker who is fully engaged with what they do, and isn’t burnt out from being overworked, will stick around longer and churn out a higher-quality product.

What You Can Do about It
As stated earlier, if you’ve got a handful of disengaged workers, you will want to take action to engage them. Otherwise, dissension will spread amongst your ranks. Therefore, the problem of employee disengagement boils down to leadership. A skilled leader will be able to spot a worker that’s “checked out” and do what it takes to engage them and maximize their potential.

To that end, here are six tips from Forbes on what “Wise Leaders Can Do to Engage Their Employees.”

  • Stop unknowingly creating tension by expecting them to behave a certain way, rather than allowing them to be their authentic selves.
  • Detect the most positive capabilities in people.
  • Stop micromanaging and start empowering them to discover their full potential.
  • Put employees in a position of influence and allow them to discover their own potential.
  • Share your success to build their momentum.
  • Be consistent and have their backs.

As an IT company, we want to add to this list the importance of providing your staff with working technology. Using slow and unreliable computers is a sure-fire way to frustrate your team, causing them to disengage. If they have to fight with their technology to do their jobs, they will care less and less about their jobs. In fact, they may even take your lack of provision to mean that you, as their leader, don’t care, and a disengaged attitude is excusable.

NuTech Services is here to help you on the technology side of motivating your staff. If you know of any additional ways to motivate your workers, share them with us in the comments.

b2ap3_thumbnail_drive_for_business_400.jpg

Tip of the Week: See What’s Taking Up All of Your Google Drive Storage

b2ap3_thumbnail_drive_for_business_400.jpgHeavy users of Google Drive may experience the issue of running low on storage space. The easiest way to resolve this problem is to give Google money and upgrade your account. Before taking this step, there are a few tricks you can do to free up Google Drive space by locating and getting rid of unneeded files.

One reason why it’s possible to miscalculate how much storage space is being used by your Google Drive account is due to the fact that the 15GB every Google user gets isn’t a full 15GB of storage space. Of this 15GB of Drive space, Google allots this space for its various services, like Gmail and Google+.

To find out exactly what’s taking up space in your Drive account, go to your Drive’s storage page. This will provide you with a handy-dandy pie chart that lays everything out for you.

drive_in_blog_1.jpg

This chart displays how much storage space is being used and what the space is being used for. From here, you can spot the unneeded files that are taking up space. For example, the email attachments in Gmail end up in your Drive account, as well as all of your photos from Google+. You might want to sift through your Drive and delete these files if you don’t need them.

On your Drive storage page, you will find below the graph a section displaying specific information about space usage. Be sure to reference this if you’re on the hunt to free up space.

drive_in_blog_2.jpg

As is the nature of computer data, you will notice that the bulk of your space is likely to be taken up by media-rich files, like photos, music, and videos. Users of Google Apps that take advantage of Docs, Sheets, Slides, etc., will notice that these files don’t take up nearly the amount of space as does the large media files.

Therefore, if you’re looking to purge your Drive account and free up the most space possible, it’s best practice to start deleting the largest files first. To figure this out, go to the lower left-hand side of the screen in Drive, right above the link that says “Buy more storage.” From here, you’ll see your current storage use. Hover over it and a box will appear with more specific numbers. Click Drive.

drive_in_blog_3.jpg

This sorts your files by Quota used. From here, you can most efficiently manage your files.

Keep in mind that if you delete email files all willy-nilly, you may end up deleting something important that you’ll regret. Therefore, it’s best practice to archive your emails with a secure email solution. NuTech Services can provide this for you.

Got an Android device? If your device is linked to your Google Drive, then it may be adding some rather large files to your storage, especially if you use your Drive account to back up your Android device’s photos and videos. One way that you take control of this is to adjust the size of pictures stored from your device to Drive. To do this, go to Settings > Auto Backup > Photo Size, then select Standard size. Keep in mind that there may be instances when you don’t want Google to change the size of your images, so keep this file path in mind.

By following these steps, you will free up space on your Google Drive account and not have to upgrade. To learn more data storage tips and best practices, call NuTech Services at 810.230.9455.

b2ap3_thumbnail_mobile_data_is_expensive_400.jpg

Tip of the Week: 4 Ways to Cut Down On Your Mobile Data Usage

b2ap3_thumbnail_mobile_data_is_expensive_400.jpgAs the world pushes toward a more mobile era, so too does the workplace embrace Bring Your Own Device (BYOD) with open arms. As such, workers will need some type of network connection in order to access mission-critical corporate data. Therefore, if they can’t connect to a WiFi network, they’ll default to their cell provider’s mobile data plan.

Unfortunately, too much strain put on this asset can quickly drain, or even surpass, your maximum monthly data expenditure. Therefore, reducing your mobile data usage can be a great way to cut down on your expenses and potentially improve battery life. Here are four ways to get started.

5six in blog1
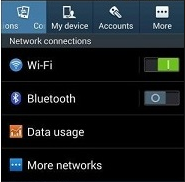
Monitor Your Current Data Usage
Before jumping too deep into how to limit your data usage, you first need to identify whether or not you’re using too much data. Chances are that if you aren’t having difficulty staying within your monthly data usage, you don’t need to make many changes to the way you use your device. However, if you find yourself constantly violating your maximum data limit, you’ll know you need to change the way you’re using your device.

Use WiFi Whenever Possible
A simple way to lower your use of mobile data is to stop using it whenever WiFi is available. Rather than using up your mobile data plan, you can simply take advantage of any wireless networks in range. While this is convenient, you don’t want to connect to any sketchy wireless hotspots in your vicinity. There’s always the chance that a network can be littered with threats. Therefore, the best way to keep your device secure is to only access connections with passwords and encryption, and to make sure your autoconnect feature is turned off.

Limit Your Media Consumption While Mobile

Though it makes life infinitely more enjoyable to stream music and video entertainment on the go, it can also be putting an enormous strain on your mobile data plan. Instead of streaming music through your 3G or 4G connection, try playing music stored locally on your device. This can prevent your device from consuming too much data too quickly.

Limit Which Apps Update in the Background
Unless you’ve explicitly configured your device otherwise, your applications will automatically update in the background while you’re going about your daily routine. Unfortunately, this can eat up a ton of data. To prevent this, you can set your device to update automatically when connected to WiFi, or to manually perform the updates yourself.

5six in blog2

If you find that even these four tips can’t stem the flow of your data problem, it might be time to cave in and get an upgrade. This should only be considered as a last resort, since it can help you avoid the overage fees associated with monthly data plans. All it takes is a little awareness of how much data you’re truly using in order to self-police yourself into staying within the confines of your monthly data plan.

b2ap3_thumbnail_no_stress_at_work_400.jpg

Tip of the Week: 5 Ways to Dramatically Reduce Workplace Stress

b2ap3_thumbnail_no_stress_at_work_400.jpg“Work smarter, not harder.” When you’re at your wit’s end, it’s annoying to be told this by a relaxed, know-it-all coworker. However, this productivity axiom holds up. Following this rule will allow you to get much more done, in a much shorter amount of time, and in a much more relaxed manner. Here are five productivity tips to help you “work smarter, not harder.”

Or, don’t follow these tips. Keep doing things the hard way and stress yourself out. The choice is yours.

Make and Stick to a Routine
The alternative to going by an organized schedule is to tackle the most seemingly-urgent task that hits your plate. This haphazard approach is a mega-stressful way to do things because you’ll always be working on the loudest, most drama-filled project.

By keeping to a strict routine, you’ll be able to schedule urgent tasks to more appropriate times. Additionally, you will want to include time to recharge and unwind from the stresses of life into your routine. If you’re not intentional about downtime being a part of your routine, then your day will quickly be overrun by things that stress you out. As a bonus, your routine can be adjusted and tweaked to allow for maximum productivity, which can’t be said for the haphazard approach.

Prioritize Your To-Do List
Having a to-do list in conjunction with a routine can do wonders to minimize stress levels. To get the most out of your to-list, try prioritizing your tasks so that your to-do list isn’t an overwhelming list of stuff that needs to be done. For example, if you assign each task with a priority level, like A, B, or C, then you’ll have a good idea of what to work on, which will minimize your stress level.

Delegate Lower-Priority Tasks
Once you have your to-do list determined and prioritized, you will then be able to appropriately delegate tasks on your list. From your list, you can easily determine what the tasks are that only you can do and which tasks your team can handle. This will minimize stress because you’ll know that you’re working on jobs that absolutely need your attention, while your staff is working on lower-priority tasks. By not delegating in this manner, you might end up giving jobs to your staff based on how “urgent” it seems, instead of based on how qualified they are for the job.

Deadlines Reduce Stress
If you don’t have a clear deadline for a project, then you might sink way more time into it than what you need to, which causes stress. Or, without a deadline, you might procrastinate on a project and never get around to it, which causes stress of a different variety. By not having a clear deadline, you will inevitably end up scrambling to get stuff done last minute, which will produce subpar results, and even headaches.

in blog frustration

With a hard deadline set, you will be able to schedule your work in manageable chunks so that you’re not last-minute panicking all of the time.

Keep Your Work and Personal Life Separate
One of the worst things you can do for your stress level is to bring your work with you to your home. Your home is supposed to be a place where you recharge and unwind from the day’s stressful activities so that you’re rested up to go back to work and take on the next day’s challenges. Granted, there are times when you have to work late hours or answer an urgent email from home, but this shouldn’t be the norm. If you’re intentional about guarding your home life from the stresses of your work life, then you’ll experience less stress and more productivity in your professional life.

Stressed out? By being intentional about how you manage your time, you will see your stress levels plummet, which will lead to a much more relaxed and productive lifestyle. What are some of your favorite productivity tips? Share them with us in the comments.