dataProtection_505098897_400.jpg

Whoops! Microsoft Update Has Been Missing This Critical Security Vulnerability

dataProtection_505098897_400.jpg

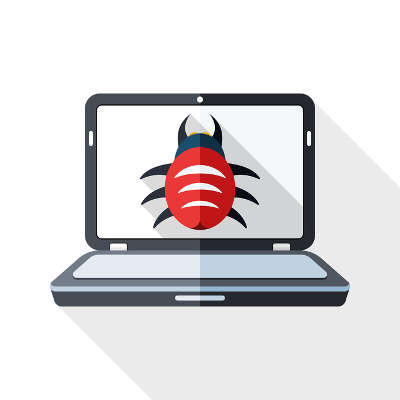
For the most part, Microsoft takes security as seriously as it should, issuing updates and patches to maintain your Windows and Server operating systems. While you can count on receiving these updates for your supported operating systems, what you might not have known is that Microsoft accidentally overlooked a flaw in its own defenses.

The Flaw is in Vulnerable Drivers

Microsoft has a Windows Update tool that is supposed to detect and add vulnerable software drivers to a blocklist.

Drivers are the bits of software that help your computer interface with various hardware. Without the driver properly installed and updated, the hardware doesn’t behave the way it should. Of course, we’re talking about software here, so drivers can be just as vulnerable to threats as any other software can, and because of their functionality, they have access to systems on your PC that can cause problems.

Well, Microsoft’s Windows Update tool hasn’t been managing the block list, even though Microsoft has insisted on reinforcing it. You may have been receiving updates and patches as needed, but this is one particular piece of security that has not been updated.

This flaw gives threats the ability to push any known vulnerable driver to your PC, then use those vulnerabilities to their advantage. These types of flaws are not new or unheard of; they have been around for at least a decade, and the large increase in threats over the past several years can be attributed to this vulnerability. Attackers like to cast wide nets using easy-to-leverage vulnerabilities, and this one fits the profile just fine.

Microsoft has been working on a fix and says that something will be coming with the next Windows update.

Businesses usually want to prevent their users from installing and configuring new devices on their work PCs, and this is a sound strategy to prevent many threats from striking your business. It’s not a magical cure-all, but it will go a long way.

If you’re ready to protect your network from external threats, know that NuTech Services is ready and able to assist your business with implementing enterprise-grade security solutions. All you have to do to get started is call us today. You can reach us at 810.230.9455.

darkModeBrowser_303234749_400.jpg

Tip of the Week: Take the Strain Off Your Eyes with Dark Mode

darkModeBrowser_303234749_400.jpg

Sometimes the last thing you want to do is stare at a bright computer screen and have the white glare bother your eyes. While we know that staying away from computers and devices is particularly hard, especially in the office environment, a dark mode option can make your device easier to tolerate for extended periods of time.

Let’s go over how you can enable a dark theme for your Windows operating system and its applications.

Keep in mind that this doesn’t affect most of your desktop applications—only those associated with Microsoft and Windows. We do, however, urge you to check the settings for other applications, as dark mode is a common thing for developers to include these days.

Enable Dark Mode for Windows

The blanket setting for dark mode on Windows can be found by following this path: Settings > Personalization > Colors. You should see the option for dark mode under Choose Your App Mode. As previously stated, this doesn’t change all of your apps, so be sure to check the settings for your other commonly used applications to see if it allows for a dark mode.

Enable Dark Mode for Edge

Microsoft Edge, Windows’ default web browser, has a dark mode setting as well. To enable it, click the three-dot menu on the right side of the screen. Select Settings, then navigate to the drop-down menu and select Choose A Theme. From here, select Dark.

Enable Dark Mode for Microsoft Office

Microsoft Office also has a dark option that can be enabled through its settings. Begin by opening any Office application, like Word or PowerPoint, then go to File > Options. Under the General tab, you’ll see the option for Personalize Your Copy of Microsoft Office. You can set the Office Theme setting to Black.

And there you have it! Dark mode is enabled on your Microsoft products. Other applications might require extensions or other add-ons, so be sure to do your research or reach out to us if you are unsure of how legitimate they are.

Did you find this blog helpful? If so, share it with colleagues!

172453146_quick_tip_400.jpg

Tip of the Week: Take a Screenshot in Windows 10

172453146_quick_tip_400.jpg

There is one key on the keyboard that might seem a little odd: PrtSc. It’s not immediately obvious what this key does or why you would want to use it, but we assure you that it is an extremely helpful keyboard shortcut once you understand how it works and why you might want to try it out. In reality, the PrtSc key is important for taking screenshots on your Windows device.

Windows has a lot of keyboard shortcuts, but PrtSc is perhaps one of the easiest to carry out. When you hit the PrtSc key, Windows will take a screenshot of your computer’s monitor, allowing you to save it as an image.

There are many practical reasons for taking screenshots, many of which you might not have considered. Let’s go over your options for taking screenshots on your Windows device.

Why Take Screenshots?

Screenshots are incredibly helpful for a variety of reasons, one of which is to help IT support determine what the root cause of your technology troubles is. Basically, it lets them see what you see on the screen so they can check off boxes for more common fixes before diving into more technical issues. Screenshots are also helpful for documentation purposes, allowing you to put together guides for workflows and processes for more visual learners.

The PrtSc Key

When you hit the PrtSc key, you might notice that there are no pop-ups or anything that appears on-screen to show that you have taken a screenshot. Basically, the PrtSc key captures an image of your desktop screen and copies it to the clipboard as an image. You can then paste it like you would if it were copied or cut text. The problem with this is that it takes a screenshot of the whole screen, not just one part of it, so for more focused screenshots, you have to get a little more creative.

Snip & Sketch

This solution is built right into Windows 10 and allows you to snip specific parts of your screen for a screenshot. To use Snip & Sketch, use the keyboard shortcut Shift + Windows Key + S. There are some options here: Rectangular Snip, Freeform Snip, Window Snip, and Fullscreen Snip. Pick whichever you think best suits your needs. Your selection will then be saved to the clipboard in the same way as PrtSc, allowing you to paste it into an application or edit it in the Snip & Sketch tool.

Third-Party Services, Applications, and Extensions

There are some third-party tools and applications that you can use to take screenshots that let you capture specific parts of your screen in much the same way Snip & Sketch allows. These other solutions may be perfectly effective for taking screenshots, but you should clear any of them with IT first just to make sure that the solution is one that is allowed on your network. Plus, you might already have better tools available to you, so it never hurts to confirm with IT before going all-in on a screenshot tool; and, of course, you have us to fall back on as well!

So, how are you going to use screenshots to take your business to the next level? Let us know in the comments, and be sure to subscribe for more great tips and tricks.

124754493_shortcuts_400.jpg

Windows Shortcuts to Help Boost Your Efficiency

124754493_shortcuts_400.jpg

Some keyboard shortcuts work within applications, but there are others that work all throughout the Windows operating system. To help you be as productive as possible throughout the workday, let’s go over some of the most common keyboard shortcuts that work not only within your applications, but whenever you are just navigating your operating system. If you use these effectively, you can dramatically improve your productivity and look like a Windows master!

With all of our keyboard shortcut blogs, we think you will get the most value out of them if you print them out and keep them as a quick reference for use throughout the workday.

General Keyboard Shortcuts

These general keyboard shortcuts should work for the majority of applications that you use on your Windows PC.

  • Cut: Ctrl + X
  • Copy: Ctrl + C
  • Paste: Ctrl + V
  • Select All Text: Ctrl + A
  • Rename selected item: F2
  • Switch between open applications: Alt + Tab
  • Refresh: F5
  • Delete an item: Delete
  • Redo an action: Ctrl + Y
  • Undo an action: Ctrl + Z

Windows Key Shortcuts

These keyboard shortcuts use the Windows key on your keyboard.

 Open the Start menu: Windows Key

  • Lock your computer: Windows Key + L
  • Hide or show your Desktop: Windows Key + D
  • Open the Action Center: Windows Key + A
  • Open Cortana in listening mode: Windows Key + C (Note: this is disabled by default. Enable it in your Settings)
  • Open File Explorer: Windows Key + E
  • Open Settings: Windows Key + I
  • Open the Search bar: Windows Key + S
  • Open Taskbar Applications: Windows Key + Number Key (whichever corresponds with the apps in your taskbar)
  • Minimize all windows: Windows Key + M

This list is not nearly all of the keyboard shortcuts possible with Windows, so if you want a more comprehensive list, visit the official Microsoft support page for even more keyboard shortcuts.

What other tips and tricks do you want us to share with you in the future? Whatever they are, be sure to plug them in the comments below.

287215660_shortcuts_400.jpg

Tip of the Week: The Letters of the Alphabet, in Windows Shortcuts

287215660_shortcuts_400.jpg

The Windows operating system comes with more than its fair share of capabilities, many of which are accessible through the appropriate keyboard shortcut. Because remembering so many would be a challenge for some (and impossible for most) we’ve put together a list of those associated with the letters found on the keyboard, with a few extras tacked on for good measure. Make sure to take note of any you may find the most useful.

Windows Shortcuts, from A to Z

  • WinKey + A opens the Action Center.
  • WinKey + B highlights the notification area.
  • WinKey + C launches Cortana in listening mode.
  • WinKey + D toggles Show Desktop and the previous state.
  • WinKey + E launches File Explorer in the Quick Access tab.
  • WinKey + F opens the Microsoft Feedback hub.
  • WinKey + G opens the Game Bar tools, for personal use at home.
  • WinKey + H opens the Dictation toolbar.
  • WinKey + I opens your Settings.
  • WinKey + K opens the Connect pane to connect to wireless displays and devices.
  • WinKey + L locks the device.
  • WinKey + M minimizes all open windows.
  • WinKey + O locks the device’s orientation on tablets and mobile devices.
  • WinKey + P opens the Project pane.
  • WinKey + Q opens Search.
  • WinKey + R displays the run dialog box.
  • WinKey + S launches Cortana in typing mode.
  • WinKey + T cycles through the apps on the taskbar.
  • WinKey + U launches the Ease of Access/Display Center to manage attached displays.
  • WinKey + V opens the clipboard app to view things copied to it with Ctrl + C.
  • WinKey + X opens the advanced, Secret Start menu.

Bonus: Adjusting Your Program Windows

A neat workspace is a productive workspace, and if there’s a quick way to arrange your computer’s display, that’s all the better. Fortunately, Windows has a few built-in shortcuts to help quickly accomplish just that:

  • WinKey + Left/Right Arrow will take the active window and adjust it to fill the left or right side of the monitor it is displayed in. 
  • WinKey + Shift + Left/Right Arrow will move the active window over to another display.
  • WinKey + Up Arrow will maximize the active window. 
  • WinKey + Down Arrow will minimize the active window.

Believe it or not, this list is just a small sample of the available Windows shortcuts out there. There are plenty more to explore. We periodically go over a few on this blog, so make sure you’re subscribed so you can be alerted whenever we post something new!

220561040_helpful_tips_400.jpg

Tip of the Week: The Better Way to Take a Screenshot on Windows

220561040_helpful_tips_400.jpg

For the Windows user seeking to take a screenshot, there is no lack of options. Most notably, many keyboards today offer a Print Screen key that allows the user to capture an image of their entire display. Having said this, there are better options, such as the platform’s integrated Snip & Sketch tool, with its greater functionality and greater ease of use.

How to Use Snip & Sketch

Snip & Sketch is a utility built into Windows, providing a user with four screenshot-taking options, called up by pressing Windows Key+Shift+S. These options consist of the following:

  1. A basic box selection, allowing you to click and drag to encompass your selection
  2. A freeform selection, allowing you to draw out your boundary
  3. Window snip, allowing you to select an active monitor to screenshot
  4. Fullscreen snip, taking the place of the Print Screen key, allowing you to take a picture of all your monitors simultaneously

This way, you have access to a wider range of utilities that are commonly useful, particularly in the workplace.

With any luck, this tip will help your in-office communication improve. If you’re interested in learning some more helpful IT tips, make sure you check back here often—or give our team a call at 810.230.9455.

99643920_chrome_apps_400.jpg

The User Experience Using Windows Apps on Chrome OS

99643920_chrome_apps_400.jpg

After a long period, punctuated by no shortness of user demand, Chromebooks can now finally support Windows applications. Well, in a manner of speaking. Let’s examine the process that now allows a user access to the applications once denied to ChromeOS users, to consider if it is worth using after all.

A Few Brief Disclaimers

Before we get into how this is possible, we should mention a few of the prerequisites of this process.

As of right now, the Windows/ChromeOS compatibility is clearly intended for enterprise use, as it is configured for company-wide setups and rings up an annual per-user cost of $70. Furthermore, the method we are covering here is only compatible on higher-end Chromebooks, with at least an i5 or i7 Intel Core processor, 16GB of RAM, and 128GB of onboard storage.

How Does Windows Run on a Chromebook?

By collaborating with a company called Parallels, Google has successfully brought Windows to the Chromebook via the capabilities of a locally installed virtual machine. As a result, any Windows program can be utilized with or without an active Internet connection.

This approach makes the user experience somewhat unique, as the Windows install effectively runs in its own window, almost as if it were simply an application installed in Chrome OS. From within this window, the user can access and utilize the Windows software they need. As a result, it almost feels as though you’re utilizing a remote desktop software, despite the OS being present on your hardware. Starting up the Windows software will take you through the entire boot process you’d typically see in a Windows device, and applying updates will sometimes prompt you to restart the OS environment, rather than your entire device.

How Well Does This All Work?

Besides the unconventional user experience and a few minor oddities, however, hosting Windows on a Chromebook works just the same as using a Windows device. Some of these oddities can even be beneficial—for example, the same system clipboard applies to both environments, allowing you to copy from one OS and paste into the other. The file storage system also works across both platforms, allowing a user to open their Windows files in Chrome, even if the Windows environment is inactive.

According to reports on Parallels’ process, the only thing that doesn’t work as intended is the recording capability within the Windows environment (although there are currently efforts to resolve this issue in the works). You can even include custom business applications along with more common solutions… you just need to make sure that your Windows environment is configured correctly.

Why Would Google Do This?

It would appear that Google has seen the value of providing support for legacy applications—this entire initiative has been framed with that concept at the forefront—so that companies who rely on these applications can continue to operate effectively. So, despite the slight difference in how native these Windows applications seem as compared to those that are web-based or work within the Chrome or Linux operating systems, these changes only foreshadow further improvements to come, and a new perspective into how computing will need to be shaped in the future.

Don’t assume that you can simply take your existing budget Chromebook and install Windows on it off the bat, but it will be nice seeing more options for low-cost hardware that plays nicely with the network environments that most businesses already have.

What do you think? Do you see any utility in the Chrome operating system playing nice with Windows applications? Let us know what you think in the comments!

45628250_windows_7_400.jpg

Windows 7 Should Be Long Gone

45628250_windows_7_400.jpg

Windows 7 was the most popular operating system Microsoft ever created. It’s so popular that months after the software giant officially retired their record-breaking OS, some businesses continue to use it. Today, we will take a look at why some businesses haven’t moved off of Windows 7, and what effect it could have on their company.

When we say that some businesses are using Windows 7, what we really mean is that with a remarkable market share that still sits around 23 percent, a lot of businesses have chosen not to upgrade to Windows 10, Microsoft’s latest OS. In fact, as of January, when Microsoft officially did away with support for Windows 7, nearly half (47 percent) of SMBs were still utilizing it. It’s not a good scene. Let’s take a look at why so many haven’t moved off of Windows 7.

Why is Using Windows 7 Bad?

Windows was released in July of 2009. That’s over ten years ago. Microsoft has upgraded their OS several times since then. While its functionality and usability are adequate, the major problem is that it is not supported by Microsoft any longer. Since it carries a long-passed end-of-life date, the OS doesn’t get the security updates and patches of a supported software, and is therefore, a liability. 

As you’d imagine, cybercriminals are not adverse to picking low-hanging fruit; and, if your business still uses Windows 7, it’s definitely time for an upgrade. This is especially true if you have any notions of connecting it to the Internet. 

FBI Says Using Windows 7 is Negligent

The Federal Bureau of Investigation released the following statement to the private companies they work with: “As time passes, Windows 7 becomes more vulnerable to exploitation due to lack of security updates and new vulnerabilities discovered.”

It’s not just the multi-billion dollar corporations that are at risk. If you have exploits built into the software you use, you are far more at risk than if you use clean and actively supported software. Cybercriminals have no problems hacking small businesses that aren’t taking the steps necessary to protect themselves. 

Most legacy software can now be run in the cloud, and with the importance that a business’ data plays nowadays, there are very few reasons that your business should be running Windows 7 or Windows Server 2008 R2.

What Should Windows 7 Users and Businesses Do?

Obviously, you should be upgrading away from unsupported software. Again, Windows 7 is not supported and you will likely get hacked. For a business, this can be a devastating process. You aren’t just going to get spammed, you are going to get hacked and whatever customer data you have stored can get stolen. I’m sure the last thing you want is to explain to your clientele that you accidentally exposed all their PII. 

More than that, you get Windows 10, which is constantly updated with security patches and functionality upgrades. Microsoft stated their intention to use Windows 10 for the foreseeable future. Windows 10 is more secure, has more features, and even law enforcement thinks you should upgrade. 

Managing risk in your business is important and using Windows 7 is the definition of risk. If you would like to talk to someone about getting out from under Windows 7 altogether, what your options are for the legacy apps you use, and how a quick upgrade will exponentially improve your business’ ability to ward of cyberthreats, call the experts at NuTech Services today at 810.230.9455.

148461139_healthcare_secure_data_400.jpg

You’d Be Surprised How Insecure Some Healthcare Providers Are

148461139_healthcare_secure_data_400.jpg

The healthcare industry is in a difficult position. Despite the utility that connected devices present to medical providers, the Bluekeep vulnerability makes it seem as though connected devices aren’t a wise solution for many to use… and there’s nobody these organizations can blame but themselves.

What is BlueKeep?

BlueKeep is a malware strain that was first discovered in May 2019, and was patched in short order to prevent it from becoming another situation like EternalBlue. EternalBlue was the exploit that allowed WannaCry to have such a considerable impact, especially on healthcare providers in the UK. Despite this precedent, however, many hospitals neglected to apply the necessary patches–and that isn’t even the worst part.

The worst part is that the three systems that BlueKeep impacts (Windows 7, Windows Server 2008, and Windows Server 2008 R2) share one thing in common: they have all passed their end-of-life date, and therefore no longer receive security updates.

This makes this situation a two-fold disaster. Not only have patches been released to mitigate BlueKeep, the systems affected by BlueKeep should not be in use anyways.

Of course, it only gets worse, and paints an unfortunate portrait of medical IT. A reported 22 percent of BlueKeep-vulnerable devices are yet unpatched. Worse, 45 percent of connected medical devices remain vulnerable, making things like x-rays, anesthesia machines, and other care-driven technology a risk to use.

Are you concerned about your organization’s technology?

Lean on the IT experts at NuTech Services for assistance. We can help any organization ensure that their technology won’t put their operations or their patrons in harm’s way. Learn more about what we can do by calling us at 810.230.9455.

187502498_Windows_400.jpg

Tip of the Week: Adding More Utility to the Windows Taskbar

187502498_Windows_400.jpg

The Windows Taskbar is meant to assist the user in opening and managing the programs they need to accomplish their goals. Did you know that you can tweak the Taskbar to add to the utility it already has? For this week’s tip, we’ll go over a couple of the things you can do with the Taskbar – specifically, things that make navigating your computer a little easier.

Using the Taskbar to Highlight Folders

If you’re like most users today, a large amount of the work you are responsible for only requires you to access certain areas of the company’s storage, which can quickly make navigating there a frustrating inconvenience. Fortunately, there is a Taskbar feature that can streamline this process considerably.

You can add direct links to folders (and their contents) to the Taskbar.

Here’s how it’s done:

  • Right-click any unused space in the Taskbar to open a menu of options
  • Hover over Toolbars and select New toolbar…
  • Find your desired folder in the directory that appears, select it, and click Select Folder

That folder should now appear in your Taskbar, with a list of its contents quickly and easily accessible to you.

Using the Taskbar to Quickly Access Websites

If your responsibilities more frequently require you to be on the Internet, you might find it useful to have a quick-access URL field in your Taskbar, enabling you to skip the step where you have to open a browser before beginning to navigate to a site.

  • Again, access your Taskbar options by right-clicking in any unused space
  • Again, hover over Toolbars, this time selecting Address

A URL field will have appeared in your Taskbar. Typing a URL into it and pressing Enter will open that website in your default browser.

Would you like to learn more about what the Taskbar can do? Let us know in the comments!

sql_server_400.jpg

Microsoft SQL Server 2008 Will Soon Reach EOL

sql_server_400.jpg

It is little wonder that, with millions of businesses relying on their secure servers for a variety of computing needs, that Microsoft reigns supreme in profitability. In order to maintain this status, Microsoft must make sure that their software is properly cared for and supported – or retired if these titles are no longer practical to maintain. SQL Server 2008 and SQL Server 2008 R2 are soon due for the chopping block, with an official retirement date of July 9, 2019.

If your business is still leveraging these titles, the clock is ticking. In order to avoid the considerable difficulties that losing support brings, you need to update your solutions very soon.

What Does SQL Server 2008 Do?

Microsoft SQL Server 2008 functions as a relational database management system (RDBMS), which means it is used to securely manage how a business’ data is stored, retrieved, and accessed. Not just a little data, either… a lot of data.

This only makes sense – why would you need a database in the first place, after all? Simple – to store a lot of data that you have (or expect to have), which also means you need a means of managing this data that is capable of integrating with the applications you use. An RDBMS can provide that means.

As SQL Server 2008 has been Microsoft’s database management software solution, and with Microsoft’s solutions supporting most of the world’s enterprise servers, this retirement has the potential to affect a lot of businesses. If yours has been utilizing either version of SQL Server 2008, you need to upgrade soon, or your business may be put in a tight spot.

The Progression of this EOL

As July 9 approaches, these versions of SQL Server 2008 draw closer to losing support. While mainstream support was actually ended in July of 2014, these solutions will finally be fully put to rest precisely five years later. Once this happens, any organization that did not upgrade would be vulnerable effectively immediately, at risk of security breaches and data loss. Furthermore, a business that experiences these issues then has to cope with the damage to its reputation, an after-effect that often leads the business’ failure.

What You Can Do

You have to work fast to upgrade your database management system. NuTech Services can help. We can introduce you to solutions that are far superior to the ones available in 2008, with improved integrations and intelligent systems. Sure, you could host a new RDBMS locally, but you could also leverage cloud-based database management, potentially bringing even greater speeds to your business.

Regardless of what you choose to replace it with, you need to ensure that your SQL Server is migrated by July 8, 2019. This is the only way to be sure that one of your business’ most crucial assets is protected by the adequate level of data protection and security. Again, we can help you equip your business for success. All you have to do is call us at 810.230.9455.

kyt_safe_mode_400.jpg

Know Your Tech: Safe Mode

kyt_safe_mode_400.jpg

If you are trying to identify a specific issue with your PC, it can be difficult to do so due to the fact that there are so many moving parts in an operating system. Still, you want a secure way to find the problem and diagnose it. Thankfully, Safe Mode allows you to take a look at your computer in its most basic form to see what the root of the issue is.

What Safe Mode Does
Chances are that your business’ computers have a lot of extra drivers and features on them that make things a little more difficult for your organization. When you boot up a device in Safe Mode, you make it much easier to diagnose problems since you’re booting it up in its bare minimum state. If the issue persists even in Safe Mode, for example, you know that it’s a problem with the core functions of your PC, whereas the opposite means that it’s a more specific issue with something you’ve installed.

There are two major ways that you can access Safe Mode on your PC. The first is the one that we just outlined. The other can include your network drivers and devices, but this sometimes isn’t what you are looking to do.

Follow these directions to implement Safe Mode on startup.

From the Start Menu:

  • Select the Start button in the bottom-left corner of the screen.
  • Select Settings (the gear icon)
  • Click on Update & Security
  • Go to Recover in the left-hand column
  • Go to Advanced Startup and select Restart Now
  • When the device restarts, select Troubleshoot > Advanced Options > Startup > Settings > Restart
  • Upon startup, hit F4 or the number 4 for Safe Mode. Hit F5 or the number 5 for Safe Mode with Networking

From the Sign-in Screen:

  • Restart your PC. Hold down the Shift key while you’re selecting Restart.
  • When the device restarts, select Troubleshoot > Advanced Options > Startup > Settings > Restart
  • Upon startup, hit F4 or the number 4 for Safe Mode. Hit F5 or the number 5 for Safe Mode with Networking

Have you found this tip helpful? Subscribe to our blog for more great technology tips and tricks.

letters_swirl_pink_400.jpg

Tip of the Week: How to Type Accent Marks and Symbols

letters_swirl_pink_400.jpg

When it comes to businesses-to-business relationships, the global impact of the Internet has unlocked quite a few doors. Rather than developing relationships with exclusively businesses in their region, it’s not uncommon for a small manufacturer of model airplanes in Iowa to use the web to find the vendor that can meet all of their needs, even if they’re located in Austria. Doing business internationally means there may be an occasion where you’ll need to communicate in another language. Fortunately, for Windows 10 users, it has never been easier to switch your computer or mobile device’s language.

First, hover over the taskbar and right-click. Select show touch keyboard button.

Cortana

You’ll now see a keyboard icon next to your clock and calendar on the right-hand size of your taskbar.

keyboard icon

This will bring up a touch keyboard. In the case that you don’t have a touch screen, you can also click on the buttons with your mouse.

Touch Keyboard

Click and hold the base letter to see all the possible accents for that letter. Click the one that you would like to insert.

keyboard accents

For those who are going to be writing in another language on a regular basis. It’s possible to change the entire layout of your keyboard. Your chosen language can be found to the right of the touch keyboard icon.

EnglishRussianKeyboard

This doesn’t just apply to the touch keyboard. It applies to your physical one, as well.

Hint: If you don’t see the language you’re looking for in the list of available languages, you can add and edit your list by selecting Language preferences.

Using Another Version of Windows?
For those of you who are using Windows 7 or 8.1 (or even Vista or XP), in addition to seriously thinking about upgrading your operating system, you can still use ALT Codes. A numeric list of codes is assigned to the accented letter or symbol in question. While pressing down the ALT key, type the four-digit code on the numeric keypad at the right edge of the keyboard.

Do you have any tips or tricks that use you like use when communicating in another language? Tell us below! Comentario a continuación! Commentaires ci-dessous! Комментарий ниже!

just_the_tips_400.jpg

Tip of the Week: Using Your Computer to Its Full Potential

just_the_tips_400.jpg

Your computer, and the many resources you use it to access, are made for utility. As a result, there is an assortment of useful features built into many commonly used systems and solutions. For this week’s tip, we’ll go over some of the shortcuts that you may not have known about.

For Windows
The Windows operating system itself comes with a few shortcuts that can make using your computer much more convenient.

A cluttered screen can be extremely distracting, but minimizing and maximizing each window each time you need a different one can add up to be a major time sink. Arguably even more so, it gets annoying pretty quickly. Windows provides a fix that sounds a little silly — to quickly minimize every window other than the one you want to keep, click and hold the bar at the top (where the minimize, full screen, and close buttons are located) and shake your mouse. All other active windows will minimize. Repeating this action calls your windows back to your display.

  • You can also use your taskbar to accomplish a similar result. Pressing the Windows key and the number of the application on your taskbar will open it, and then can minimize and maximize it.
  • If you have a file selected and you need to rename it, pressing F2 will allow you to do so without right-clicking and selecting Rename from the options.
  • If you want to speed up deleting a sentence you just typed, pressing Ctrl as you hit backspace will delete your text word-by-word, instead of character-by-character.
  • Windows also makes it easier to take specific screenshots of your active window: all you have to do is press Alt and Print Screen.

For Chrome
Google Chrome is a highly utilizable browser, with plenty of shortcuts and features baked in.

  • We’ve all had those searches we regret, and Google never seems to let us forget about them–until now, that is. Using your arrow keys, select the unwelcome suggestion, and press Shift + Delete to eliminate it.
  • If you’ve ever wanted to move multiple tabs to a new browser window, you know how quickly the back-and-forth gets old. By holding Ctrl, you can select multiple tabs and drag them to an existing window or create an entirely new window.

For Any Browser
If you aren’t a Chrome user, there are still plenty of shortcuts that will work for any of the popular browsers.

  • Selecting text in a web page can be frustrating, as you can easily grab an unwanted chunk by drifting your mouse too far one way or another. This can be avoided by clicking in the text where you want to begin highlighting, then pressing Shift as you click on the end of your desired segment.
  • You can quickly access the address bar at any time by pressing F6, or Ctrl + L.
  • Once you’re done with one of your tabs, middle-clicking it will close it.

How many of these tips did you know about? Are there any you know of that we missed? Share them in the comments!

windows_bugs_400.jpg

“The Worst” Windows Bug is Now Taken Care of, Thanks to Google

windows_bugs_400.jpg

When a security researcher tweeted about what they thought was “the worst Windows remote code exec” in his memory, a recent incident came to mind: one that allowed a targeted file to implement remote code execution processes in order to manipulate any infected system. This vulnerability let the infected machine spread the issue to others and could be set off if a certain file were to be scanned by the Microsoft Malware Protection Engine. Scary stuff!

Regarding the incident, Microsoft was quick to resolve the issue. Thankfully.

The researchers who uncovered this vulnerability were Tavis Ormandy and Natalie Silvanovich from the Google Project Zero team. Once the pair had discovered the vulnerability, they took to Twitter to announce it to the world, including to Microsoft and the Microsoft Security Response Center.

Upon the notification, the MSRC confirmed that the vulnerability was indeed present, and that there were quite a few pieces of software within the Microsoft Malware Protection Engine that allowed a “specially crafted file” to run code placed on the system. This vulnerability was so widespread that it could be found on just about any recent Windows machine, including those running Windows 7, 8.1, 10, and even Windows RT.

Though this particular problem has been resolved, its urgency serves to remind all business owners that their software solutions need to be up-to-date at all times. While problems are often resolved by programmers, hackers always try to outdo them, creating a vicious, neverending cycle. Unless you want your business to be caught in the crossfire, you should patch your software whenever new updates are released. If you try to function without them, you’ll be leaving your organization wide open to attacks–attacks that can easily be preventable with proactive maintenance.

Does your organization need this type of proactive maintenance and management? If you think that it’s a hassle to keep an eye out for updates, you’re right. You shouldn’t have to worry about this, especially not while keeping your operations afloat. NuTech Services can provide the IT you need by taking care of these updates for you so you can stay focused on running your business. To learn more, reach out to us at 810.230.9455.

multiple_file_storage_400.jpg

Tip of the Week: 5 Easy Ways to Move Several Files at Once

multiple_file_storage_400.jpg

File storage is a staple in the office, and chances are that even your work desktop is jam-packed with files and folders that could use a bit of sorting. This might include moving all of your files to different locations, but you don’t have to move each one individually. We’ll go over the many different ways that you can move files, many of which can save you considerable time and effort.

Click and Drag
If your files are located in one location, like your desktop, you can simply click and drag your mouse to display an area-of-effect box. Any files within this box will be selected. You can then drag any individual file to the desired location and you’ll move all selected files there. This is helpful if you have several files jumbled together on your desktop, and you want to move them all in one go.

Select the Checkboxes
In Windows 10, a little checkbox will appear when you hover over a file on the desktop or within a folder. If your files are scattered all over your desktop, you can simply check each of the boxes for the files that you want to move, then drag and drop any of them into the folder where you want them to be located. This will move every single item you checked to the designated location, saving you considerable time and effort.

Click and Shift
You can easily select files that are stored horizontally and adjacent to each other by using the Click and Shift method. First, select the first file that you want to move. Then, hold down the Shift key, and select the last one that you want to move. Anything stored in between the two will be selected. After that, it’s just a matter of dragging one of them to the desired folder or location.

Hold Ctrl
If you hold down the Ctrl key, you can click on files that you want to move, and they’ll be selected. Then, all you have to do is move your files to the appropriate folder.

Select Them All
If you decide that you really need to clean up your desktop, or move all of your files to a new location, you can use the Select All keyboard shortcut to do so. It’s the same as it is in any word processor: Ctrl + A. You’ll see all of your files in the current window, or your desktop, selected. Just drag them where you want and you’re all set.

Keep in mind that many of the same keyboard shortcuts will also work with Mac OS X as well. Just substitute the Command key for the Ctrl key and many of them will provide the same experience.

Fun Fact: You know how Windows is bundled with Solitaire? No, we aren’t assuming that you are playing it at work. Microsoft decided to bundle their OS with Solitaire as a way to get users more accustomed to dragging and double-clicking objects with their mouse.

For more great tips, reach out to NuTech Services at 810.230.9455; or, subscribe to our blog to receive new tricks straight to your email inbox.

b2ap3_thumbnail_windows_95_for_kids_400.jpg

How Today’s Teens React to Windows 95 [VIDEO]

b2ap3_thumbnail_windows_95_for_kids_400.jpgDo you remember the good old days of Windows 95? The nostalgia factor might be one reason to bring this up again, but the fact remains that Windows has changed significantly over the past twenty years; so much so that teenagers who were born just twenty years ago, after the introduction of Windows 95, may have no clue what they’re looking at.

You can watch the video here:

Watching these teens react to Windows 95 is borderline painful. Some make comments that it looks “prehistoric,” “dull,” and “ancient,” while others remark on how it looks somewhat like the operating systems that they are familiar with today. While many teens are in total shock over what they see, you can tell that some of the older ones are more appreciative of what they’re looking at, despite agreeing that it’s a very primitive OS for today’s tech-centric world.

Here are some observations from this video:

  • “How do you turn this thing on?” Many of the teens were confused about how to power-on the PC and power it down. The large power button on the old CRT monitor drew a lot of attention, but the teens spent quite some time looking for the power button on the main component itself.
  • Windows has grown more refined and personal: Several of the teens who responded in the video mention that it’s a little rough around the edges, but that it still seems somewhat familiar to them due to Microsoft keeping largely the same interface. Today’s Windows operating system holds many of the features that were present in Windows 95, including the Start menu and several icons, like Internet Explorer (now Edge), and the Recycle Bin, but its graphics interface and usability is much better.
  • “Oh no, there’s no WiFi!” These teens open up Internet Explorer (some of them saying that it’s somehow even worse than it is today), but are shocked that the PC doesn’t have WiFi. It just goes to show that they’ve been spoiled by two decades of technological innovations. People now believe that the worst thing that can happen to them is not having WiFi.
  • Technology has grown much easier to use: When given an explanation of how DOS systems work, the teens are in shock over how complicated and impossible it sounds to use the technology. One girl even makes a solid statement, “If users of consumer technology, like iPhones or iPads, had to enter in commands to open apps, nobody would use them.” We’ve grown accustomed to simple, easy-to-use technology, to the point where it becomes a chore to use anything less than the most recent operating system.

Either way, it’s incredible to think about just how far technology has come in just a few decades. Where will technology be decades from now? Do you have any fond memories of Windows 95? Let us know in the comments.

b2ap3_thumbnail_windows_admin_400.jpg

Why You Need to Think Through Which Employees Have Access to What Files

b2ap3_thumbnail_windows_admin_400.jpgIt’s clear that your IT department should have administrator privileges with your business’s technology, but the average employee is another story altogether. Administrator privileges provide users with the ability to do many things, such as install programs and access admin settings. Administrator privileges are exactly what you want to keep users away from, and it turns out that the majority of flaws in the Windows operating system depend on these privileges.

According to a report released by security firm Avecto, it’s estimated that a solid 85 percent of all critical flaws within an operating system can be plugged simply by removing administrator privileges. Most home and consumer-based PCs utilize administrator accounts by default without much thought, but this is a dangerous practice in a business. If hackers can gain access to administrator privileges, they can make changes to the core OS files and steal important information. Most businesses that prioritize security will have limited user privileges on their provided workstations, which help to keep malware and other threats out of central files imperative for the continued functionality of the machine.

As reported by ZDNet:

The report said that removing admin rights could have mitigated more than 99 percent of flaws affecting Internet Explorer, which had a critical-rated flaw almost every month; and mitigated 82 percent of all vulnerabilities affecting Office. The company analyzed the entire batch of vulnerabilities in Microsoft’s monthly security patch update, dubbed Patch Tuesday, to see which flaws would be less impacted whose logged-in accounts “are configured to have fewer user rights on the system.” Out of the entire batch of vulnerabilities reported, 63 percent would be mitigated or unexploitable if admin rights were removed.

User privileges are an easy topic to set on the back burner and forget about, especially if you’re a small business with a small workforce. You might like to think that there’s minimal chance for user error, but the cruel reality is that people make mistakes, be it accidentally misplacing files or allowing malware to run rampant throughout your business’s critical systems. Unfortunately, all it takes is one oversight to leave your entire business infrastructure vulnerable to damage caused by hackers who have administrator privileges.

Therefore, it’s recommended that your organization take full advantage of a user management solution that puts a lid on what the majority of your employees can access. Your users should only be accessing files and information that’s important for their daily duties. For example, the average employee doesn’t need access to personal employee records or client payment information.

Are you doing everything that you can to limit your mission-critical data’s exposure to threats? Security-minded businesses will be taking advantage of not just role-based user access, but also secondary security solutions like firewalls, antivirus, spam blocking, and content filtering solutions that are designed to prevent infiltration in the first place. These four features can be implemented in one comprehensive solution called a Unified Threat Management (UTM) tool.

For more information about proactive IT measures, remote monitoring and maintenance, or IT security, give NuTech Services a call at 810.230.9455.

b2ap3_thumbnail_snap_to_mouse_400.jpg

Tip of the Week: Take Advantage of Your Mouse’s “Snap To” Feature

b2ap3_thumbnail_snap_to_mouse_400.jpgComputers are designed to save people significant time when it comes to getting work done, and with a few simple tweaks and adjustments, you can trim even more seconds off a project, which really adds up in terms of gaining productivity. Your PC’s Snap To mouse feature is a classic example of this.

When enabled, Snap To automatically moves your mouse pointer to the dialogue box that pops up. This is the box that typically appears after you delete a file, close a window, or perform any other similar task.

Although, when using Snap To, be careful about what you click on. For example, your pointer may automatically move to the “Ok button” for something that you don’t want to approve; something like, “Are you sure you want to permanently delete this file?” A blunder like this can be avoided if you simply take a moment to read what you click on, instead of rushing yourself and clicking the first thing that pops up.

To enable this feature, go to Control Panel > Mouse Properties. Next, click on the Pointer Options tab and then checkmark the Snap To box that says “Automatically move pointer to the default button in a dialog box.”

snap to

Click OK or Apply when you’re done.

Be warned, this Snap To feature might take a little while to get used to (it’s always surprising to have your mouse pointer move when you’re not expecting it to). Also, in the event that you don’t want to go through these steps and enable Snap To, most dialogue boxes allow you to select the OK button by hitting the Enter key.

At the end of the day, it might seem like this is a rather silly tip because you’re just saving yourself few seconds of not having to move the pointer. However, any worker concerned about productivity understands the importance of saving a few seconds here and there, and how tips like this can save you significant time in the long run. Plus, when on a laptop with a squirrely touchpad, this can save you those few seconds of frustration.

For more productivity tips, subscribe to NuTech Services’s blog and check back every week.

b2ap3_thumbnail_xp_logo_for_navy_400.jpg

Microsoft Salutes the US Navy for Sticking with Windows XP

b2ap3_thumbnail_xp_logo_for_navy_400.jpgHave you already arranged for your upgrade to Windows 10 on July 29th? If so, good for you. You’ve made a decision that, last year, several Windows XP users went without. However, those who went without upgrading to a more recent operating system are now feeling the effects of having to purchase custom support from Microsoft following Windows XP’s expiration; including the United States Navy.

As reported by ZDNet, the US Navy is planning on spending an estimated $9 million this year on custom support for Windows XP. The problem here is that unsupported software is a major security risk, and custom support is so expensive that small and medium-sized businesses can’t afford it, even under the best circumstances.

Also, $9 million is an obscene amount of money for just about anything, especially when you consider that it’s going toward a system that’s literally getting replaced as soon as possible.

The proposed deal is said to run for a maximum of three years, and offers critical security patches and updates for Windows XP, Office 2003, and Windows Server 2003, the latter of which is set to expire this year on July 14th. The reasoning behind the agreement is that the Navy takes advantage of numerous legacy applications that aren’t compatible with more recent operating systems. This complicates the process of upgrading, and forces them to rely on expensive custom support. The deal is expected to run until July 2016, but just in case, they have plans to continue until 2017. You don’t need us to tell you that it’s a huge expense that could have been avoided.

If your business hasn’t upgraded from Windows XP yet, you’ve taken some very serious risks that could easily be avoided if you simply upgraded your operating system to one that’s supported by Microsoft. Of course, it’s not always so simple, as the navy’s predicament shows. When you run older software like legacy applications, you might encounter compatibility issues.

In fact, some software is so out of date by today’s standards that newer technology completely forsakes it for more recent (and, quite frankly, better) solutions. Some of these applications might be mission-critical, where they’re vital to the day-to-day operations of your business. Furthermore, if you’re not a technology expert, it can be difficult to judge which applications will be obsolete upon your upgrade.

This is why NuTech Services’s technology consultation services are so valuable. We provide the foresight needed to understand which software is compatible with your new operating system. This is especially important, as the Windows Server 2003 expiration date is fast approaching. Give us a call at 810.230.9455 to learn more.