how_microsoft_certified_400.jpg

How You Can Get Microsoft Office Certified

how_microsoft_certified_400.jpg

There are many reasons, both personal and professional, that you may want to consider adding a few certifications to your expertise. Today, we’ll discuss how you and your staff can become certified Microsoft Office Specialists on Microsoft Office 2016, and why you may want to consider doing so.

Why You Want An MOS (Or Any Other) Certification
The more your internal staff can handle, the less they have to lean on others for assistance.

Chances are, these “others” would be the members of your internal IT team (assuming that you have more than one person in the first place). Otherwise, they’ll likely spend a bunch of valuable time trying to Google the answer to their question.

Therefore, it only makes sense to have your staff be capable of as much as possible independently, without the need to turn to someone else or an Internet search. That way, everyone’s time is used more efficiently, maintaining productivity and allowing everyone to focus on what needs to be done.

When a solution is as commonly used as Microsoft Office is, this only becomes even more evident.

Certifications are effectively seals of approval from an authority. If someone was to be certified as a Microsoft Office Specialist, it more or less is just proof provided by Microsoft that this someone does indeed know their stuff when it comes to the Office software suite. Having certified people on staff means that a business is able to handle more advanced situations.

The Operational Benefits Of A Microsoft Office Specialist
Microsoft’s productivity software titles are among the most commonly used in the business world, to the point where many of their applications’ names are now synonymous with the documents they produce – how often have you heard someone call a presentation a “Powerpoint” instead of a “slideshow?”

As a result, chances are fairly high that your business is one that uses at least one of the applications included in the “Microsoft Office” suite.

Like we said before, a lot of time can easily be wasted trying to do something in an Office program, especially if the person is having difficulty remembering how to perform a task that they do not need very often, or have never encountered before.

However, if your team has a few Microsoft Office Specialists on it, they would be able to assist with a quick message, reducing the stress put on your IT staff and allowing them to continue their other duties without interruptions coming in (at least, interruptions from Microsoft Office requests).

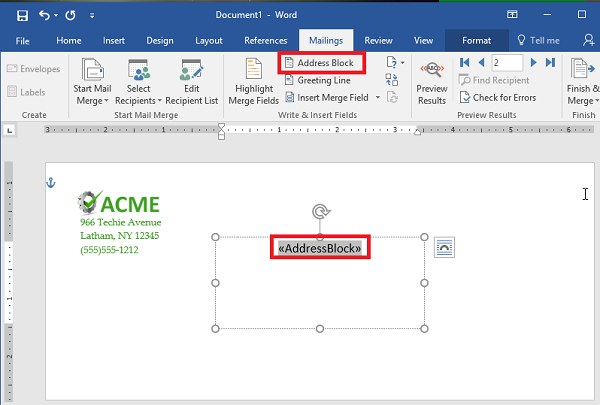
How to Become Certified
To learn more about this certification, visit Microsoft’s official page describing it. The official test is exclusively administered by Certiport testing centers, who provide a useful test center locator to help you figure out where and when your next testing opportunity is.

To otherwise assist your staff with their technology issues, and take some more of the workload from your internal IT staff’s shoulders, NuTech Services is here to help. Reach out to us at 810.230.9455 to discuss our solutions with one of our professionals.

totw_word_pdf_400.jpg

Tip of the Week: Changing a PDF in Microsoft Word

totw_word_pdf_400.jpg

Did you know that Microsoft Word can actually edit PDF files? Well… the most recent version of it can, anyway. Since Adobe Acrobat can be a considerable investment for each and every one of your employees, you can instead turn to the tried and true Microsoft Word for this purpose. We’ll show you how you can do this (as long as you have the most recent version of MS Word).

Open the PDF
First, you’ll need to open the PDF. To do this, open up Microsoft Word and select Open Other Documents from the left-hand menu.

_ib_word_pdf_1.jpg

This brings up the Open menu. Next, you want to click on Browse.

_ib_word_pdf_2.jpg

Another message will appear telling you that Word will convert the PDF to an editable Word document. If this sounds fine, click on OK.

_ib_word_pdf_3.jpg

Your PDF should open up in Word now, but you might notice that there is still a yellow bar at the top of the screen that says PROTECTED VIEW. This is meant to secure your software from opening anything dangerous. If you can trust the document, click the Enable Editing button.

_ib_word_pdf_4.jpg

Once you press the button, another notification will show you that Word will convert the PDF to an editable Word document. To close this message, just click on the checkboxor click OK.

_ib_word_pdf_5.jpg

You can now edit your PDF.

_ib_word_pdf_6.jpg

Once you’re done, you can save the file back to a PDF format. To do this, select File > Save As and set the type to PDF from the dropdown menu under the assigned file name. You will have to rename the document slightly to save it to a file folder.

_ib_word_pdf_7.jpg

Once you’re done, your edited PDF will open in Microsoft Edge, or whatever your default PDF viewer happens to be.

_ib_word_pdf_8.jpg

What are some other cool features of Microsoft Word that you would like us to cover? Let us know in the comments, and be sure to subscribe to our blog.

Wordlogo400.jpg

Tip of the Week: 3 Useful Microsoft Word Features

Wordlogo400.jpg

Microsoft Office’s Word is undoubtedly one of the most popular word processing software in the world, perhaps even the most popular. Still, there are many people who use Word on a regular basis without putting the majority of its features to use. Here’s three more Word capabilities that you’ll find very handy.

Change the Case of your Text
HAVE YOU EVER ACCIDENTALLY WRITTEN SOMETHING ENTIRELY IN CAPS? It happens to everyone. However, many people don’t realize that you don’t have to delete everything and rewrite it. Microsoft Word has a handy feature that allows users to change the case of your text. You can choose from: Sentence case. Lowercase. UPPERCASE. Capitalize Each Word. and tOGGLE cASE.

word ib 1

Auto-Update Date & Time
Even though the majority of business correspondences are done digitally, there are still some times when you need to write a good ol’ fashioned direct mail letter. For example, many businesses like to send a welcome message/onboarding letter to new clients. These letters will probably be uniform, with some personalization for each client. Word offers some assistance in making sure the information is updated in the letter. One very handy one when working with templates is the auto-update Date & Time feature.

Under the Insert tab, click the Date & Time button and a pop-up window will appear. Click the date format you want and then be sure to click the “update automatically” box in the bottom right corner. Now the date will automatically be updated every time you open (or print) the document.

word ib 2

Get Rid of Unwanted Formatting
Most people who use Microsoft Word on a regular basis have had to deal with accidentally pasting text that held the formatting of the document you copied it from. This contagious font will even take over the rest of the document, following the formatting of what was pasted rather than your desired format.

Word has a command that you can use to Clear All Formatting. It can be found in the menu and its icon looks like the letter ‘A’ with a pink eraser. You can also use the keyboard shortcut: Ctrl+Space

word ib 3

For more great information about the software you use every day, visit our blog regularly.

Wordlogo400.jpg

Tip of the Week: Use Microsoft Word To Create Envelopes For Your Contacts

Wordlogo400.jpg

Microsoft Office has long been a valuable asset for all types of businesses, but would you be surprised to hear that most organizations don’t take full advantage of it? All of the most recent editions of programs like Microsoft Word, Excel, and PowerPoint are designed with powerful, user-friendly interfaces that allow your business to do lots of neat things. In fact, you can create a professional envelope for your organization, add a list of contacts from a CSV file or from Outlook, and so much more.

Step 1: Open a New Document
Blank Page

Step 2: Access the Layout Menu
Layout

Step 3: Change the Size of the Page
You want the page to be set to the proper envelope size. If you need to know what size your envelopes are, try checking the box. #10 is generally the traditional letter envelope.
Envelope 10

Step 4: Check the Layout
Before proceeding, make sure that the layout has changed to the proper size.
Envelope 10 Resize

Step 5: Go to the Insert Tab and Select Text Box
Insert Tex Box

Step 6: Use the Simple Text Box Option
This will be used for your return address.
Insert Tex Box2

Step 7: Update the Address and Draft the Text to the Desired Location.
Drag to Position

Step 8: Remove the Border Around the Text Box
You can do this by right-clicking the box and selecting Format Shape. Switch the radial button from Solid Line to No Line.
Remove Border

Step 9: Style and Brand Your Return Address
You can use the Font options to customize the appearance of your return address. Make sure you don’t forget your logo.
BrandingAddress

Step 10: Start Your Mail Merge
First, let’s add another Text Box. You should remove the standing text and leave the cursor right where it is in the box.
Mail Merge 5

Step 11: Load Your Contacts
To do this, access Select Recipients and check the source of your contacts. You’ll need a CSV file for this next step.
Mail Merge 1

Step 12: Select Address Box. This appears in the text box that you created earlier.
Mail Merge 6

Step 13: Follow the Directions to Format Your Address
Mail Merge 4

Step 14: Preview Your Results
Use the Preview Results option to check that the addresses are displaying properly, are simple to read, and fit on the envelope. This might change depending on how many recipients you have. Just scroll through them to ensure that the formatting remains the same throughout them all.
Mail Merge 7

Step 15: Save or Print
That just about wraps it up. You can finish your work or print them out as you see fit.
Mail Merge 8

For more great tips and tricks, subscribe to NuTech Services’s blog.