308593867_virtual_desktop_400.jpeg

Tip of the Week: Working with a Virtual Desktop in Windows 10

308593867_virtual_desktop_400.jpeg

With Windows 10, you have no shortage of features and capabilities to take advantage of. One such capability: the use of a virtual desktop. Found near the Start button in your taskbar, the Task View button enables you to create and manage these virtual desktops, which we’ll discuss here.

Understanding the Virtual Desktop

Before we go on, we should clarify that we’re discussing a specific variety of virtual desktop.

Most things you hear called “virtual desktops” are the product provided as part of a Desktop-as-a-Service (DaaS) solution. Here, we’re discussing the feature built into the Windows 10 operating system that effectively opens a separate session of Windows 10 alongside your first one. Doing so can provide some significant benefits to your usage of Windows in terms of task organization and application management, along with other use cases that business and personal users alike could find an advantage in.

How to Use These Virtual Desktops

Opening a virtual desktop in Windows 10 almost couldn’t be simpler.

  • Start by clicking on the Task View button in your taskbar. If the button isn’t there by default, right-click on the taskbar and select the Show Task View button. Alternatively, Task View is accessible through Windows Key + Tab.
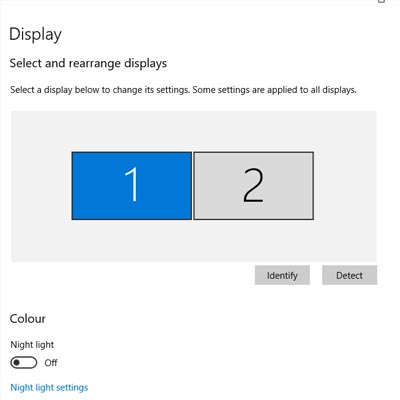
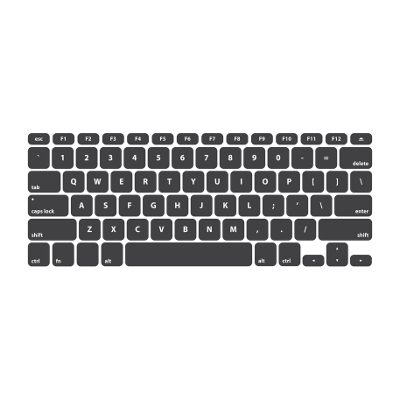
  • In Task View, you’ll see the option to add a New Desktop. These desktops are your different instances of Windows 10 and can be switched between by either returning to Task View or using Ctrl + Windows Key + Left/Right Arrow to cycle through your open desktops.

When working in these desktops, you should see no difference in performance. Be warned, some apps can only be opened once in a system, so trying to open another version of these will pull you into the desktop where it is already running. Closing one of these desktops will simply cause any open applications to jump to another open desktop instance.

Hopefully, you have a better idea of what Windows 10’s virtual desktop options have to offer. If you have any other questions about the technology that your business relies on, leave them in the comments or give us a call at 810.230.9455.

microsoft_windows.jpg

What’s Next for Microsoft Windows?

microsoft_windows.jpg

It may be hard to believe but Windows 10 has been around for five years. It may not have reached the on-every-device OS Microsoft had planned, but it still can be found on over a billion devices worldwide. That’s pretty impressive. Today, we will be taking a look at Microsoft’s plans for Windows 10 and how it might just be the last build of Windows.

Windows 10

In Windows 10, Microsoft has built a complete and secure operating system. Users can do about anything they’d like inside of Windows 10. The platform was initially built to support three levels of devices, from smartphones to other mobile productivity machines, to your traditional productivity machines, your PCs. After Microsoft pulled the plug on their smartphone division, the subsequent changes they’ve made to the OS have been with the PC user in mind. 

Microsoft had a solid strategy to get their Windows 10 software on as many devices as possible: they gave it away. For a year they provided any user that had Windows 7, Windows 8, or Windows 8.1 the ability to upgrade for free. Since then, it has been available as other versions of Windows have been, for digital download.

Windows-as-a-Service

Since the software giant has retired support for the hugely-popular Windows 7, and Windows 8.1 was kind of a flop, Windows 10 becomes the development priority for Microsoft. They seem to be extremely invested in the OS, hinting that it might very well be the last Windows title ever developed. Microsoft has made many huge changes to Windows 10 over the past five years and looks to continue to develop the software more as a service than a product. 

Like many other software, Windows–or, Windows-as-a-Service, if you will–will continue to be one of the leading names in computing. It just won’t be replacing Windows 10 the way Windows 10 replaced Windows 8.1. In fact, Microsoft is now offering Azure-hosted Windows 10/Office 365 platforms for one monthly fee. In doing so it is changing the way that people access, and pay for their computing. 

If you would like to know more about Windows 10, Microsoft 365 platforms, or any other way that business computing is innovating, call the IT professionals at NuTech Services today at 810.230.9455. 

time_182562237_400.jpg

Windows 7 Has Nearly Ticked Its Last Tock

time_182562237_400.jpg

It won’t be long before Microsoft retires two of its most popular operating systems – but hopefully, you already knew that. Microsoft has made a point of reminding Windows 7 users that they need to upgrade before January 14 – and yet, many users haven’t done so.

By many, we mean about a quarter of them.

With the deadline just a week and a half away, we wanted to reiterate what a solution reaching end of support means, how it would impact you, and what your options are.

The first thing to address is what “end of support” actually means. It doesn’t mean you won’t have the ability to use whatever software it is (in this case, the Windows 7 operating system) after the end of support date. What it means is that Microsoft is no longer doing anything to it – including improving its security and patching issues. As a result, the software will lose its functionality over time. Worse, the computer running the software becomes vulnerable, which makes the entire network vulnerable – not a good thing.

To be fair, there are some ways that you can protect your network while still using these devices. For instance, if you rely on a particular line-of-business application that requires Windows 7, you could theoretically isolate a Windows 7 device to allow you to do so. However, to be completely fair, there isn’t any guarantee that you will be protected from vulnerabilities, short of completely taking problematic systems entirely offline.

Therefore, it only makes sense to explore your other options.

Your Other Options

With the deadline as close as it is, you will need to hustle to put any of these alternatives into action:

Upgrade to Windows 10

Objectively speaking, Windows 10 is better than Windows 7, if only for its improved security. Furthermore, it isn’t one of those solutions that requires insanely higher specifications to run. In fact, the minimum numbers you need to operate Windows 10 are as follows:

  • Processor – 1 GHZ or faster
  • RAM – 1 GB for 32-bit or 2 GB for 64-bit
  • Hard disk space – 16 GB for 32-bit or 20 GB for 64-bit
  • Graphics card – DirectX 9 or later with WDDM 1.0 driver
  • Display – 800 x 600 resolution

Mind you, this is all it takes to run Windows 10, not to run Windows 10 well. To improve your performance, we suggest that you make a few alterations – upgrading to a 2 GHz dual-core processor, increasing your RAM to between 4-and-8 GB, and Increasing your hard drive space to 160 GZB, at least.

Purchase New Hardware

While it will cost you a pretty penny, obtaining new hardware (that comes with Windows 10 installed) may be the easiest option, especially when you take your looming deadline into account. Windows 10 and regular updates to it are all included, but it may take some time to configure everything properly.

Virtualize with a Thin Client

In a similar vein as leveraging Chromebooks instead of Windows, you could use your old hardware as a thin client to virtualize your needed solutions. However, despite the reputation that virtualization has as a solid option for businesses, it may not be a practicable option with the deadline pressing so close.

Alternatively, you could simplify this process using one of Microsoft’s services. Microsoft 365 offers a combination of Windows 10, Office 365, One Drive with an included terabyte of storage, and fully featured security. Available at a predictable monthly flat-rate per user, it gives you a solid alternative for at least your productivity-software-using employees.

Regardless, you need to take action now. Reach out to NuTech Services today for help. We’ll figure out which approach is best for you and help you with your upgrade process. Call us at 810.230.9455 to learn more.

Microsoft365_400.jpg

Taking a Long Look at Microsoft 365

Microsoft365_400.jpg

Microsoft has always offered a variety of business solutions, some which conform to your needs and others that do not. The beauty of this, is you can pick what solution will benefit your business, and leave the ones that will not behind. Here, we will discuss Microsoft 365 and what is offered within the Microsoft 365 package.   

What is Microsoft 365?

Microsoft 365 is a bundle containing Office 365, the Enterprise version of Windows 10, along with Microsoft’s Enterprise Mobility + Security. Microsoft 365 is comprised of all of these solutions, meaning your business will benefit from all of the features that come with these solutions, with just one package. So, what does this package include exactly?

Here are all of these solutions you could or should be taking advantage of with Microsoft 365:

Here at NuTech Services we understand this list is extensive. However, it is worth viewing as there could be solutions your business could benefit from. NuTech Services has the technicians needed to help you procure, implement, and manage the right solutions for you. Reach out to us at 810.230.9455 to learn more.

276677721_tips_400.jpg

Tip of the Week: Simple Windows 10 Tips

276677721_tips_400.jpg

Windows 10 is the benchmark in PC operating systems at this juncture. It offers users all types of great options from previous versions of Windows, while integrating some of today’s most dynamic technology to provide users with the very best in organization and ease-of-use. Today we will talk about five very simple tips that will get you started getting the full function of Windows 10.

Shake to Minimize

Sometimes when you are working in any Windows platform, you will have too many windows open and you just want everything out of your face except the thing you are currently viewing. Well in Windows 10 there is a cool little feature you can use to make that happen very quickly. Just take your mouse (or your finger if you have a touchscreen) and click-and-hold the title bar of the app you are working in and shake it back and forth. This will minimize all other open applications. To get them back, simply repeat the action.

Choose Folders on Start Menu

The start menu is extremely useful in Windows 10, but sometimes it can get cluttered. To choose which folders you want to see on your Start Menu go to Settings > Personalization > Start then click on the “Choose which folders appear on Start” link at the bottom of the screen. From there you can toggle the folders you want to see in your Start menu. 

Find the Original Control Panel

The settings options in Windows 10 are far and away easier to use, but if you are one of those people that likes working with tools they know, the old Control Panel is still available in Windows 10 as it is still the go-to option for customizing advanced options. The easiest way to access the control panel is by clicking on the Cortana icon on the taskbar and typing in “control panel”. It will give you immediate access to all user settings. 

Selectively Sync Folders with OneDrive

One of the best parts of using Windows 10 is the integration with OneDrive cloud storage. Windows 10’s OneDrive integration provides users a lot of flexibility. To sync folders with data stored in OneDrive, make sure OneDrive is running and right-click on the OneDrive icon in the notification area. Select Settings and then navigate to the Account tab. Under the Account tab you will see the option to “Choose folders”. Click on choose folders and you will see a list of the folders you have in OneDrive, select the ones that you would like access to through Windows 10 and select OK. Now you have access to this data through your File Explorer in Windows 10.

Customize Your Application Notifications

Having too many notifications is one of the most frustrating parts of modern technology. To keep from being bogged down with too many notifications, you can customize which notifications you see in Windows 10. To do so, click on Start > Settings > System > Notifications & action. Once there all you have to do is scroll down and select the notifications you want on, and which ones would be better served not notifying you.

Windows 10 has hundreds of options for any user to customize their experience. Check back next week when we provide some more advanced tips on how to best experience the OS.

92760244_video_400.jpg

Tip of the Week: How to Set your Default Video App in Windows 10

92760244_video_400.jpg

Windows 10 is a great operating system, but it changes up the formula a bit in regard to default applications for certain types of files. Anyone who has been using a computer for any amount of time has their preferred applications for watching videos or listening to music. We’ll show you how to set your default video playback application, as well as how to change certain settings for just about any purpose.

As with any applications on your device, you’ll have a variety of first and third-party applications that can be set as your default apps. Here are the steps to make this happen:

  • Click the Windows icon at the bottom left-hand side of the taskbar.
  • Click on the gear icon to open up your Settings.
  • Select Apps.
  • In the left-hand column, click on Default Apps.
  • In the right-hand side of the Default Apps screen, you can see the various types of files that will be opened by specific apps.

Changing your default video playback settings is also easy to do. From the Video playback option in the Apps section, you can enable streaming content at high dynamic range quality, process video for more enhanced quality, play back video in either a high or low resolution based on preference, and change how video is played based on battery life. You can pick from prioritizing video quality or battery life–whichever you prefer.

Before making any changes to your computer, we recommend speaking with the technology professionals at NuTech Services. This prevents you from making any changes to hardware or software settings that could cause frustrations for you and your staff. To learn more about the services we provide, reach out to us at 810.230.9455.

2.5_72712129_windows_400.jpg

Tip of the Week: How to Speed Up a Slow Windows 10 Device

2.5_72712129_windows_400.jpg

Windows 10 is a remarkable tool. Having said this, it can sometimes seem to slow to a crawl… not the ideal situation when you’re trying to be productive. That’s why we’re devoting this week’s tip to speeding up Windows 10.

However, as with any changes you are considering to your computer, you should lean on your IT resource to determine if it’s okay to make these adjustments. Better yet, IT may want to make them for you. One way or another, make sure you get the all-okay before switching anything on a work device.

Cleansing of Bloatware
Whether you picked something up during your browsing or the device’s manufacturer installed it during production, your computer can easily collect programs known as bloatware or adware. These programs, while not always harmful per se, can easily eat up system resources for nothing. Ask your IT resource to seek out these programs and eliminate them for you. This alone may result in some considerable boosts to your computing speeds.

Adjust Power Settings
While it may sound like a good idea, the Power saver plan that comes baked-into Windows 10 can actually make your experience as a user more of a pain. This is because this setting cuts your device’s processes to minimum so that energy can be conserved. Furthermore, desktops are plugged in as a rule, leaving little reason to use Power saver anyways. To improve performance on your Windows 10 laptop, stick to the Balanced power option when unplugged, and switch to High when power is available.

Kill Windows Tips and Tricks
Yes, it’s ironic that we’re recommending that you disable Windows Tips and Tricks in a tip-based blog post, but there are a few compelling reasons to do so. Most pertinent to our current conversation, the fact that Windows is analyzing your usage with these capabilities enabled means that your device’s performance is going to suffer.

In order to disable these invasive bits of advice, click the Start button. Under your Settings, access System and from there, Notifications & actions. Under the Notifications section, you will find the option to Get tips, tricks, and suggestions as you use Windows.” Deactivate this option, and you won’t have anything more to worry about.

Finally, the Cliché: Restart Your Device
Yes, this suggestion has become a joke in and of itself, as the IT field’s go-to question. However, there’s a really good reason for this: restarting a device can often solve its issues. This is because it clears out the use of the computer’s resources, wiping unneeded memory usage and stopping equally unneeded background processes. Restarting your workstation effectively gives it a fresh slate, allowing it to run much better than it did when it was bogged down.

Let us know if there are any other tips you want us to share in the comments, and don’t forget to subscribe!

totw_display_settings_400.jpg

Tip of the Week: Change Display Settings in Windows 10

totw_display_settings_400.jpg

One of the easiest ways you can customize your Windows 10 experience is by changing your device’s display settings. There are plenty of settings to change as per your specific needs, so this week’s tip will be dedicated to getting the most out of your displays, whether it’s a large new monitor you got over the holidays or an old one that has a little more life in it.

There are lots of options for changing your display settings. To access these settings, click on the Start menu and select the gear icon for Settings. The first option on the Settings screen is System, where the first option is Display, so you’ll have no problem checking it out. Here are some of the options:

Change Your Screen’s Brightness
With this option, you can change–get this–your screen’s brightness! This is critical if you want your device’s battery to stay under control. There is a slider that you can use to adjust the screen’s brightness. Underneath this, you’ll see another option to turn on the Night Light. This makes the device’s screen turn to warmer colors to make it easier on the eyes at night. You can even schedule the night light to turn on at a specific time.

Scale and Layout
Under this option, you can change the default size of text and applications, among other things. There are several dropdowns under this heading that give you dynamic control over several aspects of your display, including the display’s resolution and the screen orientation.

Multiple Displays
One of the best ways you can get the most out of your monitors is by using more of them. If you have multiple monitors connected to your device, your settings will give you options for what to do with them. You can connect to them wirelessly, detect connected devices, and so much more. Just click on the links in your settings to learn more about what you can do, or reach out to us to learn more about what the settings mean.

Before you change any settings for your devices, if you have any questions about what they mean or why, consult professionals at NuTech Services who know what they are doing. It’s better than making a change and not knowing how to change it back.

Overall, changing up your display can be great for both your device’s battery and your productivity. For more great tips and tricks about how you can get the most out of your monitors and displays, reach out to us at 810.230.9455.

tt_breadcrumb_400.jpg

Know Your Tech: Breadcrumbs

tt_breadcrumb_400.jpg

A trail of breadcrumbs can be a useful thing, whether you’re using it like Hansel and Gretel to find their way back home, or you’re using it in computing to find your way back to a page you were previously on. Today’s tech term is dedicated to the latter.

What is Breadcrumb Navigation?
As per the aforementioned fairy tale, breadcrumb navigation consists of a path leading home. In this case, home is the homepage. With breadcrumb navigation, you can more easily keep track of how you got to the current web page you’re on, as well as the path back to the home page. This path can typically be viewed at the top of the page. Each step includes a link that navigates back to a specific page.

Let’s say that you’re looking at a service page on a website. If the path you took leads back to the home page, you’ll see all of the pages in between in the breadcrumbs menu. For the sake of this example, let’s say the pages in between are the second menu item and the fifth menu item. It would look something like this:

Home > [Menu 2] > [Menu Item 5]

Since these breadcrumbs are links, you can click on any one of them to be brought back to that page. This lets you continue browsing with minimal chance of getting lost on the site trying to backtrack.

More Than Just Websites
You might notice that this navigation style is similar to the ones used in toolbars in file folders or files saved on your desktop. The reason is the same–it makes finding certain files easier at a later date. The location can also be shared with others who need to know where it is.

Breadcrumbs are typically meant for helping users with browsing and organization. Are there any other features out there you can think of that do the same thing? Let us know in the comments.

totw_set_system_apps_400.jpg

Tip of the Week: Set Your System up with the Apps You like to Use

totw_set_system_apps_400.jpg

Sometimes you’ll open up a document and it will open up in a default program on your computer that you never use, or one that you might not even know you have. This can happen with common types of file formats, like PDFs or MP3s, that could be opened by more than one program on your computer. Windows 10 makes it easy to customize your user experience through changing up the default applications for specific file types. We’ll show you how it’s done.

To change your default applications for Windows 10, just follow these steps:

  • Click on the Start menu in the bottom-left corner of the screen.
  • Click on Settings. It’s the option with a gear-like icon next to it.
  • Select the System option.
  • Click on Default apps next.

You’ll see your options for selecting an app in the form of categories. These categories are Email, Maps, Music Player, Video Player, Photo Viewer, and Web Browser. Once you’ve selected a category, you can choose a default app that will open anything related to that category.

An easier way to do this is by right-clicking the file you want to open. You then need to select Open with. Choose the app that you’d like to use to open the file, or you can select Choose another app if you don’t see the one you want. You can either select it for this one instance or you can have Windows remember your choice for the future.

If you need to reset your default apps, it’s as easy as can be. Just follow the steps below… just in case you set a default app you don’t like.

  • Click on the Start menu.
  • Select Settings.
  • Navigate to System.
  • Click Default apps.
  • Click the Reset button at the bottom.

Once you’ve finished, your Windows 10 device will reset to its default applications. It’s really that easy.

Don’t fall behind the times with your tech knowledge. To keep learning more about your favorite business solutions, subscribe to our blog.

iconic_product_key_400.jpg

Tip of the Week: Saving a Windows Product Key to a Microsoft Account

iconic_product_key_400.jpg

To activate Windows 10, every user will need a product key. Every legitimate version of the software has one, but often times, users will need the product key later down the road, only to find that they’ve lost it or tossed it. For this week’s tip, we’ll describe a way to link your software’s product key to a Microsoft account so that you’ll never lose it again.

Step One: Get a Microsoft Account
In order to link your Windows 10 product key to your Microsoft account, you’ll have to have a Microsoft account. If you don’t have an account under the Microsoft umbrella (hotmail, live, outlook, etc.) and depend on another platform such as Google or Apple, have your IT administrator set up a Microsoft account for you. This way you can know you have an authorized account that is ready to go.

Step Two: Link the Product Key to Your Account
Now that you have a Microsoft account that is authorized by your organization’s IT administrator, you can log in and navigate to Settings in the Windows 10 Start Menu. Click on Update & Security, and then on Activation.

The Activation page will read “Windows is activated with a digital license”. If it doesn’t, you can stop because your product key doesn’t enable you to digitize your license and you won’t be able to link your Microsoft account with Windows 10. If this happens to you it is important that you keep your Windows 10 product key on file.

If you have a digital license, you then have to change your type of account to successfully link your Windows 10 product key to your Microsoft account. To do this, open Settings and then click on Accounts. You will then click on Your Info. Find the hyperlink on the page that reads “Sign in with a Microsoft account instead” and click on that.

You will then sign in using your Microsoft account using your username and password and click the Sign In button at the bottom of the screen. Enter your Windows password if it is different, otherwise click Next and it will ask you to Set up a PIN. If you don’t want to set up a PIN, you can click on the “Skip this step” hyperlink on the left side of the box.

Step Three: Verification
To check to see if this process has been successful, open your Settings, click on Update & Security, click on Activation, and you will see “Windows is activated with a digital license linked to your Microsoft Account” under the Activation subheading in the main box under Windows.

To protect your software and yourself, knowing the best practices of software management is important. If you would like to know more great tips and tricks in Windows 10, visit our blog regularly.

start_menu_tips_400.jpg

Tip of the Week: Miss The Start Menu From Windows 8? Here’s How To Bring It Back

start_menu_tips_400.jpg

Remember how when Windows 8 came out, it had that slick tiled Start screen? If you are one of the people who miss that interface, you are in luck. While Windows 10 returned the nostalgia of the traditional Start menu, you can emulate the experience of Windows 8’s tiled screen relatively easily in Windows 10.

First thing’s first–open your Start menu and select the Settings icon. This is the gear-shaped one. Alternatively, you can simply use the Windows key and the I key for a keyboard shortcut. Next, you’ll want to navigate to Personalization > Start. You should see the option for Use Start full screen. Once you’ve turned on this setting, your Start menu should open into the full-screen mode.

While it doesn’t quite look exactly like its Windows 8 counterpart, it has some similar functionality built into it. You’ll see icons for all of the usual suspects, including apps that you use on a regular basis, and icons for opening up various menus. You’ll also be able to see your pinned tiles in an easy way. Another note is that this can actually make navigation a little bit easier if you are using Windows 10 on your tablet.

If you want to just use the normal Start menu and change the size of it without going full-size, you can do that as well. Just open your Start menu and click on the edge. You can click and drag your Start menu to suit your specific size needs. You’ll see more tiles depending on how large you make it.

Speaking of Windows 8, are you still using it for your business’s needs? If so, you should really consider upgrading to Windows 10. If your business is struggling to implement the latest and greatest software solutions, or you just want all of the best tips and tricks, reach out to NuTech Services at 810.230.9455.

windows_apps_full_screen_400.jpg

Tip of the Week: How to Automatically Open a Windows App in Fullscreen

windows_apps_full_screen_400.jpg

If you’re a regular user of Windows applications, you’ll notice that they will, by default, open into smaller windows, allowing users to customize the size of their windows as need be. Usually, when you want to increase the size of the app, you have to click the maximize button in the top-right corner. However, you can save a little bit of time each time you do this by setting Windows to default to full-screen mode for this application.

First, you’ll want to pick the application, and find it’s shortcut on your desktop. When we say “shortcut,” we are referring to the little icons on your desktop that open a program, like Microsoft Word or your preferred Internet browser.

Select the app’s icon and right-click it. Go to the bottom of the dropdown menu and you’ll see Properties. Click it and you’ll open a Properties window, which will open up to the Shortcut tab.

You’re looking for the Run drop-down menu. It will be just a few selections down from the top of the tab. Currently, you’ll notice that it’s set to Normal window. However, if you click on the down arrow, you’ll be shown choices for Normal Window, Minimized, or Maximized. Click on Maximized, and whenever you open the program in the future, it will default to full screen mode. Once you’ve done this, click Apply to save the changes.

ib app full screen 1

While it might not seem like it saves a lot of time, it will certainly be more convenient. Just take a moment to optimize your settings now and you’ll save a lot of time and frustration in the future. To learn more about how to save time and optimize your business technology, subscribe to NuTech Services’s blog.

restart_windows_10_400.jpg

Tip of the Week: How to Prevent Windows 10 From Restarting While You’re Working

restart_windows_10_400.jpg

How many times has this happened to you: you’ve walked back to your home or work PC after taking a break, only to find that Windows 10 installed new updates and automatically restarted? Thanks to Windows 10’s notoriously aggressive update behavior, any work that wasn’t saved was lost forever. It can be very frustrating to lose a project that you’ve spent hours on, through no fault of your own. Luckily, there are steps you can take to easily create a restart schedule.

In the fall of 2016, Microsoft issued an Anniversary Update to the Windows 10 OS. With this update, Microsoft included a new feature called “Active Hours.” Active Hours was created to let users specify the times when they’re more likely to be using their computers. In order to set up an Active Hours restart schedule, ensure that your computer has the Anniversary update installed (check your PC settings to see if it has already present). If you need help installing Windows 10 Anniversary, you can download this Update Assistant on Microsoft’s website: https://www.microsoft.com/en-us/windows/features.

After Windows 10 Anniversary is properly installed, follow these steps to setup Active Hours on your PC:

    n

  1. Click on the Start menu and then the Settings. As a shortcut, you can also use Windows key + i on your keyboard.
  2. Next, select Update & Security.
    ib win 10 1
  3. Under the Windows Update tab, which will show up automatically, you’ll see a link to Change active hours. Click that.
    ib win 10 2
  4. From there, you can set your active hours (note: time lengths exceeding 12 hours will be marked as invalid).
    ib win 10 3
  5. Click Save to confirm your changes.

Now your PC will not install updates during those specified hours. But again, at most, you’re only covered for a 12-hour period. So, what about those times when you need to pull an all-nighter to complete a project? Not only can Windows 10 updates interrupt your productivity, they can also take a long time to install. To further prevent unwanted installations and restarts, you can also adjust your restart settings.

To change your restart settings, you’ll need to stay in the Update & Security section of your PC settings. Next:

    n

  1. Click on Restart options, which is located under Change active hours.
    ib win 10 4
  2. Turn the feature On.
    ib win 10 5
  3. Next, set the day and time when you’d like Windows to finish installing updates. There is no need to save anything. As long as the switch is set to On, you’re all set.
    ib win 10 6

If you find that the On/Off switch is grayed out and you aren’t able to adjust it, this means that there are no new updates available at that time. In other words, you won’t have to worry about updates finishing up and forcing your PC to restart. Be sure to keep an eye on your restart options if you are planning to burn the candle at both ends.

There you have it. Windows 10 will no longer be able to bully you into halting your productivity. For more tips on how to avoid downtime for your hardware, give NuTech Services a call at 810.230.9455.

shift_and_f10_400.jpg

How 2 Keystrokes Can Bypass the Security of Windows

shift_and_f10_400.jpg

Usually, when a troubleshooting feature is put in place, it is meant to assist the user in resolving an issue. However, one such feature in Windows 10 could ultimately lead to more problems, as it also can serve as a free-ride vulnerability for an opportunist bystander.

Security expert Sami Lailo discovered that if someone keys in Shift + F10 during a ‘Feature Update’ in Windows 10, they are able to access a Command Prompt window with Admin privileges. Compounding this with the fact that Microsoft updates disable BitLocker while they are in progress, means that someone could feasibly access the hard disk without the aid of any external device.

If that someone happened to be ill-intentioned, they could potentially wreak havoc through the command-line interface. Admittedly, the perpetrator would have to move quickly, but if they had come in with a plan and the foreknowledge of a Feature Update being implemented, they would have plenty of time to do what they had come to do.

Lailo reached out to Microsoft, and the company is now working to resolve this issue.

The current fix? Don’t leave an updating workstation unattended, despite the long periods of time updates can sometimes take.

Once Microsoft releases a patch, businesses and organizations will want to apply it. Keep in mind, any NuTech Services clients on our managed services will have the update applied once it is tested. Give us a call at 810.230.9455 to learn more.

lesser_known_shortcuts_400.jpg

Tip of the Week: Be More Efficient With These Windows 10 Shortcuts

lesser_known_shortcuts_400.jpg

A mouse can be very handy when it comes to navigating around the documents you have to work on, but it can also slow you down. Fortunately, key command shortcuts exist for situations just like these, and as Windows 10 has continued to improve, more shortcuts have been included to accomplish more tasks with improved efficiency.

Quick Access to the Start Menu
Take, for instance, the Start menu. Almost anyone who has sat at a computer knows that by clicking the Windows icon in the bottom left-hand corner, a comprehensive menu of your available content is revealed. However, for those those cases when a mouse is unavailable and a trackpad (if working on a laptop) is inefficient, you can navigate the Start menu exclusively with your keyboard. Press the Windows key to open the menu and navigate up and down the column with the arrow keys. You may also begin a search by just typing, once you have opened the Start menu.

For users seeking a more advanced experience, there’s an additional menu, the Power Users menu, that offers utilities like your device’s Event Viewer, Device Manager, and Command Prompt module.

Greater Accessibility of Your Apps
You can also press the Windows Key in combination with a number key to open the associated apps that appear on your taskbar. If the app is already open, it’s a quick way to minimize and maximize a window. Adding the Control key to the combination will open a new window for an app. For example, if you want a separate Chrome window, and Chrome is the fifth app on your taskbar, you would press Ctrl+Windows+5. Alternatively, to open a new app from your taskbar, you can use Windows+T to highlight your first toolbar app by selecting which app to launch with the arrow keys and Enter.

Utilizing a Virtual Desktop
If you are one to heavily use virtual desktops in your day-to-day, you can quickly create one by pressing Windows key+Shift+D. Once you are finished, Windows key+Ctrl+F4 will close the virtual desktop back down.

With these shortcuts now in your arsenal, you have the tools to help you stay productive–with or without a mouse. For more tips, tricks, and handy information, keep coming back to NuTech Services’s blog!

windows_10_kindle_fail_400.jpg

Latest Windows 10 Update Has Kindle Users Feeling Blue… Screen of Death

windows_10_kindle_fail_400.jpg

Have you have recently plugged in your Kindle and received a blue screen of death? Many Kindle users have found that Windows 10’s anniversary update is creating an issue in the way that Kindle transfers books and charges via a USB connection. Some users are reporting that connecting a Kindle to a Windows 10 device will cause the device to lock up and display Windows’ infamous blue error screen before rebooting.

Users who have experienced this issue have taken to the Microsoft support forums hoping to find a way to resolve this issue. Unfortunately, what happens seems to vary by the user–some claim that the problem is rooted in the anniversary update, while others seem to think that it’s due to the pre-release software testing service Microsoft Insider.

The fallout of the issue also seems to vary. Some reports claim that the device can be restored to normal functionality after the reboot, but the problem comes up again with the next reboot. Some users have found that leaving their devices asleep as they plug in their Kindle can prevent the error from happening. Yet, even this doesn’t prevent the crashing, as many users report that the issue happens regardless of what they do.

All of these issues are in response to what users did to troubleshoot their own individual problems, yet nothing that they did could resolve them, despite elements like the USB cable being used as variables.

Worse yet, this isn’t the first problem that Microsoft has had to deal with since they released Windows 10’s anniversary update. While the update brought an enhanced usability and interesting new features, it also brought a bug that has led to some Windows 10 users being unable to use their webcams.

So far, neither of these issues have been resolved, though Microsoft claims that the webcam fixes will be available in September. In regards to the Kindle issue, there have been no hints as to how long these issues will persist. Kindle users may have to avoid causing the blue screen error in the first place, and tolerate the problems until the official fix is issued.

For the latest tech news and tricks, subscribe to our blog.

windows_10_black_hat_400.jpg

According to Hackers, Windows 10 Security Passes the Test

windows_10_black_hat_400.jpg

Windows is perhaps the most common workplace computing tool, and hackers have been trying for decades to uncover holes in its security. In some cases, like with unsupported operating systems, they’ve succeeded. However, Microsoft’s latest addition to their OS family, Windows 10, seems to have exceptionally potent built-in security measures, many of which have the hackers at the Black Hat conference scratching their heads and scrambling to find threats to talk about.

During Black Hat, the annual hacker convention in held in Las Vegas, Windows 10 was lauded as perhaps the most secure Windows operating system in decades. It was agreed that Windows 10 is much more difficult to break into than its older brethren, but like any software, nothing is impossible with enough funding and research. The Black Hat presenters discussed potential ways that Windows 10 could be hacked, and how Windows 10 makes it more difficult for attackers to breach its systems.

Windows 10 Uses Built-In Anti-Malware Tools
Windows 10 has what’s called the Antimalware Scan Interface (AMSI), which is designed to identify and capture malicious scripts in its memory. Your applications can access the information stored in the AMSI, and can use it to protect your systems. For example, Windows Defender and AVG use AMSI. The primary reason why the AMSI is a huge problem for hackers is because most of their attacks utilize some sort of script. Of course, the AMSI is a valuable tool, but it still needs secondary security protocol (like antivirus or remote monitoring and maintenance) to keep your network safe. While it’s great for detecting scripts executed in PowerShell (since PowerShell records logs), it still requires someone to regularly monitor the logs in order for it to be most effective.

Active Directory
Active Directory has long been a critical part of how Windows administration works, and recent innovations have allowed for the management of workloads through the cloud and identity and authentication management on in-house networks. Microsoft Azure puts Active Directory to good use, allowing for quality security for any Azure-based cloud platform. The problem with AD, though, is that any user account can access it unless the administrator has limited these permissions. Your IT administrators need to restrict access to AD and control authentication procedures for it.

Virtualization
Virtualization-based security features a set of protocols that are built into the hypervisor of your Windows 10 OS. Basically, Hyper-V can create a virtual machine that stands separate from the root partition. This machine can then execute security commands as needed. Hyper-V creates a machine that can’t be compromised, even in the face of hacking attacks that target the root partition. It’s a way to minimize the damage done by data breaches, but it only works if the credentials aren’t found in the root partition. IT administrators, therefore, need to ensure that these systems cannot be compromised.

Eventually, there may come a day when Windows 10 experiences a dangerous flaw that’s exploited in the wild. Hackers are always trying to undermine security measures, but Microsoft engages these attacks with patches of their own, so it’s an endless cycle. Hackers will inevitably find ways to crack Windows 10’s innate security, so it’s your responsibility to complement your OS’s security with your own solutions.

To secure your business’s devices, reach out to us at 810.230.9455.

steam_windows_10_400.jpg

New High Score for Microsoft: More Than 44% of All PC Gamers Use Windows 10

steam_windows_10_400.jpg

While we tend to focus on the latest technology solutions in the workplace, sometimes it helps to view them from a different perspective, like recreation. Specifically, Windows 10 has become a popular operating system amongst PC gamers, and has reached nearly half of the considerable total user base of the cloud-based gaming platform, Steam.

For the month of June, use of Windows 10 (both 32 and 64-bit versions) with Steam reached an all-time high of 44.6 percent; an increase of 3.41 percent from the previous month, and a 1.54 percent increase from the month before that. It’s safe to say that the free upgrade played a major role in this increase in use, but now that it’s no longer offered for free, is Windows 10 still worth the investment? We would argue yes, as do the gamers. After all, they want to take advantage of the latest Windows OS, and so should you.

Not all Steam users use Windows 10, though. Here are some statistics from the latest Steam OS check:

  • Windows 7: 36.97 percent, down 2 percent from last month
  • Windows 8.x: 12 percent
  • All Windows OS: 95.5 percent
  • Mac OS X: 3.6 percent
  • Linux: 0.8 percent

Regardless of whether or not you enjoy games, there’s a lesson that can be learned from these statistics, and it’s that the latest operating system can offer a significant improvement to your user experience. For gamers, their hobbies are a way of life, and they take it very seriously. They’re often known for their meticulous attention to PC performance and specifications, so it’s no surprise that they would be willing to adopt the latest Microsoft operating system.

If anything, these statistics are a strong endorsement of Windows 10, and warrant, at least, a consideration of an upgrade. If you’re unsure of how an upgrade can help your business or user experience, NuTech Services can help. We’ll work with your business to ensure that legacy applications and software solutions aren’t negatively affected by an upgrade. In situations like this, it’s always best to have professionals on hand to guarantee that you experience minimal downtime.

To get started with Windows 10, give us a call at 810.230.9455.

useful_windows_10_tips_400.jpg

Tip of the Week: 4 Windows 10 Tips You’ll Use Again and Again

useful_windows_10_tips_400.jpg

It’s been almost one year since the release of Windows 10. Are you taking advantage of everything Windows 10 offers? Here are four of the best Windows 10 features that you’ll want to start using right away.

Virtual Desktops
If you’ve never used a virtual desktop before (not to be confused with desktop virtualization), it’s a feature that allows you to open up multiple desktops that can be used for different things. This is ideal if you want to organize and spread out the way that you use your apps and windows, and helps to keep your main desktop free from the clutter. To open a new virtual desktop, click the Task View icon next to the Cortana search bar. Select the New desktop feature on the right corner of the screen. Then, if you’d like to move an open app to a different virtual desktop, it’s only a matter of clicking and dragging it to where you’d like the window to be.

Advanced Screenshots
Windows 10 lets you take screenshots in a quick and easy way. To do so, just hold down the Windows key + Prt Scn. This captures your entire screen, and will place the file in a Screenshots folder. Or, alternatively, you can press Alt + Prt Scn to copy the screenshot to your clipboard, and then paste it into your preferred image editor. Another great way to edit your screenshot is to use Windows 10’s built-in Snipping Tool to customize it.

We’d also like to add that communicating with tech support is made much easier by using screenshots of your specific trouble. A visual representation helps technicians figure out the exact problem, and take steps toward resolving it.

Record Your Screen
Windows 10’s latest Xbox app allows users to record their desktop screens, which can be useful if you want to put together a quick tutorial or record a task being completed for future reference. To get started, launch the Xbox app, then press Windows + G while you’re in the app that you want to record. You’ll be shown a message that says, “Do you want to open the Game bar?” Check the “Yes, this is a game,” option, and click the record button. Even if it’s not a game, you’ll be able to record something quickly and easily.

Battery Saver Mode
On Windows 10 mobile devices, you can customize how the battery saver mode works. Specifically, you can control when it turns on. Normally, the battery saver mode will kick on around 20 percent, but you can change it to suit your preference. All you have to do is go through Settings > System > Battery saver.

Of course, if you can’t take advantage of these tips because you don’t have Windows 10, it’s not too late to claim your free version of Windows 10 from Microsoft. Just a few days from now (July 29, 2016) you’ll be unable to get it for free. Of course, before doing so, you’ll still want to consider the pains of the migration process. If you don’t do your research, your business could suffer from unexpected downtime and incompatibility with legacy applications.

Now that you know of these four tips, how will you use Windows 10? Let us know in the comments, and be sure to subscribe to our blog for more great tips and tricks.